Replacing parts 4-19
Hitachi Compute Rack 220H CRU Replacement Guide
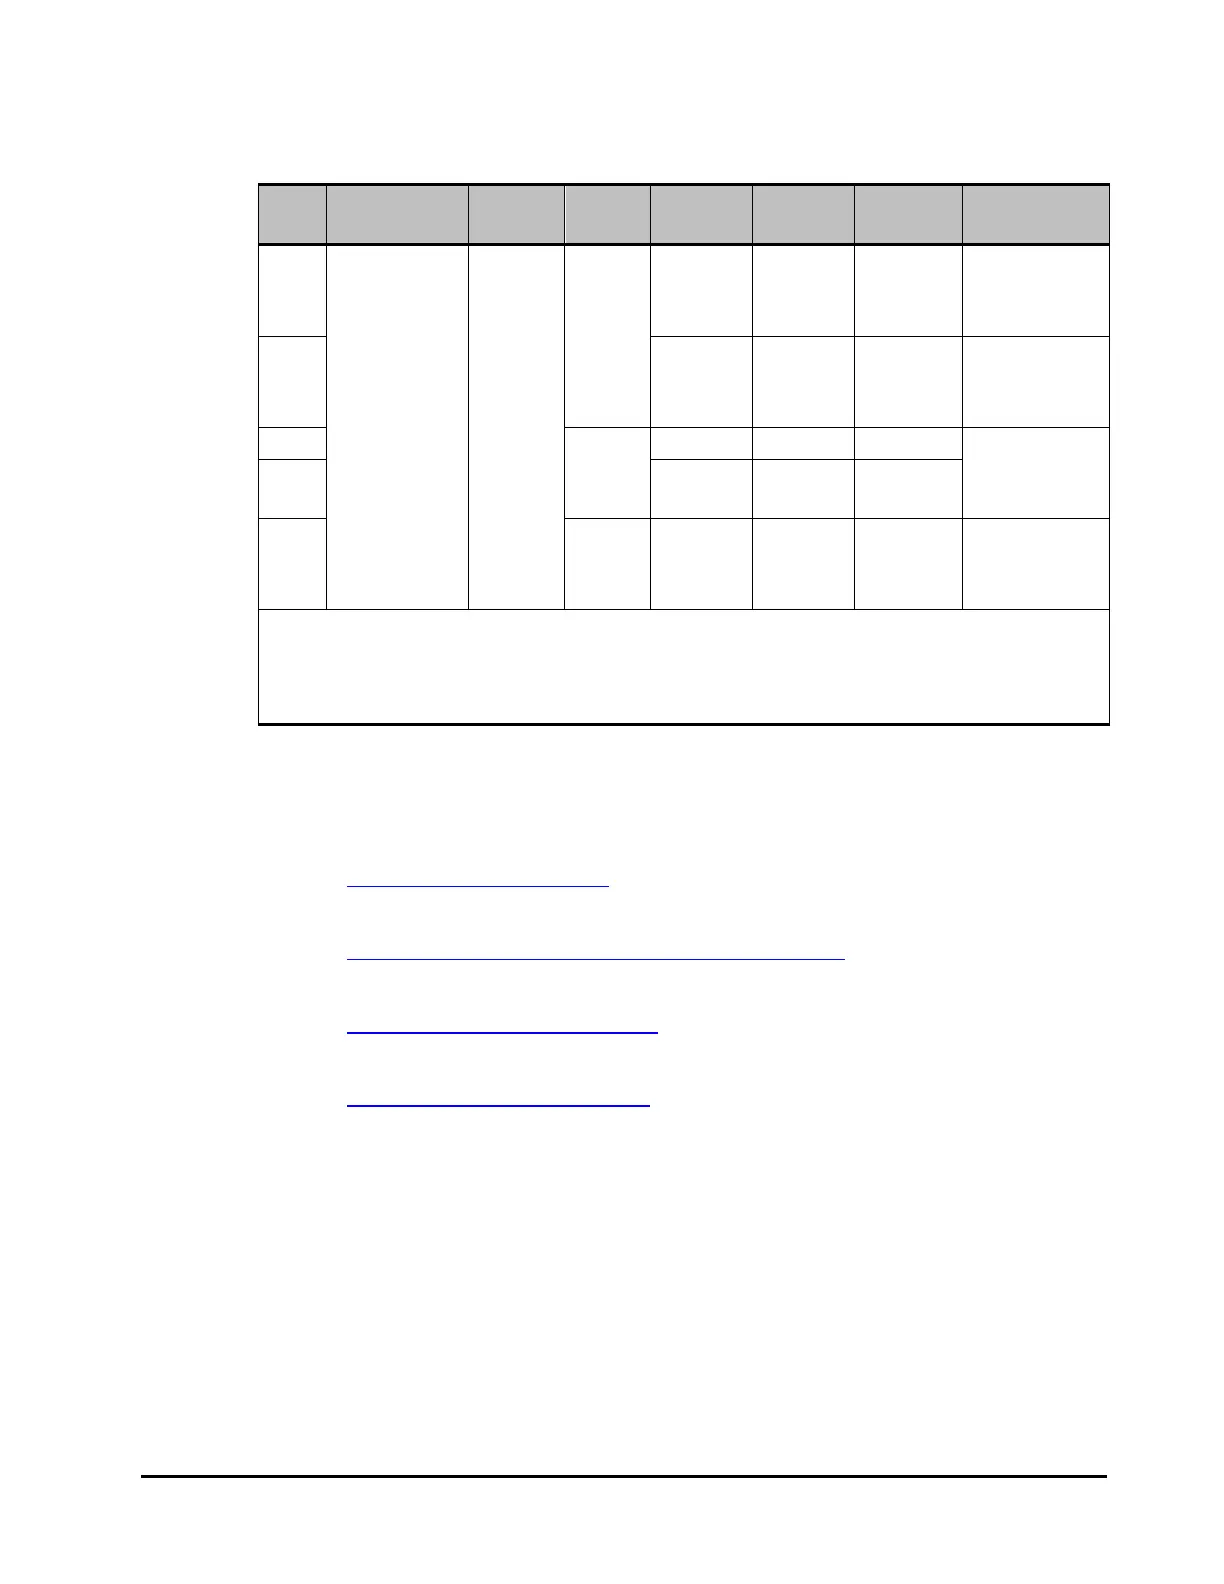
Table 4-3: PCI slot specification
PCI
slot
PCI type I/O
voltage
Slot
form
Bus
number
Device
number
Bus scan
order
1
Support PCI
card type
1 PCI Express 3.0 3.3 V
8 lanes
(x8)
2 0 1
PCI Express
x1, x2, x4, x8 /
standard /half
size
3
2 3 0 2
PCI Express
x1, x2, x4, x8 /
standard / full
size
3
3
4 lanes
(x4)
4 0 3
PCI Express
x1, x2, x4 /
lowprofile /
MD2
4 5 0 4
5
2
8 lanes
(x8)
81 0 5
PCI Express
x1, x2, x4, x8 /
standard / full
size
3
Notes:
1 A PCI card within has a base class value "01h" is given priority to performing shadow.
2 This slot can be used only when two processors are installed.
3 When you install a full-size card, you need to remove the retainer of the PCI card.
Removing a PCI card
1. Turn off power to the system and peripherals.
See Powering off system unit on page 3-4.
2. Slide out the system from the rack cabinet.
See Sliding out the system unit from a rack cabinet on page 3-5.
3. Remove the front top cover of the system.
See Removing the front top cover on page 3-7.
4. Remove the rear top cover of the system.
See Removing the rear top cover on page 3-8.

 Loading...


