16
Using the remote control
CAUTION ŹBe careful in handling the remote control.
• Do not drop or expose the remote control to physical impact.
• Do not get the remote control wet or place it on wet objects. It may result in
malfunction.
• Remove the batteries from the remote control and store them in a safe place if
you won’t be using the remote control for an extended period.
• Replace the batteries whenever the remote control starts malfunctioning.
• When strong lights (such as direct sunlight) or light from an extremely close
UDQJHVXFKDVIURPDQLQYHUWHUÀXRUHVFHQWODPSKLWWKHSURMHFWRU¶VUHPRWH
sensor, the remote control may cause to function. Adjust the direction of the
projector to keep the light from directly hitting the projector’s remote sensor.
The signal settings for the remote control transmitter and the projector's remote sensor can be changed.
If the remote control does not function properly try changing the signal setting.
Changing the signal setting for the remote control transmitter
(1)Setting 1 (FREQ. : NORMAL)
Simultaneously press and hold the MUTE and RESET buttons for about 3 seconds.
(2)Setting 2 (FREQ. : HIGH)
Simultaneously press and hold the MAGNIFY OFF and ESC buttons for about 3 seconds.
• Setting 1 is the factory default setting.
:KHQWKHEDWWHULHVDUHUHPRYHGIURPWKHUHPRWHFRQWUROXVHUVSHFL¿HGVHWWLQJVDUH
saved for about half a day. If the batteries are removed from the remote control for longer
than half a day, the remote will reset to Setting 1.
Changing the signal setting for the projector's remote sensor
Switch between Setting 1 and 2 using the SERVICE/REMOTE FREQ. item found in
OPTION MENU. (
43)
If the remote control does not seem to function properly, try changing the settings for the
remote control and the projector's remote sensor.
The remote control will not function properly if the remote control transmitter settings and
the projector's remote sensor settings are not the same.
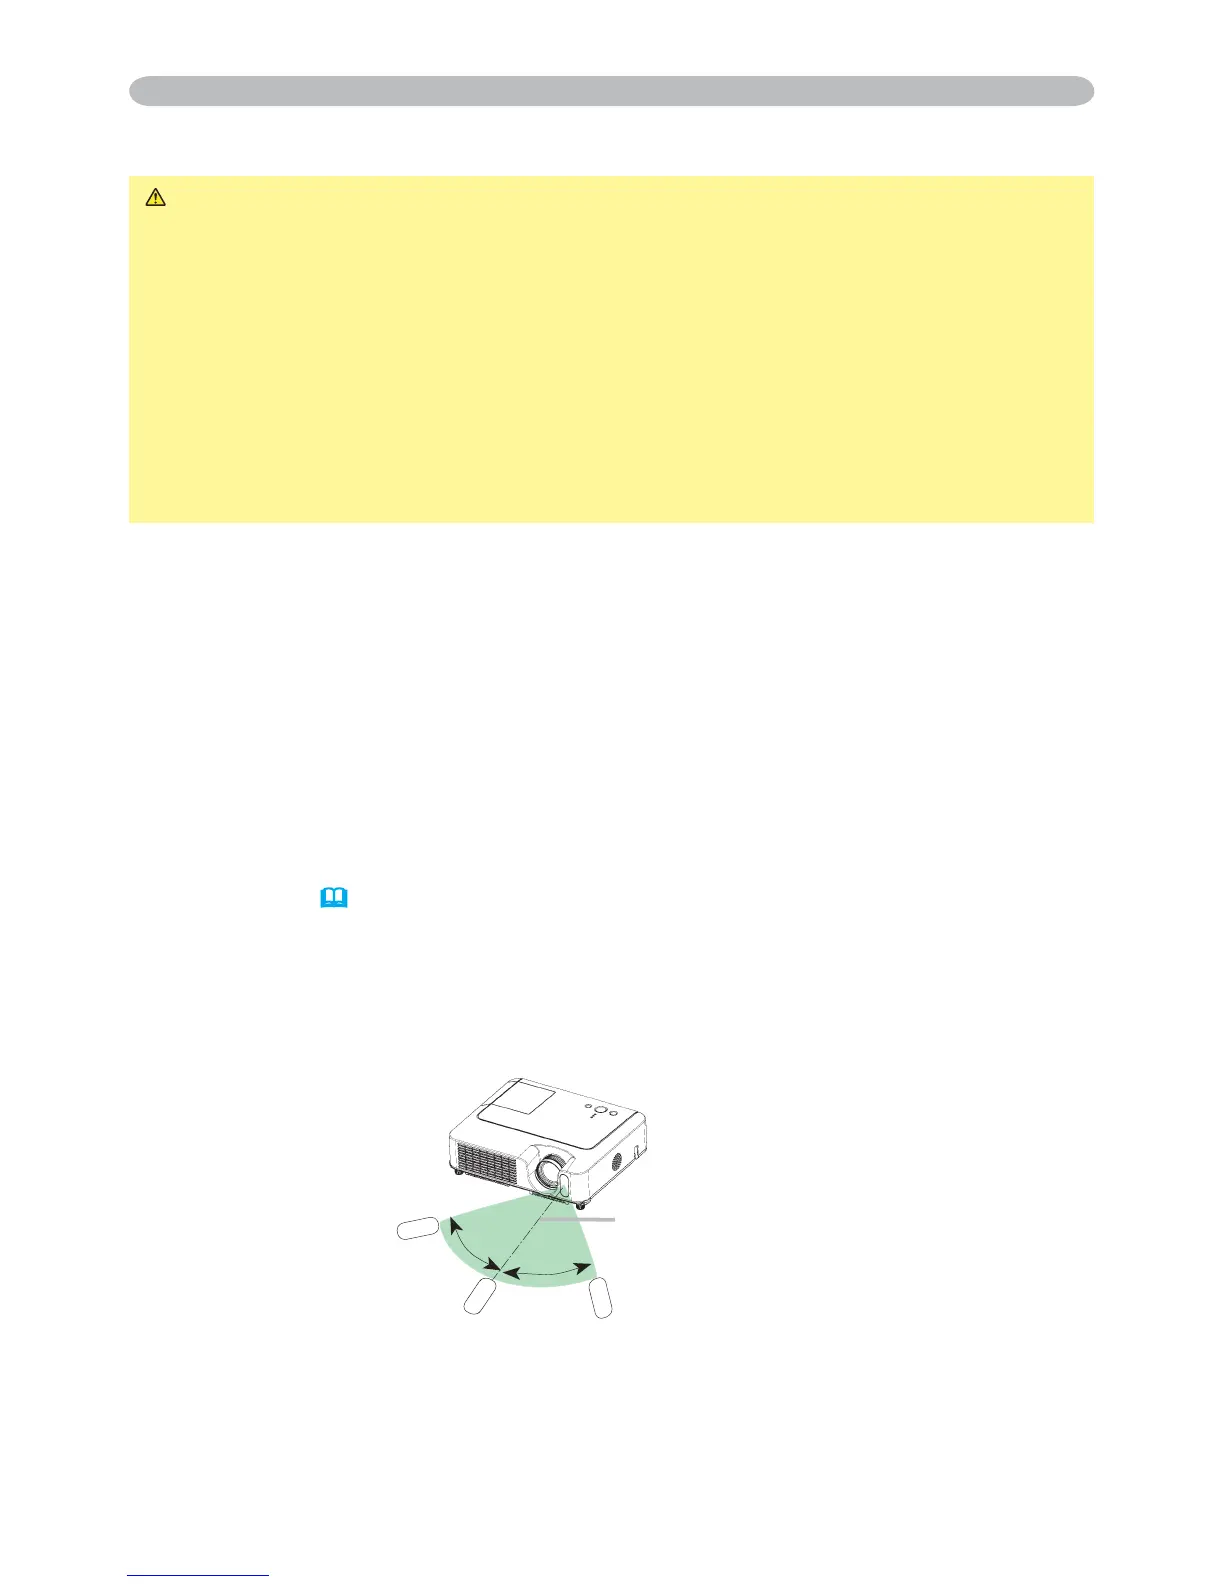
The remote control works with the projector’s remote sensor.
• The range of the remote sensor is 3 meters with a 60 degree range (30 degrees to the left
and right of the remote sensor).
$OVRDUHPRWHVLJQDOUHÀHFWHGLQWKHVFUHHQHWFPD\EHDYDLODEOH,ILWLVGLI¿FXOWWRVHQGD
UHPRWHVLJQDOWRWKHVHQVRUGLUHFWO\SOHDVHWU\WRXVHWKHUHÀHFWHGVLJQDO
• Since the remote control uses infrared light to send signals to the projector (Class1
LED), be sure to use the remote control in an area free from obstacles that could block the
remote control’s output signal to the projector.
Remote control
30º
30º
approx. 3 meters

 Loading...