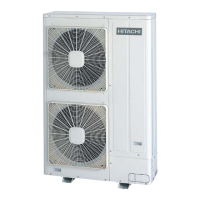
Location of check joints and stop valves
Liquid Stop Valve
High Pressure Gas Stop Valve
Low Pressure Gas Stop Valve
Check Joint for Collecting Refrigerant Oil
High Pressure Check Joint
Low Pressure Check Joint
• The refrigerant collection method when replacing indoor unit.
Process No. Procedure Remarks
1 Turn OFF the main switch of O.U. and I.U. -
2
Close all the gas stop valves (at low and high pressure side) of
O.U. and the liquid and gas stop valve completely.
-
3
Collect the refrigerant by a refrigerant collector. Collect the
refrigerant from the gas stop valves (at low and high pressure
sides) of
O.U. and the check joint of the liquid stop valve. Collect
all the refrigerant in the I.U. side by refrigerant collector.
• The discharge of the refrigerant in the atmosphere is strictly
forbidden.
Make sure that the refrigerant is collected by a
refrigerant collector.
• Measure the quantity of the collected refrigerant and record
it.
4
After collecting the refrigerant, remove the charge hose at the
collector side,
so that the inside of the refrigerant cycle will be the
atmosphere pressure.
• ;ake sure that there is no pressure increase after collecting
the refrigerant and then remove the charge hose.
•
Make sure that the refrigerant cycle is the atmosphere
pressure. Otherwise, problems such as the blowing of gas
and the suction of the cutting material may occur when
removing the refrigerant cycle parts.
5 Perform replacing I.U. -
6
Perform the vacuuming from the gas stop valves (at low and high
pressure sides)
of O.U. and the check joint of the liquid stop valve.
Refer to Installation vacuum, see on page 59.
7
Recharge the collected refrigerant (Process No.3) from the liquid
stop valve.
Refer to Refrigerant charge, see on page 61.
8 Check the liquid and gas stop valves are fully opened. -
O.U.: Outdoor unit.
I.U.: Indoor unit.
Comp.: Compressor.
12 Maintenance notes
364
SMGB0065 rev. 1 - 12/2010
 Loading...