Chapter 3 Basic Operation
3-16
3.3. Print Head Cleaning
This section describes the cleaning procedure when the area around the nozzle is soiled by ink.
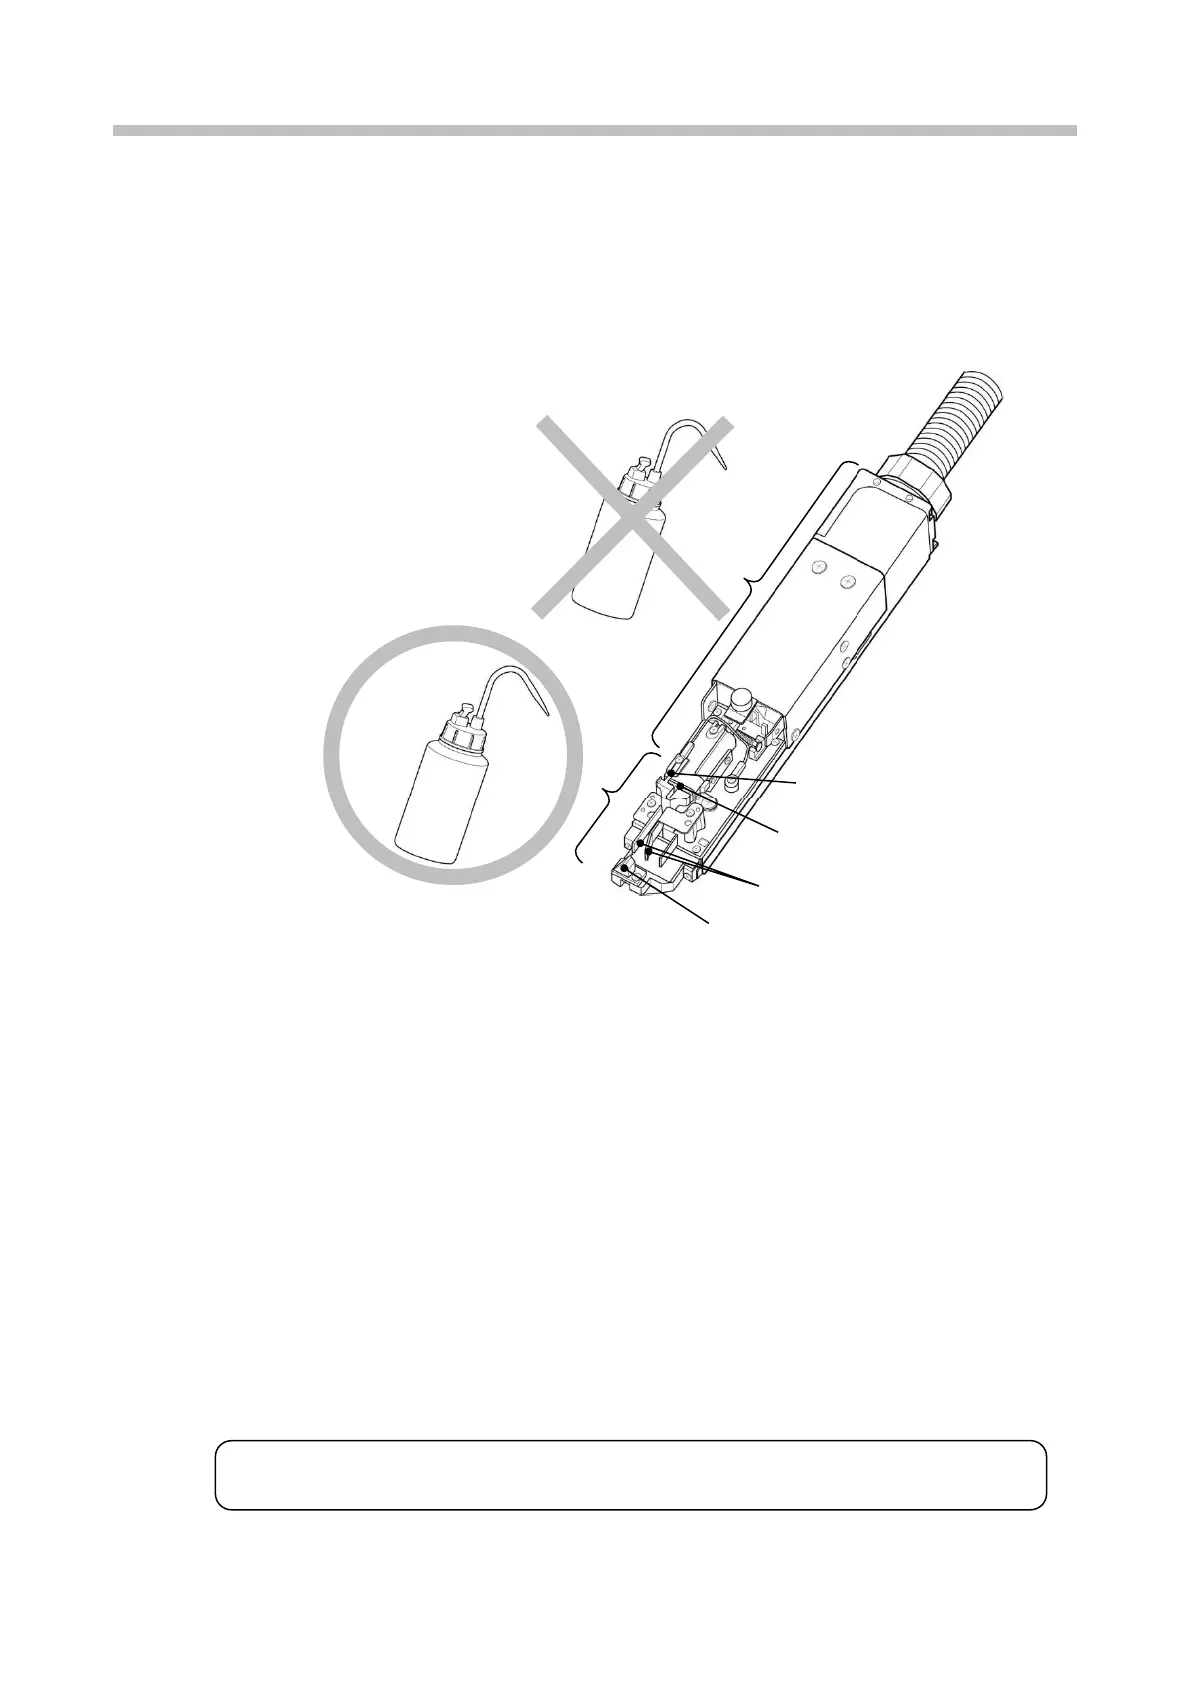
3.3.1. Cleaning with Cleaning Bottle
(1) Face the end of the print head downward and pour makeup onto the dirty part and clean while catching
the makeup in a beaker.
(2) After cleaning, thoroughly wipe the print head with wiping paper and dry it with the blower.
● Thoroughly dry the nozzle orifice, charge electrode, deflection electrode, and fringe of the gutter in
particular. Make sure that the print head is sufficiently dry before starting the operation. If operated
while the print head is wet, the printer will not start normally
● While the print head is wet, do not face its end upward.
(3) Do not immerse the print head in the makeup. The makeup may enter the print head.
(4) When printing is frequently performed or the distance between the print material and the print head is
short, ink splashes may stain the end of the print head and the print head cover. If this condition is left
unresolved, the staining will be worse, resulting in a print error or emergency stop. If a print error or
emergency stop frequently occurs due to staining caused by ink splashes, stop the operation in progress
and clean the end of the print head (around the nozzle, charge electrode, deflection electrode, mounting
base and gutter) and the print head cover. Perform this operation in addition to the cleaning at the end of
each day's work.

 Loading...


