. A complete Parts List is available at www.HobartWelders.com
OM-260 274 Page 21
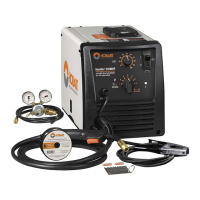
5-13. Connecting 1-Phase Input Power For 115 VAC Input
Ref. 250 332-B
! Installation must meet all National
and Local Codes − have only
qualified persons make this
installation.
! Always connect green or green/
yellow conductor to supply
grounding terminal first, and never
to a line terminal.
For 115 volts AC input power, a 20 ampere
individual branch circuit protected by
time-delay fuses or circuit breaker is
required.
1 Multi-Voltage Plug And Power Cord
Connector (NEMA Type 5−15P Plug
Shown)
For multi−voltage plug connections, see
Section 5-11.
2 Receptacle − NEMA Type 5−15R
(Customer Supplied)
2
1
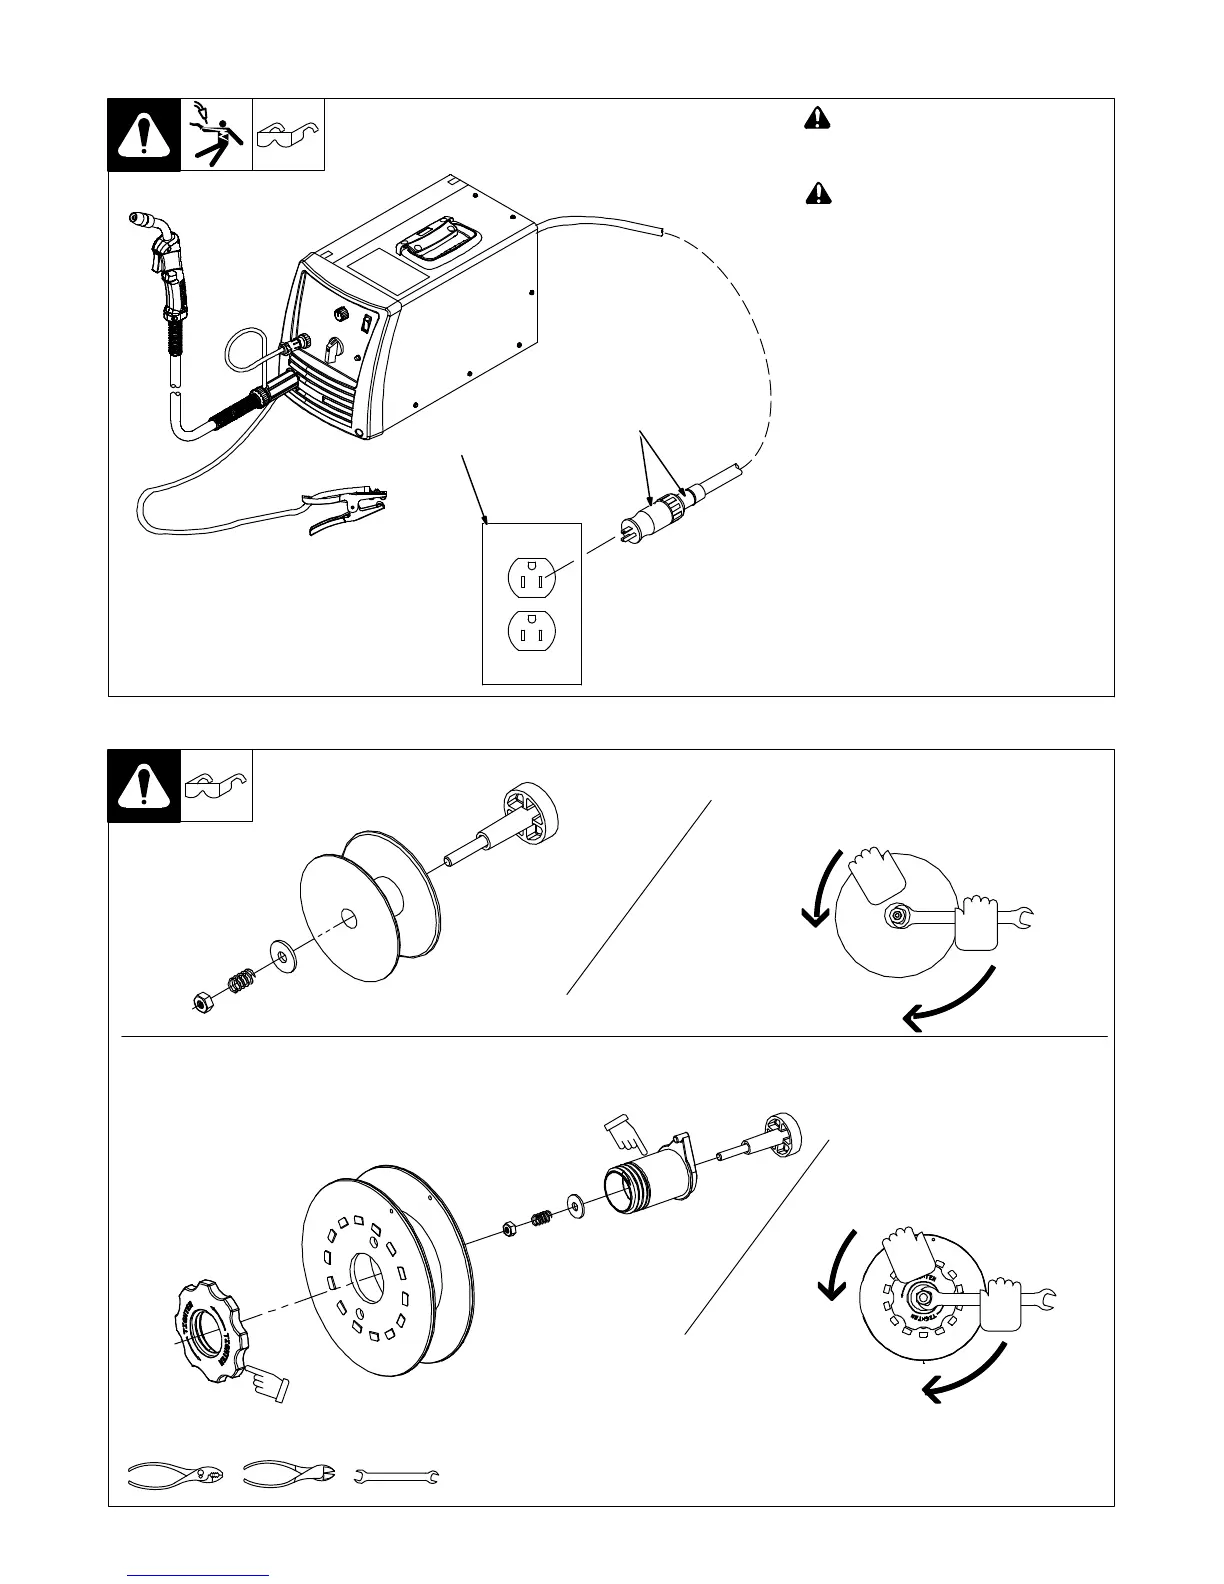
5-14. Installing Wire Spool And Adjusting Hub Tension
When a slight force is needed
to turn spool, tension is set.
1/2 in.
Tools Needed:
803 012 / 803 013 -B / Ref. 802 971-C
Installing 8 in. (203 mm) Wire Spool
Installing 4 in. (102 mm) Wire Spool
When a slight force is needed
to turn spool, tension is set.
Retaining ring used
with 8 in. (203 mm)
spool only.
Adapter used with 8 in.
(203 mm) spool only.
 Loading...