3
❏ 1. In the fuselage (fuse), connect the plug from the battery pack, colored red, to the plug from the on/off switch, labeled “BATTERY.”
❏ 2. Presently, the rechargeable batteries in the plane and in the transmitter are not fully charged. They may require additional
charging for setting up the radio after the plane has been assembled. If you plan to assemble the plane immediately, the batteries
may be charged later. If you plan to begin assembly later, charge the batteries following the instructions in the accompanying
Futaba
®
instruction manual that came with this kit.
Note: When charging the receiver batteries (inside the plane), connect the charger to the plug labeled “CHARGE.”
Assemble the Wing
Charge the Batteries
PART I: ASSEMBLY
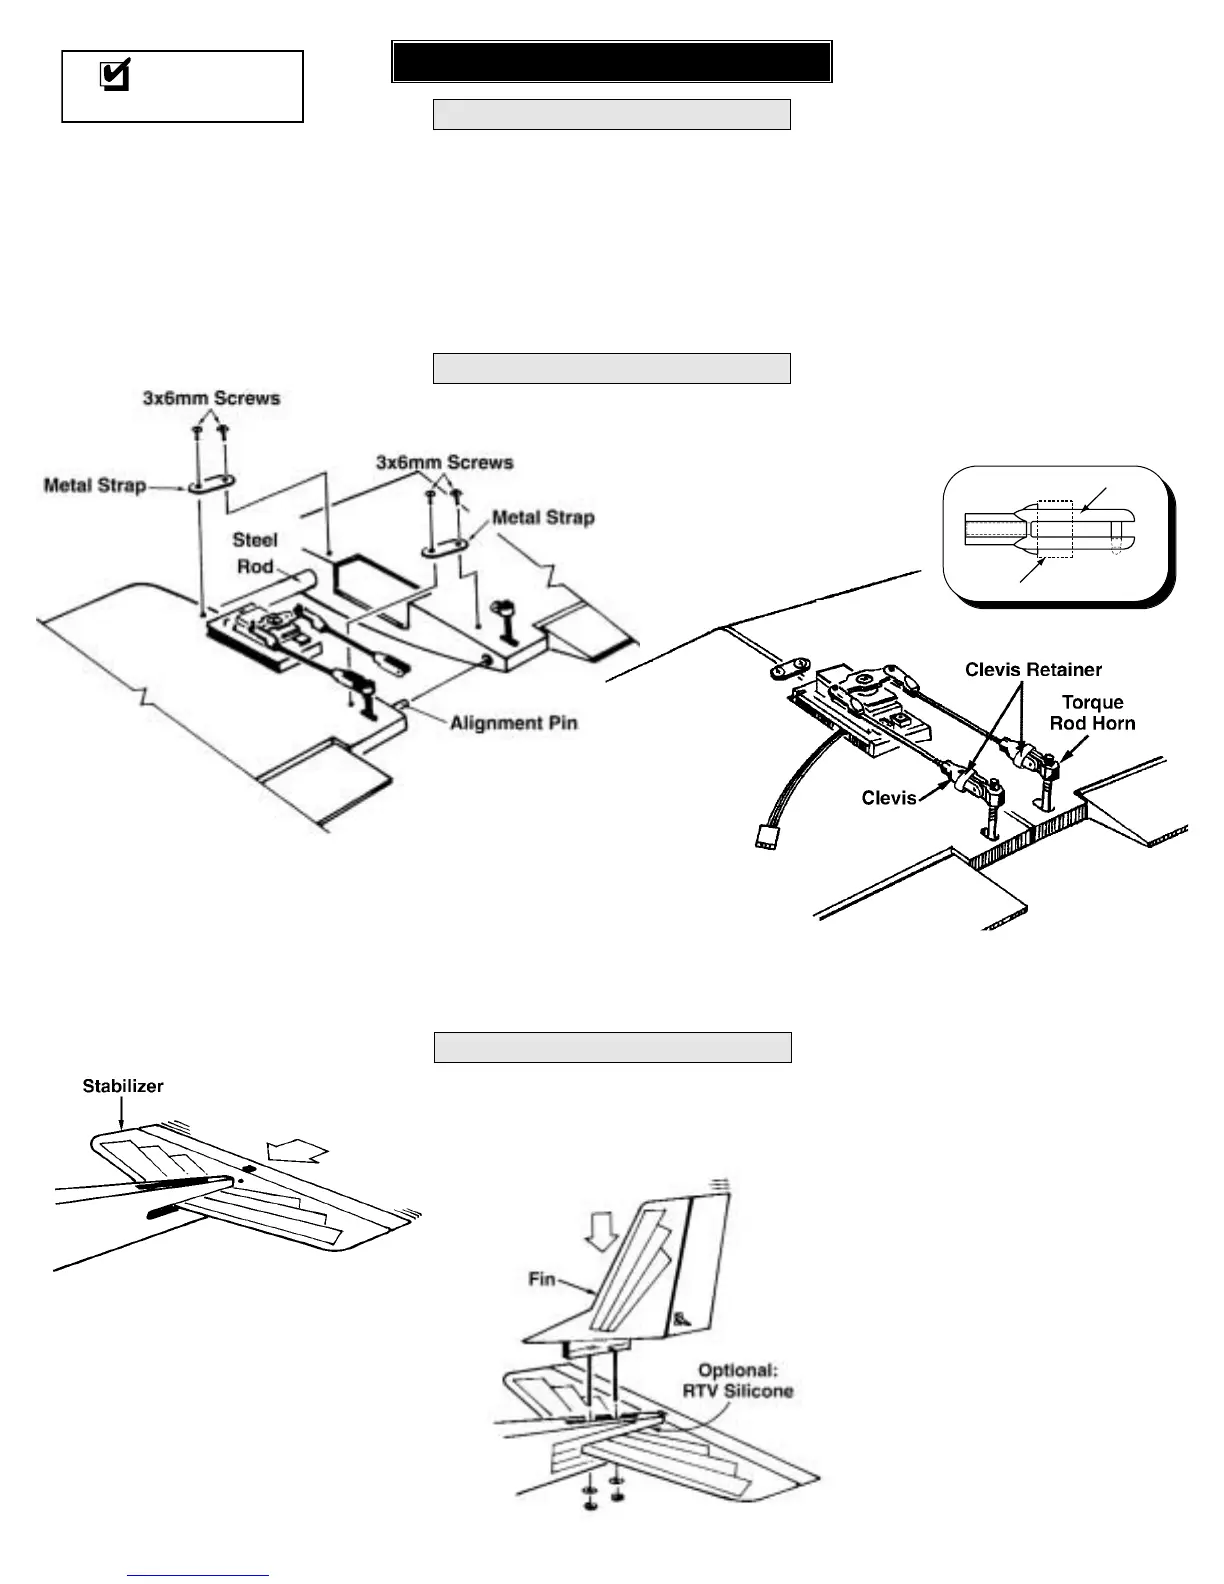
❏ 3. Connect the pushrods to the torque rod
horns with the clevises and clevis retainers.
❏ 1. Insert the stabilizer (stab) into the fuse.
❏ 1. Join both wing halves using the steel rod and the
alignment pin.
❏ 2. Fasten the wing halves with two metal straps
and four of the 3x6mm screws (the smaller screws in
the hardware bag with the washers attached).
❏ 2. Insert the fin into the stab, guiding the
metal rods through the holes in the stab and the
bottom of the fuse. Secure the fin and stab with a
washer and a 3mm lock nut. Be certain to tighten
the nuts securely, but do not over tighten so as to
damage the bottom of the fuse. Optional: Apply
RTV silicone rubber around the joint between the
stab and fuse.