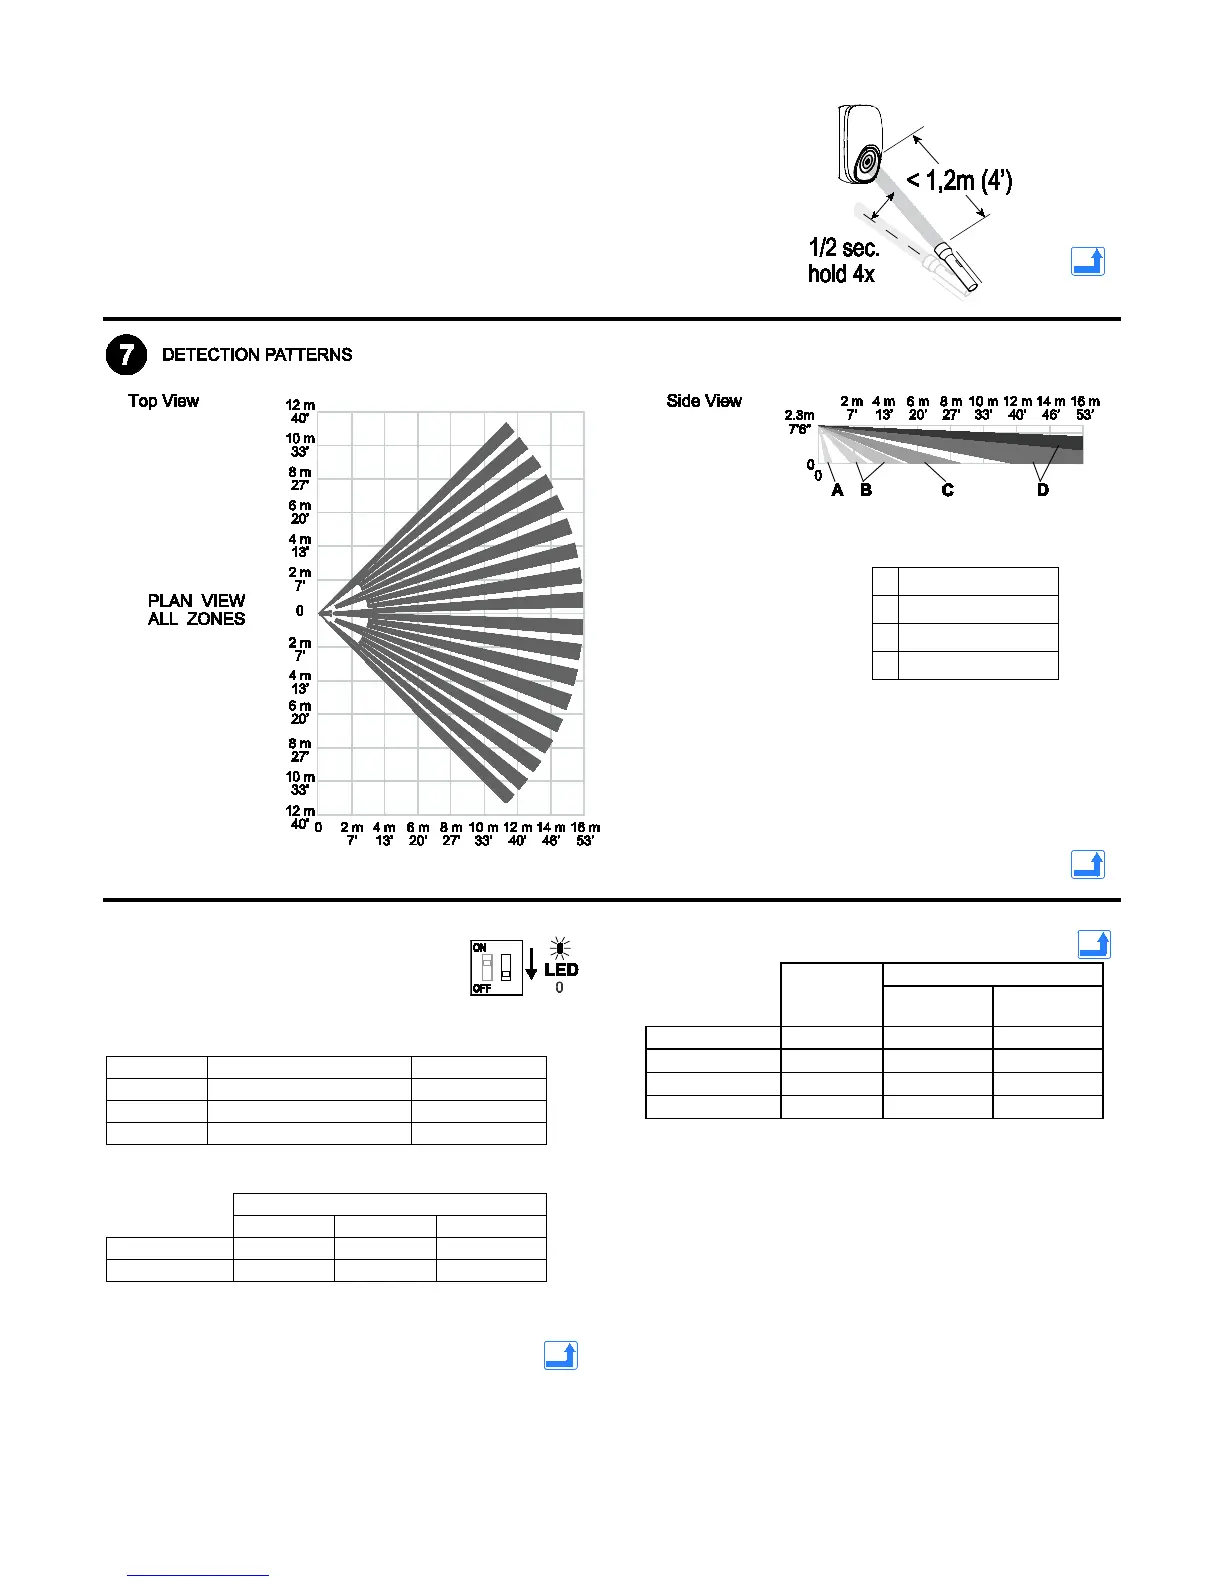
Flashlight Feature:
1. Use a flashlight with a bright light beam, and stand within 1.2 m (4’) of the
sensor.
2. Swing the light beam past the sensor IR window 3-5 times, holding the beam
on the window for 0.5 second each pass.
The flashlight feature is only available for the first 24 hours after the first power up.
REMOTE LED ENABLE (LED INPUT)
The LED input terminal allows the LED to be
remotely enabled. To use this feature, the
LED DIP switch (switch 2) must be OFF,
allowing the LED to operate based on the voltage level
connected to the LED Input (see Wiring Details).
Low (0 V) or High (+12 V)
Closed Closed Open
1
For information on Trouble conditions, see the Troubleshooting section.
2
In a Trouble condition, the Trouble relay will latch open until the Trouble
condition has been cleared.
TROUBLESHOOTING
*TROUBLE CONDITIONS:
1
Low Voltage: The sensor is disabled. [Note: If voltage drops below 5V, both
Alarm and Trouble relays open.]
2
Self-Test Failure conditions:
• Microwave supervision failure: The sensor is operating in PIR mode only.
• PIR self-test failure: The sensor is disabled.
• Temperature compensation failure: The temperature compensation is
disabled.
Depending on the Trouble condition, take the following corrective actions:
• Verify the power supply is sufficient (at least 9V at the sensor).
• Cycle power to the sensor.
• Walk test the sensor.
If the Trouble condition does not clear, replace the sensor.
 Loading...