9-5
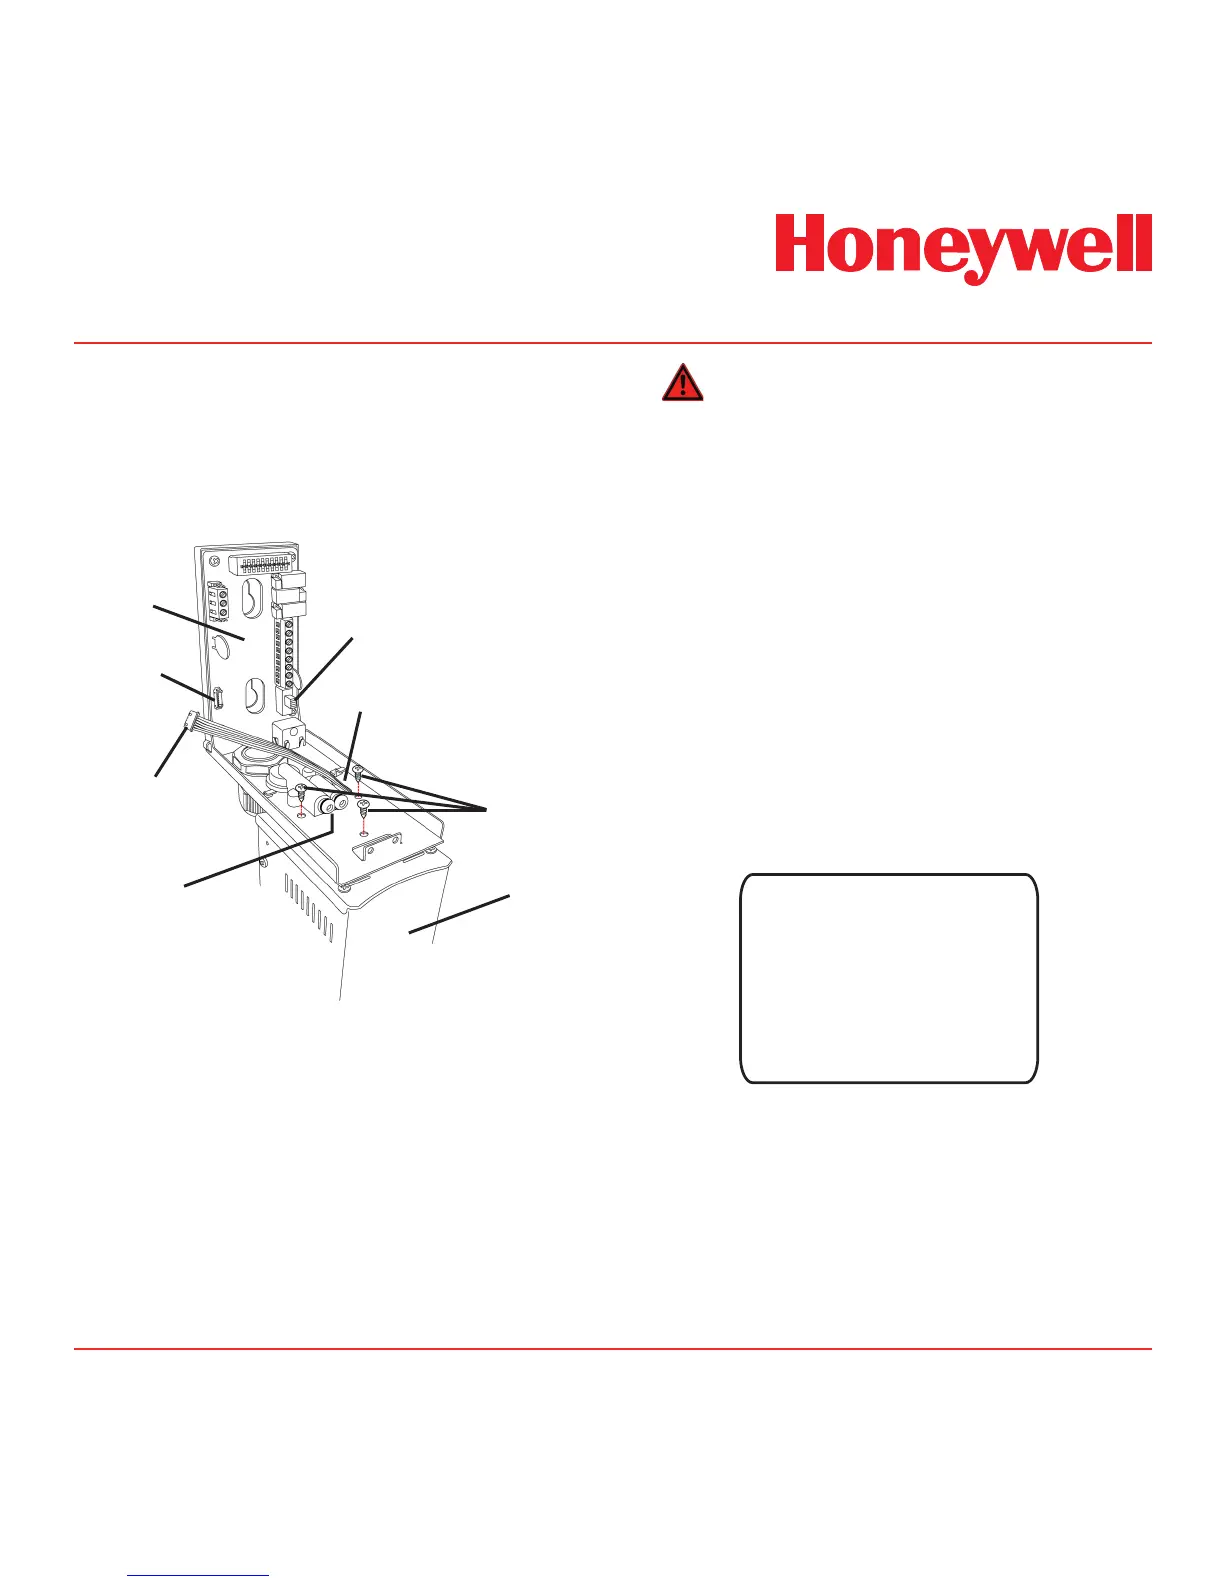
10. Connect the pyrolyzer to the detector with
the three provided mounting screws (see
Diagram 9-6).
Diagram 9-6. Attaching the pyrolyzer.
terminal
module
power switch
rectangular access at
bottom of bracket
mounting
screws (3)
pyrolyzer
socket
(con5)
connector
tubes
WARNING To maintain sensor accuracy
when using the pyrolyzer, perform a gas calibration
every six months. Do not allow the ambient tem-
perature at the point of installation to exceed 40°C
(104°F). Operation above this temperature may require
more frequent bump testing or calibration to confirm
working specification. Because of the higher operat-
ing temperatures when using the pyrolyzer module,
Honeywell Analytics strongly recommends that the
ventilated Midas Top Cover (shown in Diagram 9-1) be
used in all pyrolyzer applications.
Note:
Consult the label on the side of the Pyrolyzer
module, as shown in Diagram 9-7, for the
rmware version level required in the Midas
detector for proper operation.
Diagram 9-7. Pyrolyzer label.
P/N: MIDAS-T-NP1
05/16 REV 1 S/N:00001
For non-flammable gases only
www.honeywellanalytics.com
This pyrolyzer is to be used only
with Midas extractive units
equipped with version 1.10 or later
application software
.

 Loading...