UDACT-2 — Instruction Manual P/N 54089:B3 10/29/2019 17
Installation Options Installation and Wiring
BMP-1 Blank Module Plate
The UDACT-2 mounts on the back of a BMP-1 blank module plate, so it can be mounted on a DP-DISP, DP-DISP2, or ADP-4B dress
panel.
Remote Installation
For remote installation, the UDACT-2 can mount in an ABS-8RB, UBS-1B, or UBS-1R enclosure. The unit must be placed within the
same room and within 20 feet (6.1 meters) of the panel or network annunciator. Wiring must be enclosed in conduit.
Step Action
1 Disconnect AC power and disconnect batteries.
2 Mount the BMP-1 onto a DP-DISP, DP-DISP-2, or ADP-4B dress panel by placing it over the two threaded studs and
fastening with two 4-40 KEPS hex nuts (included with BMP-1) as indicated.
3 Attach four 3/16” hex standoffs (p/n 42170, included with UDACT-2) to the BMP-1’s four threaded studs.
4 Align the UDACT-2 over the standoffs and fasten with four 4-40 screws (included with UDACT-2, p/n 38122).
UDACT-2_CHS-M3.wmf
Screws
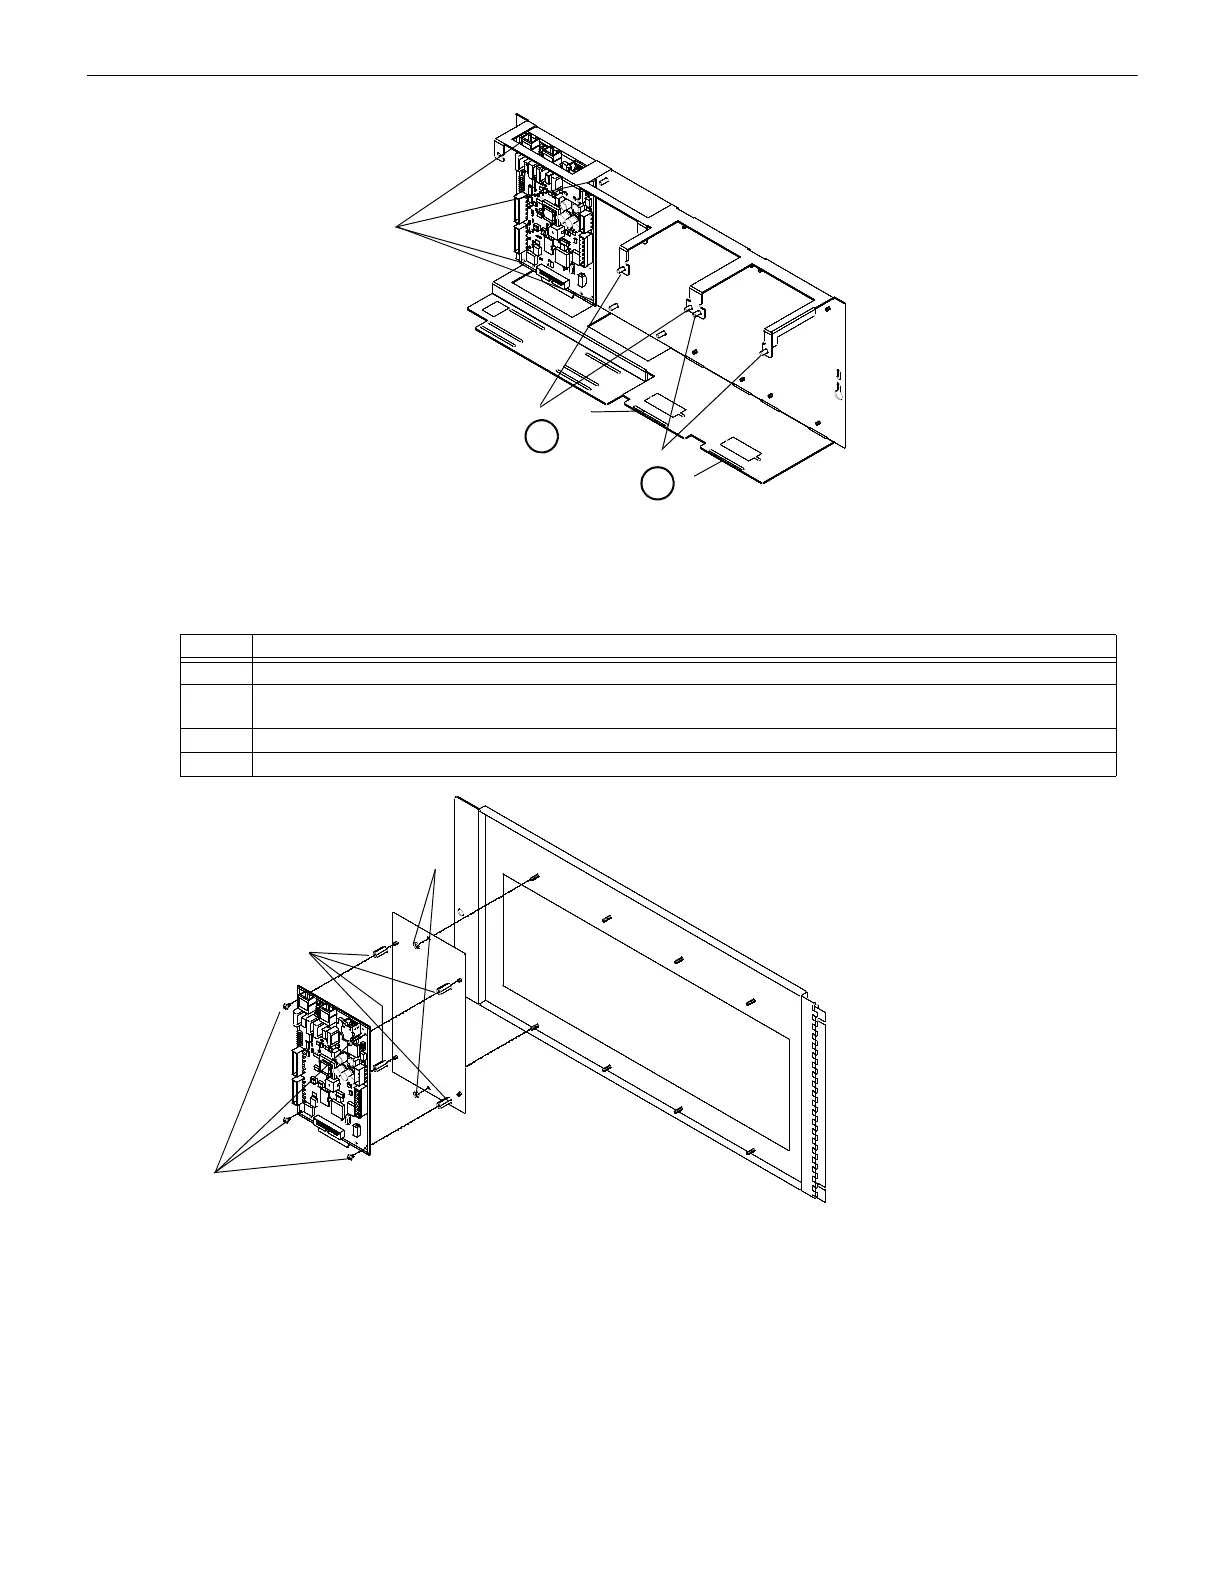
Rear Mounting
Front Mounting (two possible positions)
1
2
Screws
Screws
Tab
Tab
Figure 2.8 CHS-M3 Installation
Figure 2.9 BMP-1 and Dress Panel Installation
Screws
Nuts
Standoffs
udact-2 to bmp-a to dp-disp.wmf
 Loading...