8.2. Calibration
WARNINGS
It is recommended to bump test the sensors frequently to ensure proper operation.
8.2.1 Zeroing and span calibration
Caution: Before initial calibration allow the detector to stabilize for 30
minutes after applying power. When in zeroing and span calibration mode
the current output from the detector is inhibited (default 3mA) to avoid false alarms.
It is recommended for most sticky gases the tubing should be PTFE with
short pieces of rubber tube to make the nal connection due to the
inexibility of PTFE. This minimizes adhesion of the gas to the tube surface
and allows for more accurate measurement.
For Hydrogen Sulde type sensors refer to section 8.2.2 before conducting
zero and span calibration.
Note: It is recommended that the calibration is made where the sensor / transmitter have stabilized with
their local environment. It is recommended that calibrations be performed at a stable temperature in
which the system is to be used. Re-calibration is recommended if the temperature of local environment
has varied by more than +/-15 degrees C from the temperature of calibration.
It is essential that the sensor is tested frequently to be sure the system is operating properly. Typically
gas detectors should be tested at least twice per year. However it is recommended that testing is
conducted on a more frequent basis after initial start up as sensor operation and performance will vary
in different environmental conditions and in the presence of other gases. It is the responsibility of the
user to determine an appropriate calibration frequency for the application.
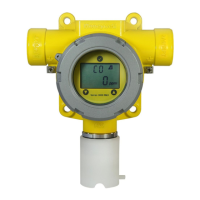
To calibrate the detector, use an appropriate span gas cylinder, ow regulator set to 300-375mL/min,
tubing, magnet and calibration gas ow housing. A compressed air cylinder (20.9%Vol oxygen) should
be used to perform the zero calibration if the area where the detector is located contains any residual
amount of the target gas. If no residual gas is present then the background air can be used to perform the
zero calibration. Contact your Honeywell Analytics representative for details of suitable calibration kits.
To calibrate the detector follow the procedure below.
Note: the Oxygen sensor does not require a zeroing procedure. Background air (20.9%Vol oxygen)
can be used to span the oxygen sensor in place of a compressed air cylinder (20.9%Vol oxygen). For
oxygen sensors only do parts 1-4, 13, 14 (if compressed air cylinder is used), 15-19 and 24 of the
procedure below.
1. If using compressed air, push the calibration gas ow housing onto the bottom of the sensor and
apply the gas.
2. To access the calibration mode, hold the end of the magnet over the switch located at the top centre
of the detector display for at least 5 seconds and then remove.
3. The display will indicate the rst menu mode menu ‘SEt CAL’.
 Loading...
