MOUNTING
Before proceeding to Plumbing:
I selected a duct mounting location
I connected the duct nozzle
I installed the mounting bracket to the duct
I installed the steam humidier onto the mounting bracket
Steam Humidier System 69-2285—09 13
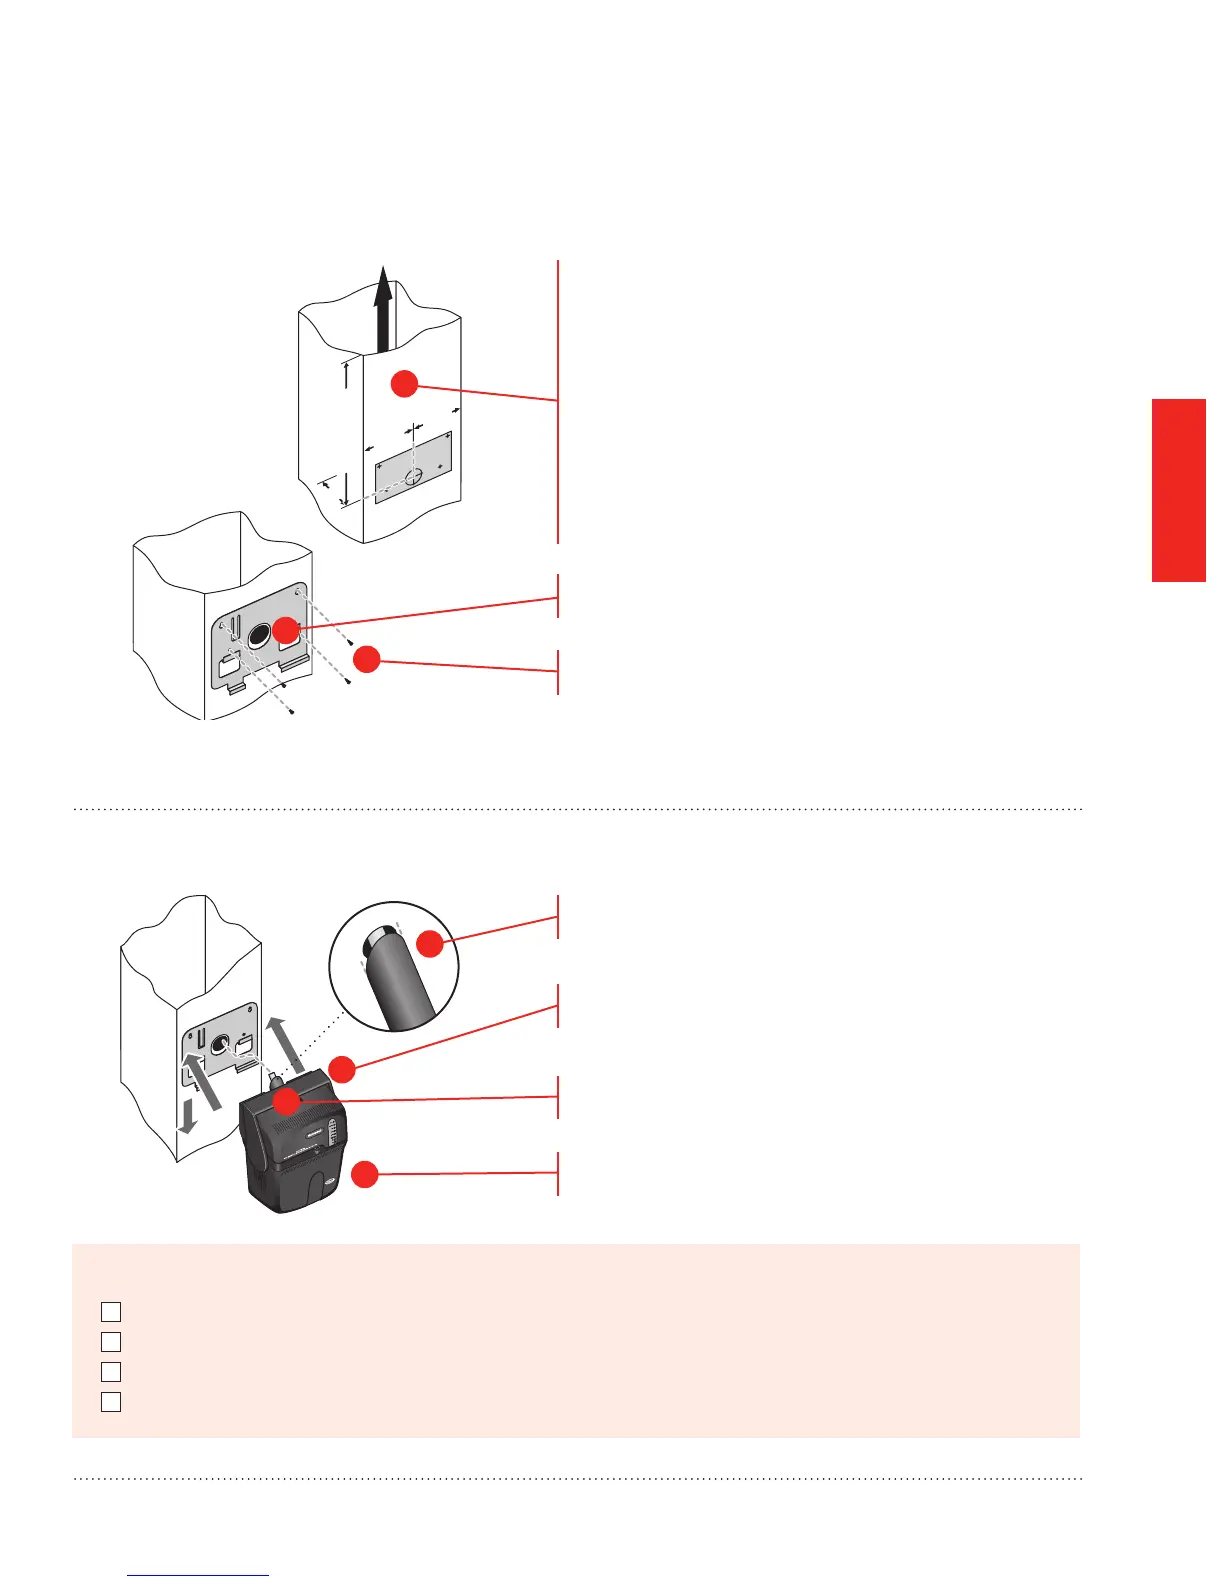
STEP THREE: Install Mounting Bracket to the Duct
Position the template on the supply duct:
• Make sure the template is level and in the desired
position on the duct.
• Ensure proper clearances from A-coil.
• Make sure the duct nozzle will have proper
clearances from duct walls.
• Minimum 4-inch clearance from nozzle outlet to any
duct wall.
• Minimum 24 inches of downstream open duct air
space. (Needed to prevent water condensation.)
Drill the 1-3/4 inch hole.
Secure the mounting bracket to the duct, using four
self-drilling sheet metal screws provided.
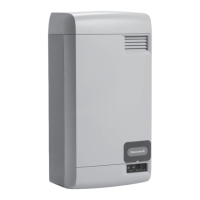
STEP FOUR: Install Steam Humidier onto the Mounting Bracket
Make sure the foam gasket is positioned correctly over
the nozzle.
Lift steam humidier into place against the mounting
bracket. Insert the nozzle directly into the duct hole.
Check the foam gasket – it must form a tight seal in
the duct hole.
Push down to secure steam humidier to the bracket
arms.
Flow
4”
12”
(min)
4”4”
M29601A
2
3
1
3
2
1
4

 Loading...