USING YOUR OVEN
(continued)
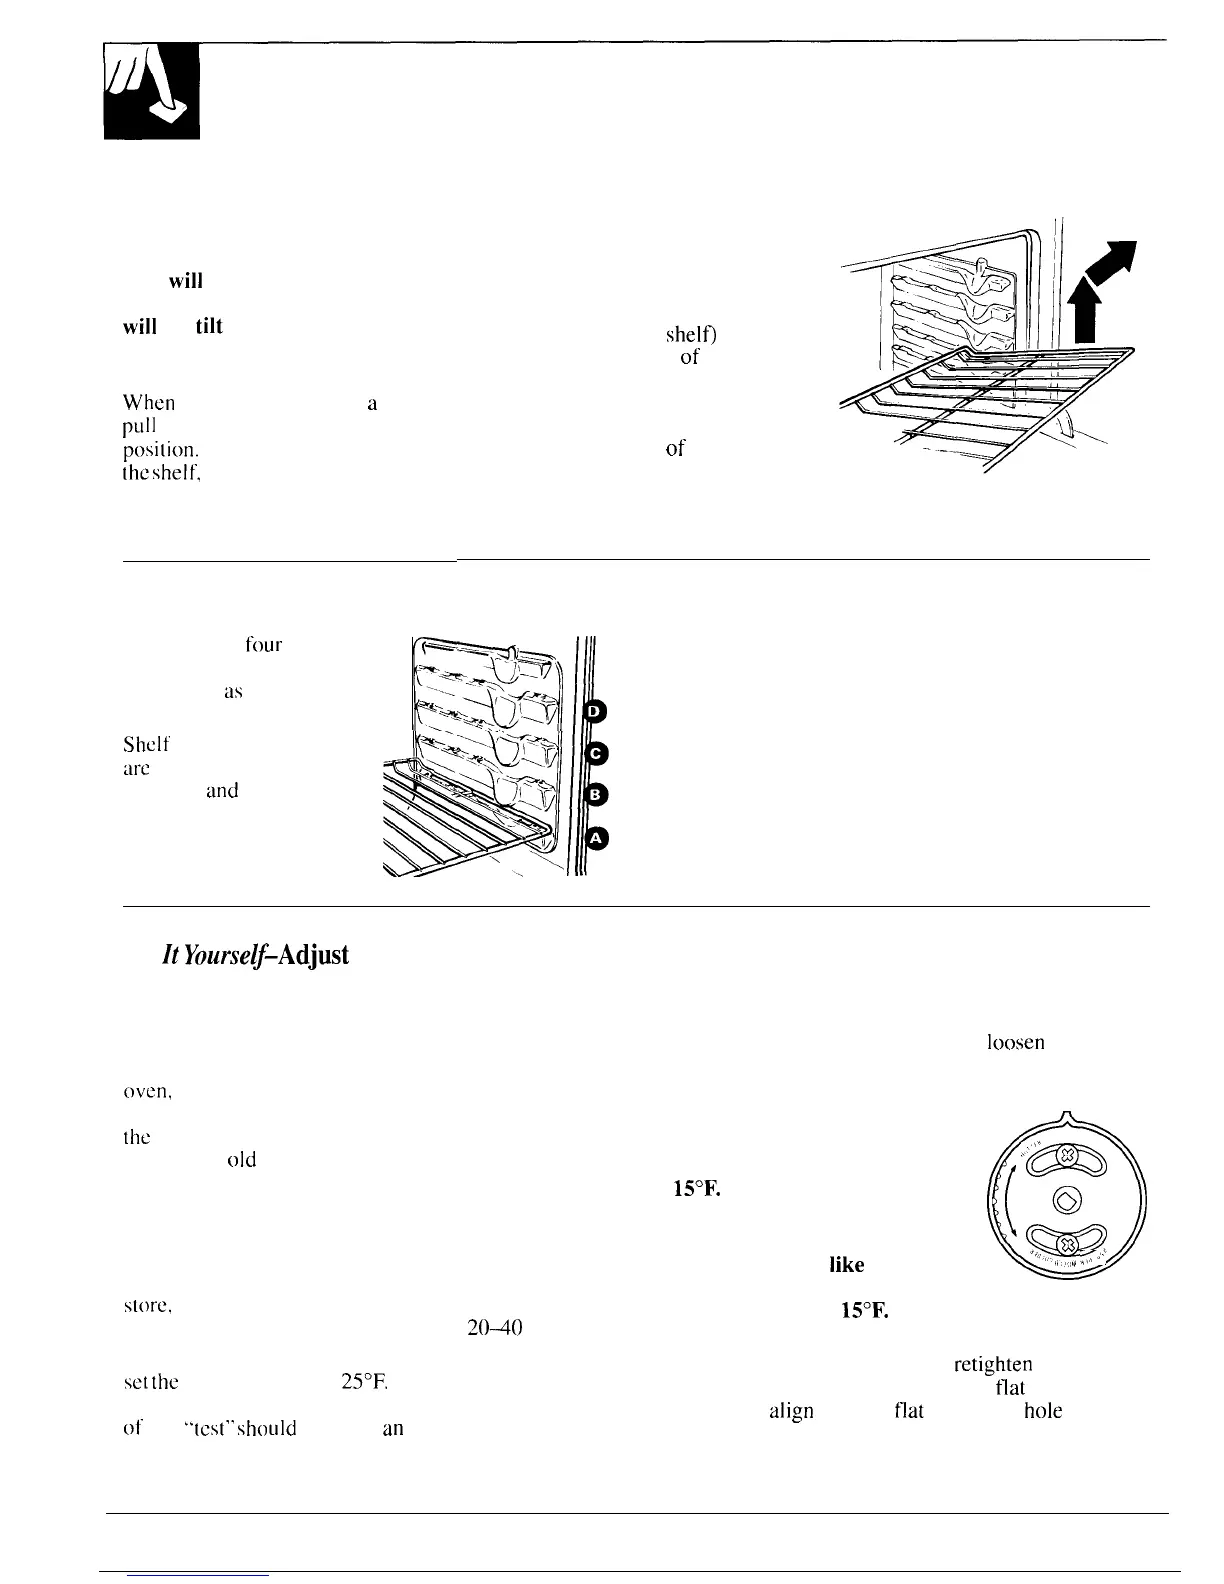
To remove the shelves
from the
Oven Shelves
The shelves are designed with
stop-locks so when placed
correctly on the shelf supports,
they
will
stop before coming
completely out of the oven and
will
not
tilt
when you are
removing food from them or
placing food on them.
When
placing cookware on
a
shelf,
pLIll
the shelf out to the “stop”
posi~ion.
Place the cookware on
the
shelf,
then slide the shelf back
into the oven. This will eliminate
reaching into the hot oven.
oven, pull them toward you, tilt the
front end upward and pull them out.
To replace,
place the shelf on the
shelf support with the stop-locks
(curved extension of
shelfi
facing
up and toward the rear
of
the oven.
Tilt up the front and push the shelf
toward the back of the oven until it
goes past “stop” on the oven wall.
Then lower the front of the shelf
and push it all the way back.
Shelf Positions
The oven has
four
shelf
supports, identified in this
illustration
as
A (bottom), B,
C and D (top).
P4
(-*.
‘:.%QT
~..~~~
Shelf positions for cooking
are
suggested i n the Baking,
Roasting
and
Broiling
sections.
F
Oven Light
Ii
A manual switch (on some models) is located on the
control panel. The light turns on when the oven door
is opened or when the control panel light switch is
B
turned on.
Do
Zt
Yourse~-Adjust
the Oven Thermostat
If you don’t think the oven is heating at the right
temperature when you are baking or roasting, you
can reset the thermostat yourself.
When cooking food for the first time in your new
oven,
use time given on recipes as a guide. Oven
thermostats, over a period of years, may “drift” from
the
factory setting and the differences in timing
between an
old
and a new oven of 5 to 10 minutes are
not unusual. Your oven has been set correctly at the
factory and is more likely to be accurate than the oven
which it replaced.
We do not recommend the use of inexpensive
thermometers, such as those found in the grocery
s[ore.
to check the temperature setting of your new
oven. These thermometers can vary by
2040
degrees.
To decide how much to change the temperature,
set
the
oven temperature
25°F.
higher or lower than
the temperature in your recipe, then bake. The results
of this
“[cst”
should
give you
an
idea of how much the
temperature should be changed.
Pull knob off shaft. Look at back of knob and note
current setting before making any adjustment.
To make an adjustment, carefully
loosen
the two
screws until the back of the knob can be rotated, then
move the pointer one “click” from the original setting.
If you would like the actual
oven temperature (at any
setting) to be approximately
15°F.
hotter, move the pointer
clockwise in the “HOTTER”
direction.
o
(
‘m
&
%
If you would
like
the actual oven
~
“’”
temperature (at any setting) to
be approximately
15°F.
cooler, move the pointer
counterclockwise in the “COLDER” direction.
After making the adjustment,
retighten
the screws
and return the knob to the range–the
flat
side of the
shaft must
align
with the
flat
side of the
hole
in the
back of the knob. Check the oven performance. Make
additional adjustments if needed.
12