6.5 Replace Microinverter
a. How to remove the Microinverter.
• De-energize the AC branch circuit breaker.
• Remove the PV panel from the racking, and cover the panel.
• Using a meter to measure and make sure there is no current owing in the DC wires between panel and
microinverter.
• Use the DC disconnect tool to remove the DC connectors.
• Use the AC disconnect tool to remove the AC connectors.
• Un-screw the xing screw on the top of the microinverter and remove the microinverter from the PV racking.
b. How to replace the Microinverter:
• Please record down the new Microinverter’s SN.
• Please make sure the AC branch circuit breaker if off, and following the Microinverter installation steps to
install the replacement unit.
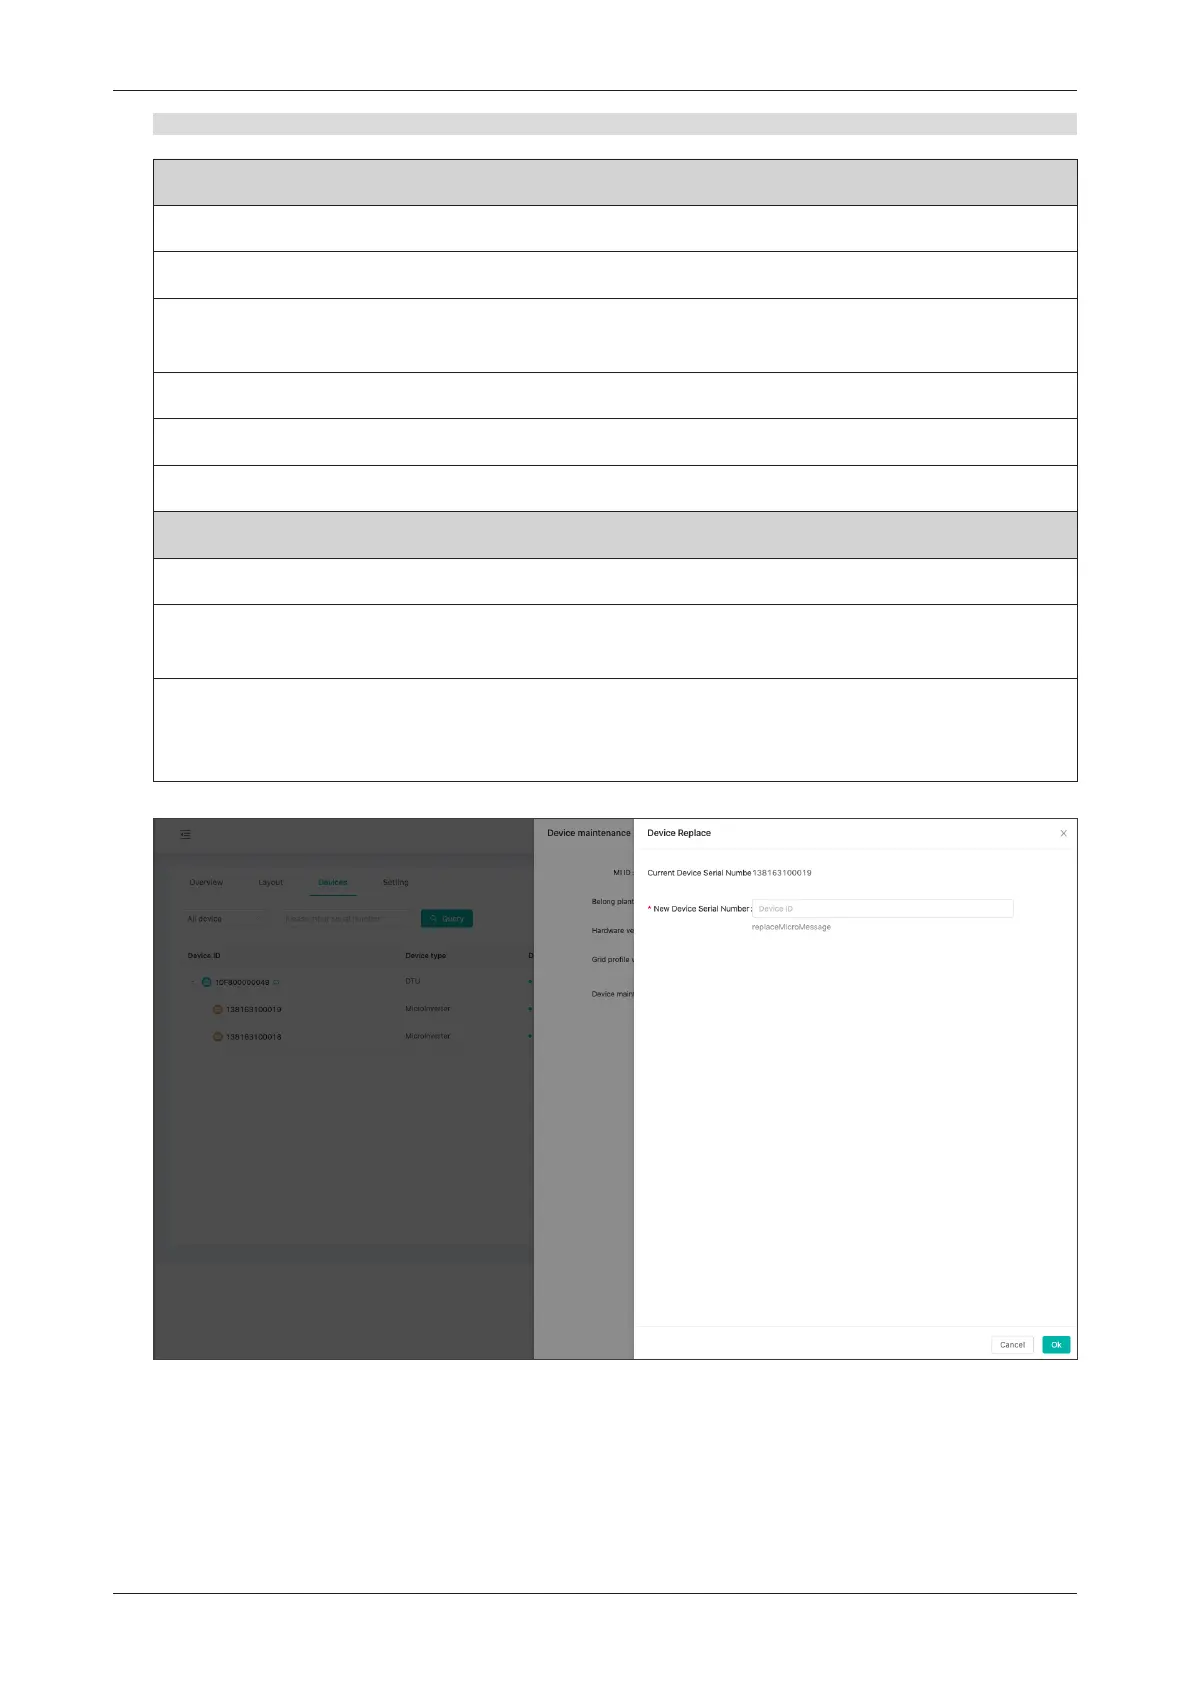
• Go to the monitoring platform (if customer already register this station online), please access the “Device List”
page and nd the device that you just replaced. Please click the edit button on the right side of the page, and
select “Device Replace”. Input the new Microinverter’s SN and click “OK” to complete the station changes.
© 2020 Hoymiles Power Electronics Inc. All rights reserved.
18
Three-phase Microinverter HMT-1800/2250 Troubleshooting

 Loading...