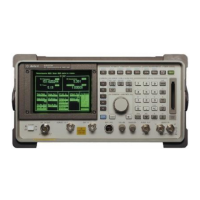
Model
182C Operation
SECTION III
OPERATION
3-1.
INTRODUCTION.
3-2. This section of the manual presents information
on
Che operation, function
and
capabilities of
(he instru-
ment controls. Information regarding control turn-on
procedures and front panel adjustments is explained
to
assist the operator in properly setting
up
and using the
Model 182C.
3-3.
GENERAL.
3-4.
The
Model 182C is
designed to
operate with plug-in
time bases, and vertical
amplifiers
or sampling and time
domain
reflectometers.
These plug-ins
are
accommodated
in the lower portion of the instrument. The required oper-
ating power is obtained from the oscilloscope mainframe
Time base
and
vertical amplifier units must be locked
together before being installed in the mainframe.
3-5.
The vertical amplifier is always installed in the left-
hand side and the
time base on
the right-hand
side
of
the
mainframe
compartment. Refer to the plug-in operating
and service manuals for mating and installation
instruc-
tions.
3-6. PUSHBUTTON
SWITCHES.
3
7. Three switches are of the
two
position push-push
type. These are; MAGNIFIER. DISPLAY and EXT
COUPLING.
The pushbuttons
for
these functions are color
coded to indicate the function selected. When the released
position is selected, the white skirt of the
pushbutton is
exposed. This corresponds to the control function on the
panel outlined in while. For example: if MAGNIFIER is
depressed, only
the black portion
of
the
pushbutton
is
visible. Magnification is therefore XI
0.
When MAGNI FIER
is released, the white skirt of the pushbutton
can be
seen
and magnification
is XI.
3-8.
FRONT PANEL CONTROLS AND CON-
NECTORS.
3-9. All operating controls and front panel
adjustments
are identified
and
described
in
Figure 3-1
The information
presented
gives the operator a quick reference regarding
the
operating function of each. Additional information
regarding some of these
is explained below in
greater
detail.
3-10.
CALIBRATOR.
3-11.
The calibrator has two outputs. 10V and
250
mV
peak-to-peak. negative-going from ground,
with an am-
plitude accuracy of The
output is a square wave
at a frequency of approximately 1 kHz. Risetime of the
signal is less than 3 microseconds. These outputs are
useful for checking vertical and horizontal sensitivity
calibration, and divider probe calibration.
A 3-way bind-
ing post provides a convenient ground connection point
and may be used with
banana plug, wire
or spade lug
connection.
3-12. SCALE.
3-13. This control
adjusts the overall
brightness of
the
CRT
graticule.
It should be adjusted
for
good contrast
between the background
and
the graticule. The
SCALE
control is useful
when
using
a hood to
view
the display
or when photographing waveforms.
Rotate the SCALE
control counterclockwise to OFF when graticule
illumir>-
atlon is not
needed.
3-14. TRACE
ALIGN.
3-15. This screwdriver
adjustment is used to compensate
for
external magnetic fields that
may
affect
alignment of
the horizontal trace with the
graticule Use it to position
the trace parallel
to
the
graticule horizontal lines. The
alignment should
be
checked
when the instrument
is
moved to
a
new location and
adjustment made whenever
necessary.
3-16.
FOCUS AND ASTIGMATISM.
3-17.
These controls are
used to obtain a display of
uniform focus.
Adjust both controls for the
sharpest
display possible.
3-18.
FIND BEAM.
3-19. Occasionally
the CRT beam may be driven off-
screen by large dc input levels or improper
control
settings.
Pressing the pushbutton increases
intensity and reduces
horizontal and vertical amplifier
gains enough to always
return a displaced beam to the viewing area. This enables
the
operator
to determine the action necessary
to center
the display. All operating controls function
while the
FIND BEAM control is depressed. Obtaining
a centered
display may require
adjustment
of
the deflection factor,
horizontal and vertical position, coupling, trigger
level
or intensity for example. If
the controls are properly set,
the
display will remain visible when FIND BEAM
is
released.
3-1