Service
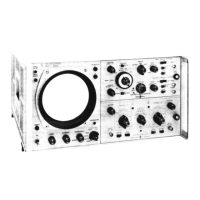
Model 162C
8-61. SWEEP-GATE
ASSEMBLY
REMOVAL. 8^67.
CRT REMOVAL.
8-62.
The Sweep-gate
amplifier is located on the upper
rear panel of the instrument.
It is exposed
for servicing
bv
removing 4 screws holding the rear panel to the rear
casting frame.
(Do
not remove rear feet from panel.) If
complete
removal
is desired, disconnect 12 square-pin
connections to the assembly. Five BMC connectors
and
one screw hold the circuit board to the rear panel.
8-63.
GATE AMPLIFIER ASSEMBLY
REMOVAL.
8-64.
Disconnect ac power input and remove
the in-
strument top cover. Then proceed as follows:
held in
place by
4 screws.
(Do
not remove
rear
feet.) Then
proceed
as
follows:
a.
Disconnect
Cate Out
coaxial
cable
(2
square-pin
connections) from rear of Gate Amplifier.
b. Remove 2
screws from rear
casting frame.
c.
Remove by pulling
assembly back and pivoting
connector
end
out
of mainframe.
8-65.
HORIZONTAL MODULE
REMOVAL.
8-66. To remove the Horizontal module, use
the following
procedure:
a. Disconnect ac power input and remove the
in-
strument top cover.
b.
Disconnect
2
horizontal deflection
cable pin con-
nections from
CRT neck.
c. Remove
2
screws holding bottom of circuit board
to oscilloscope frame and 1 screw located
at top
center
of
circuit board.
d.
Remove 1 screw from front casting frame.
e. Slide module toward front of instrument to discon-
nect module and turn rear of
module to outside of oscil-
loscope
mainframe.
f. Bend horizontal deflection cable forward and flat
against rear of module.
g.
Carefully slide module toward front of instrument
for removal.
h. When reinstalling, be certain that horizontal deflec-
tion cable is placed toward front of
module
before
instal-
ling. After module
is
inserted,
bend cable toward rear
before
making connection to oscilloscope conneaor.
8-68.
Remove the CRT
as follows:
To prevent personal
injury, always wear
a face mask or safety
goggles when
handling
the CRT. Wear
protective gloves
and handle carefully.
a. Disconnect
ac power input
and remove covers
from instrument.
b.
Disconnect
CRT post-accelerator
lead at connector
mounted
on H.V. module. Cable
is permanently
fastened
to
CRT. Completely
discharge
CRT and H.V.
Multiplier
connections
by grounding
both plug
and jack.
The
CRT post
accelerator lead
may
have
a high voltage present
even if the
instrument
has been turned
off for a
long time.
Ground both
CRT and H.V.
Multiplier connections to
discharge.
c. Remove
2
screws
holding CRT socket
cover to
rear panel.
d.
Carefully
remove
CRT socket by gently prying
it
loose. If desired, the instrument
top rear panel may
be
removed
to facilitate
socket removal.
e.
Disconnect
8 CRT neck pin
connections.
(See
Figure 8-20
for
connection
identifications.)
f.
Remove 4
screws which hold
the front
bezel
in
place. These
screws are removed
from the
rear of front
casting frame and are
located near
each corner of
the CRT.
g.
Loosen circular clamp
securing CRT shield
to CRT
neck.
Note
If the standard P31 phosphor CRT
is replaced with
a
P1
1
phosphor CRT,
circuit modification
is required. The
increase in intensity from use of the
FIND BEAM switch can cause phos-
phor burn. Refer
to
Section VII for
information
about
the circuit change
required.