Internal WLAN antenna cables
The antennas route from the WLAN module to the cable connectors on the front and the rear of the computer.
To install the antennas:
1. Prepare the computer for disassembly (Preparation for disassembly on page 14).
2. Remove the access panel (Access panel on page 15).
3. Remove the hard drive (Hard drive on page 18).
4. Remove the drive cage (Drive cage on page 20).
5. Remove the fan (Fan on page 28).
6. Remove the heat sink (Heat sink on page 29).
7. Disconnect the antenna cables from the WLAN module (WLAN module on page 22).
8. Remove the system board (System board on page 31).
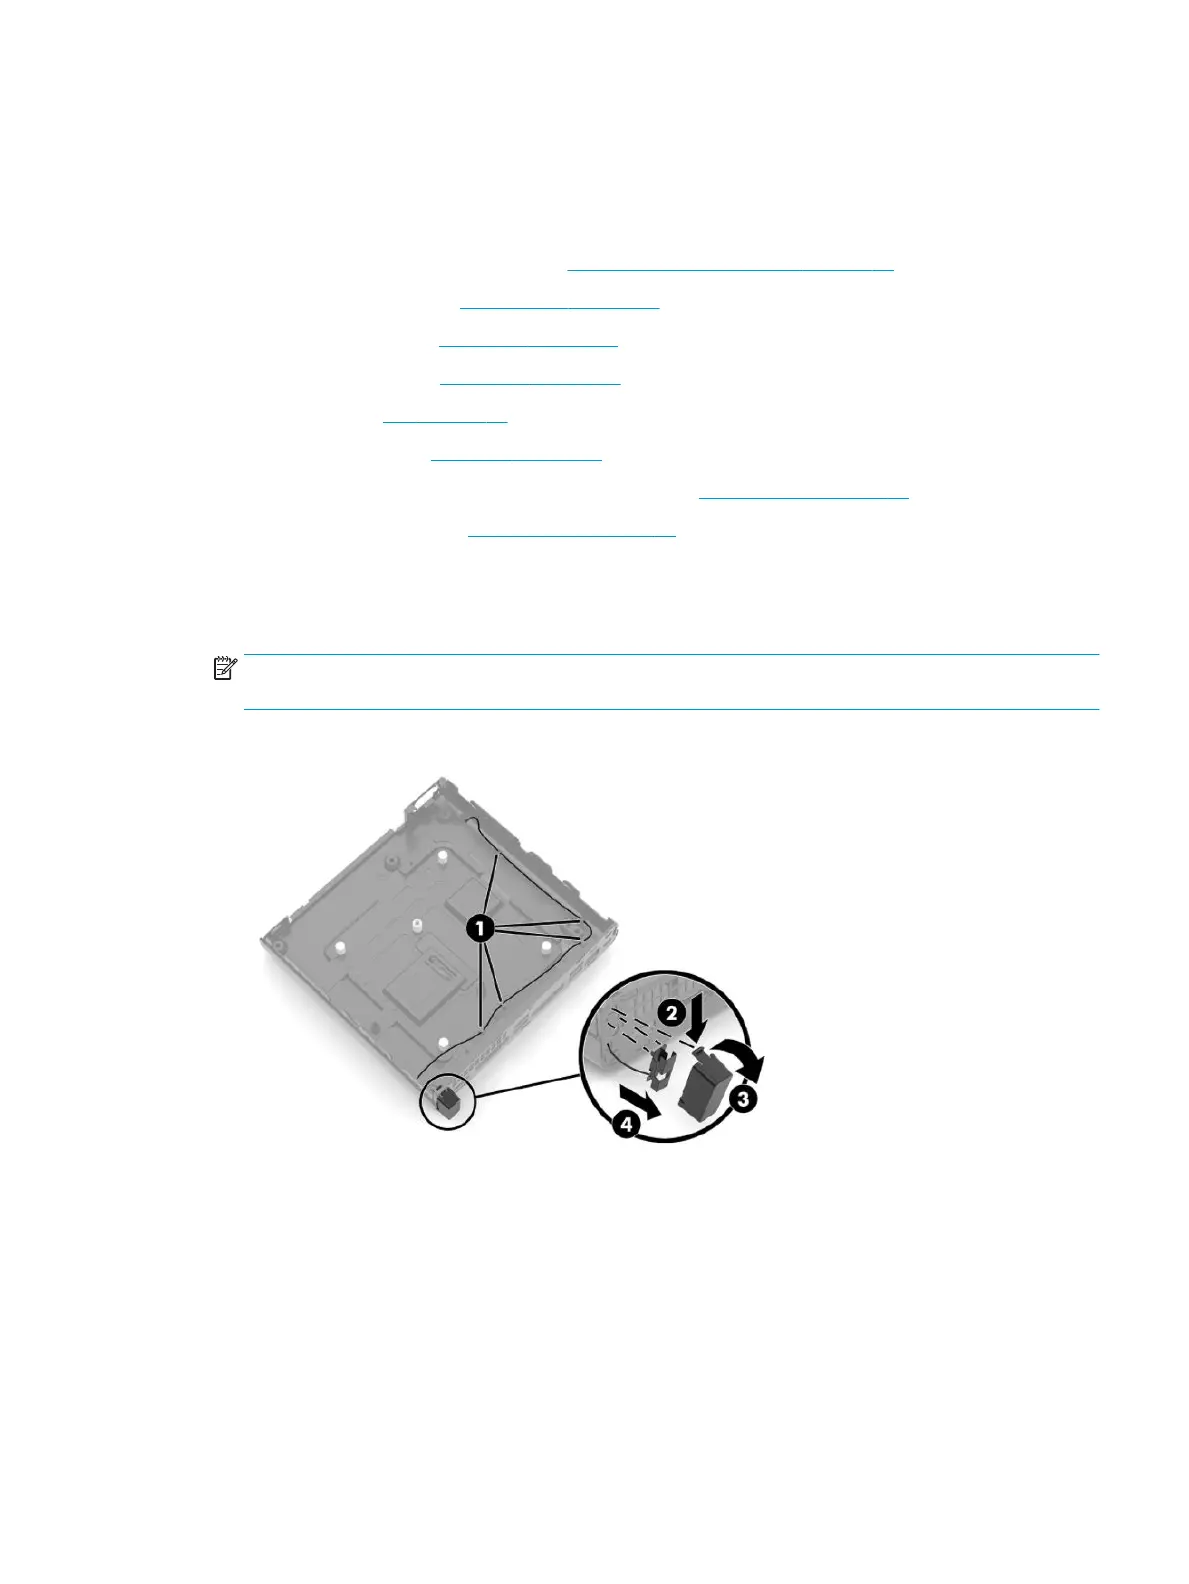
9. Remove the antenna cables from their routing paths along the interior sides of the computer chassis (1).
10. On the rear of the computer, remove the antenna cover by pressing on the tab on the top of the cover
(2), and then rotating the top of the cover downward and o the computer (3).
NOTE: One end of the antenna cover is slightly longer than the other, so make sure to correctly
orientate the cover when replacing.
11. Pull the antenna o the chassis, and then pull the cable out of the computer (4).
12. If the computer has dual antennas, from the front of the computer, remove the antenna cables from the
clips in the chassis (1).
13. Remove the Phillips screw (2) that secures the antenna to the chassis.
Internal WLAN antenna cables 35
 Loading...