Installing a solid state drive
1. Prepare the computer for disassembly (Preparation for disassembly on page 16).
2. Remove the access panel (Access panel on page 17).
3. Remove the front bezel (Front bezel on page 18).
4. Remove the slim optical drive (Removing a slim optical drive on page 29).
5. Remove the drive cage (Drive cage on page 19).
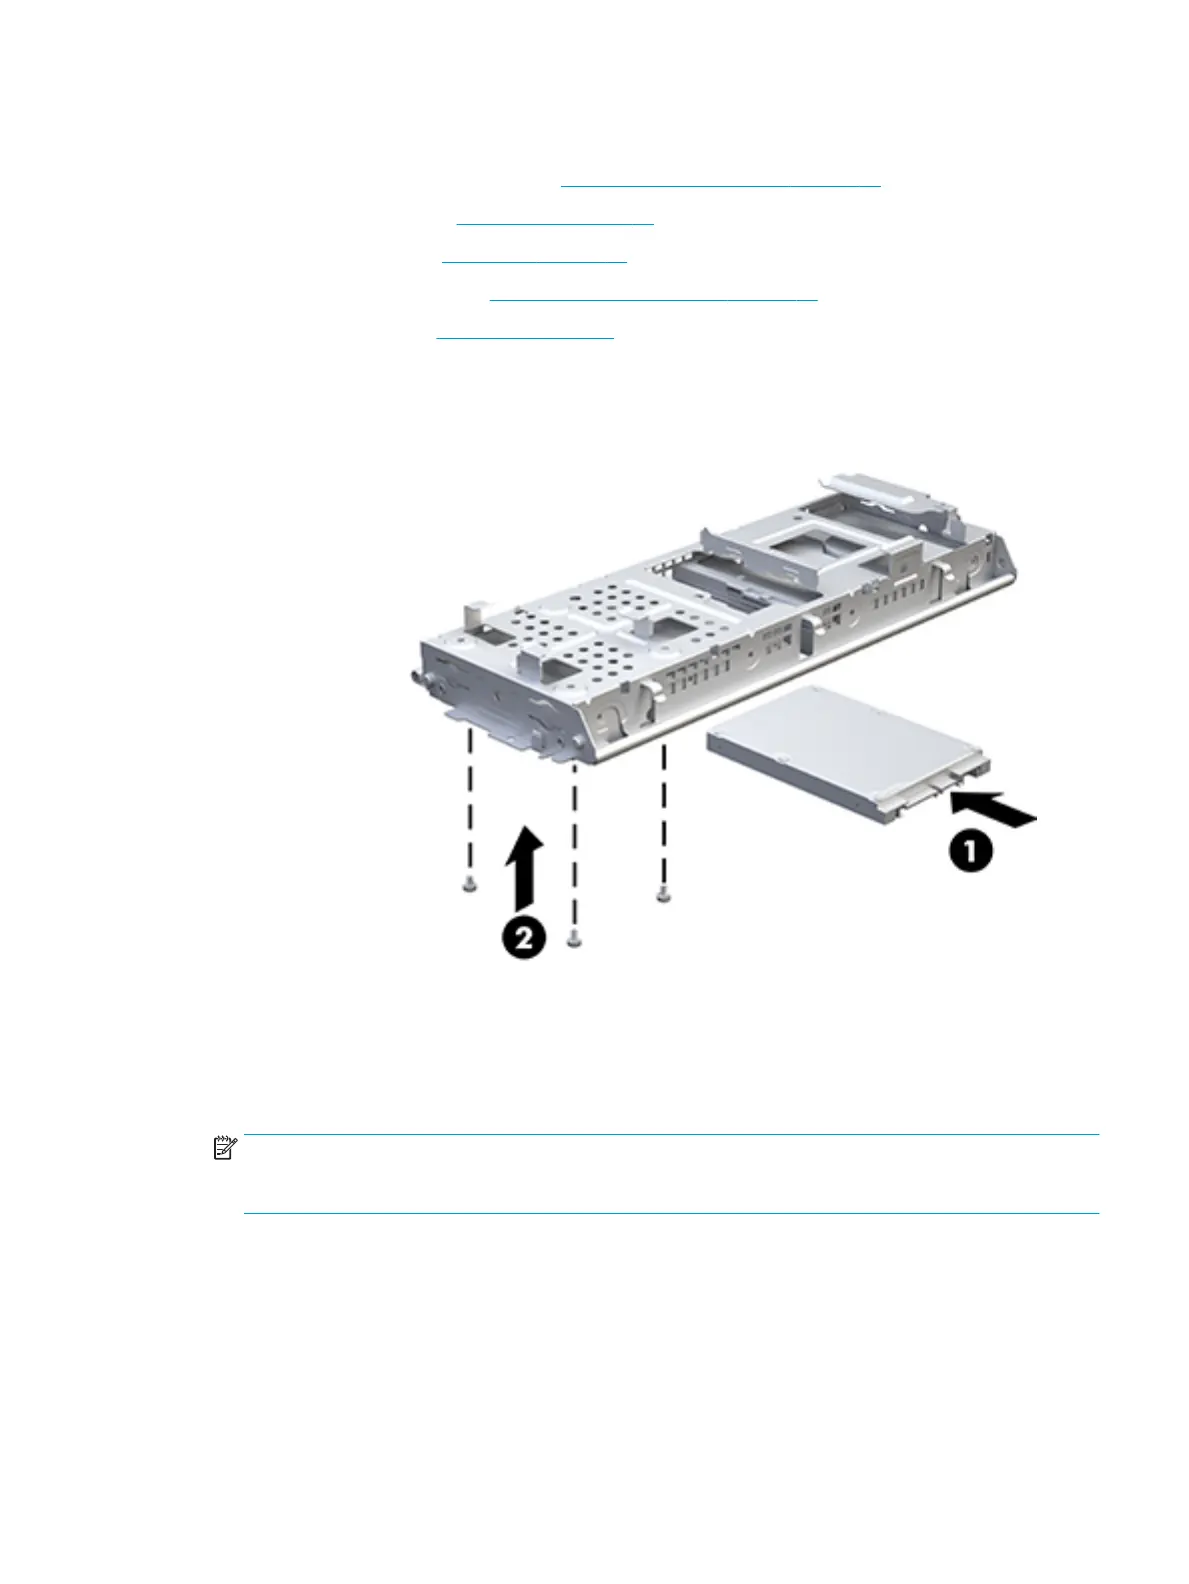
6. Slide the solid state drive into the drive cage (1) and then secure the drive to the drive cage by installing
three mounting screws
(2).
7. Connect the power cable and data cable to the rear of the hard drive.
8. If installing a new drive, connect the opposite end of the data cable to the appropriate system board
connector.
NOTE: You must connect the primary hard drive data cable to the dark blue connector labeled SATA0 to
avoid any hard drive performance problems. If you are adding a second hard drive, connect the data cable
to one of the SATA connectors labeled SATA1 or SATA2.
9. Replace the hard drive cage.
10. Replace the computer access panel.
11. Reconnect the power cord and any external devices, and then turn on the computer.
12. Lock any security devices that were disengaged when the access panel was removed.
Drives 33

 Loading...