EasyManuals Logo

HP Compaq dc7100 DT Hardware Reference Guide

HP Compaq dc7100 DT
70 pages
To Next Page IconTo Next Page
To Previous Page IconTo Previous Page
Page #38 background imageLoading...
Page #38 background image
2–26 www.hp.com Hardware Reference Guide
Hardware Upgrades
13. Connect the data cable to the data connector on the system board.
āœŽ
The replacement hard drive kit includes several data cables. Be sure
to use the cable that is exactly the same as the factory-installed cable.
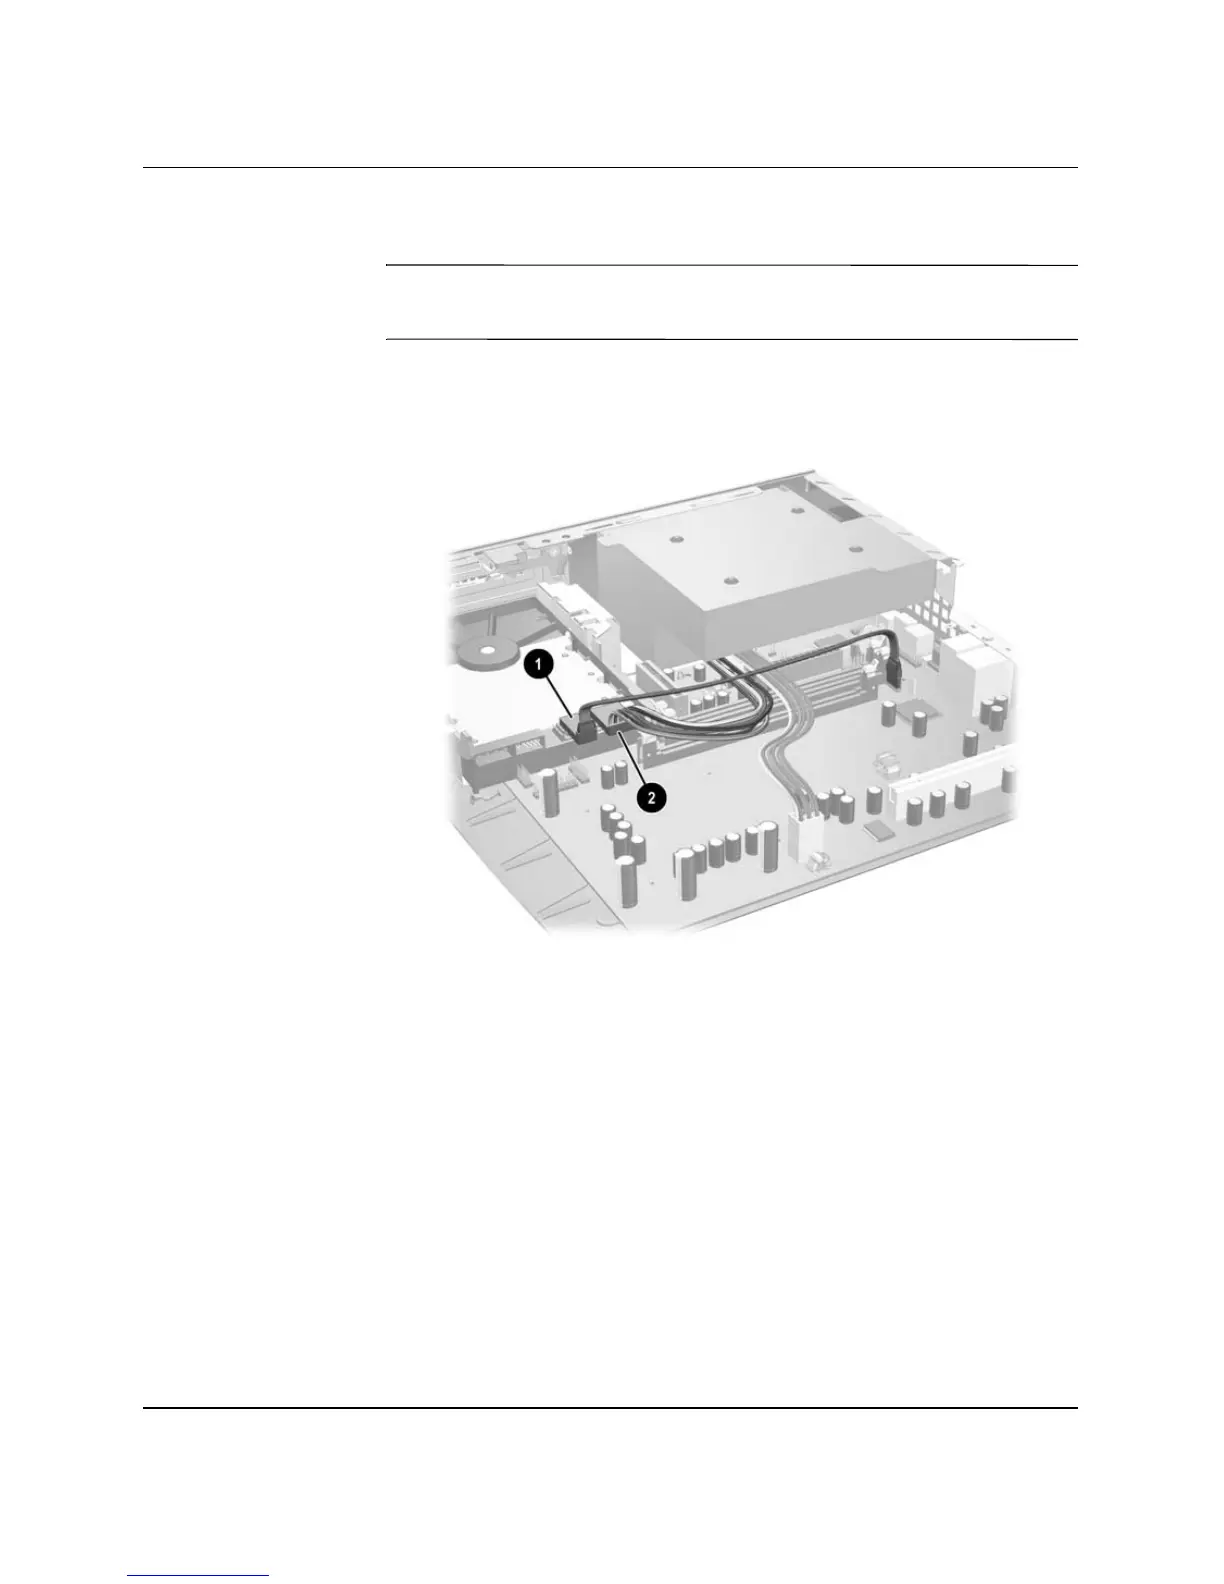
14. Connect the data cable 1 and power cable 2 to the new hard
drive.
Data 1 and Power 2 Cable Connector Locations
15. Gently place the left side of the hard drive in place, then rotate the
right side of the drive down until it locks.
16. Replace the front bezel and MultiBay assembly.
17. Replace the access panel.
18. Replace the stand, if desired.
19. Reconnect all external devices, plug the power cord into the
power outlet, and turn the computer on.
20. Use Computer Setup to enable the Smart Cover Sensor, if desired.

Other manuals for HP Compaq dc7100 DT

Questions and Answers:

Question and Answer IconNeed help?

Do you have a question about the HP Compaq dc7100 DT and is the answer not in the manual?

HP Compaq dc7100 DT Specifications

General IconGeneral
Processor SpeedUp to 3.8 GHz
ChipsetIntel 915G
MemoryUp to 4 GB DDR2 SDRAM
Operating SystemWindows XP Professional
Form FactorDesktop
ProcessorIntel Pentium 4
Storage40 GB to 160 GB SATA
GraphicsATI Radeon X300 SE
Optical DriveDVD-ROM
AudioIntegrated audio
NetworkIntegrated Gigabit Ethernet
Expansion Slots1 PCI Express x16
Ports1 Parallel, 1 Serial, 2 PS/2, 1 VGA

Related product manuals