EasyManuals Logo

HP Compaq dc7100 DT Hardware Reference Guide

HP Compaq dc7100 DT
70 pages
To Next Page IconTo Next Page
To Previous Page IconTo Previous Page
Page #37 background imageLoading...
Page #37 background image
Hardware Reference Guide www.hp.com 2–25
Hardware Upgrades
When removing cables, pull on the connector instead of the cable
itself. This will help prevent cable damage.
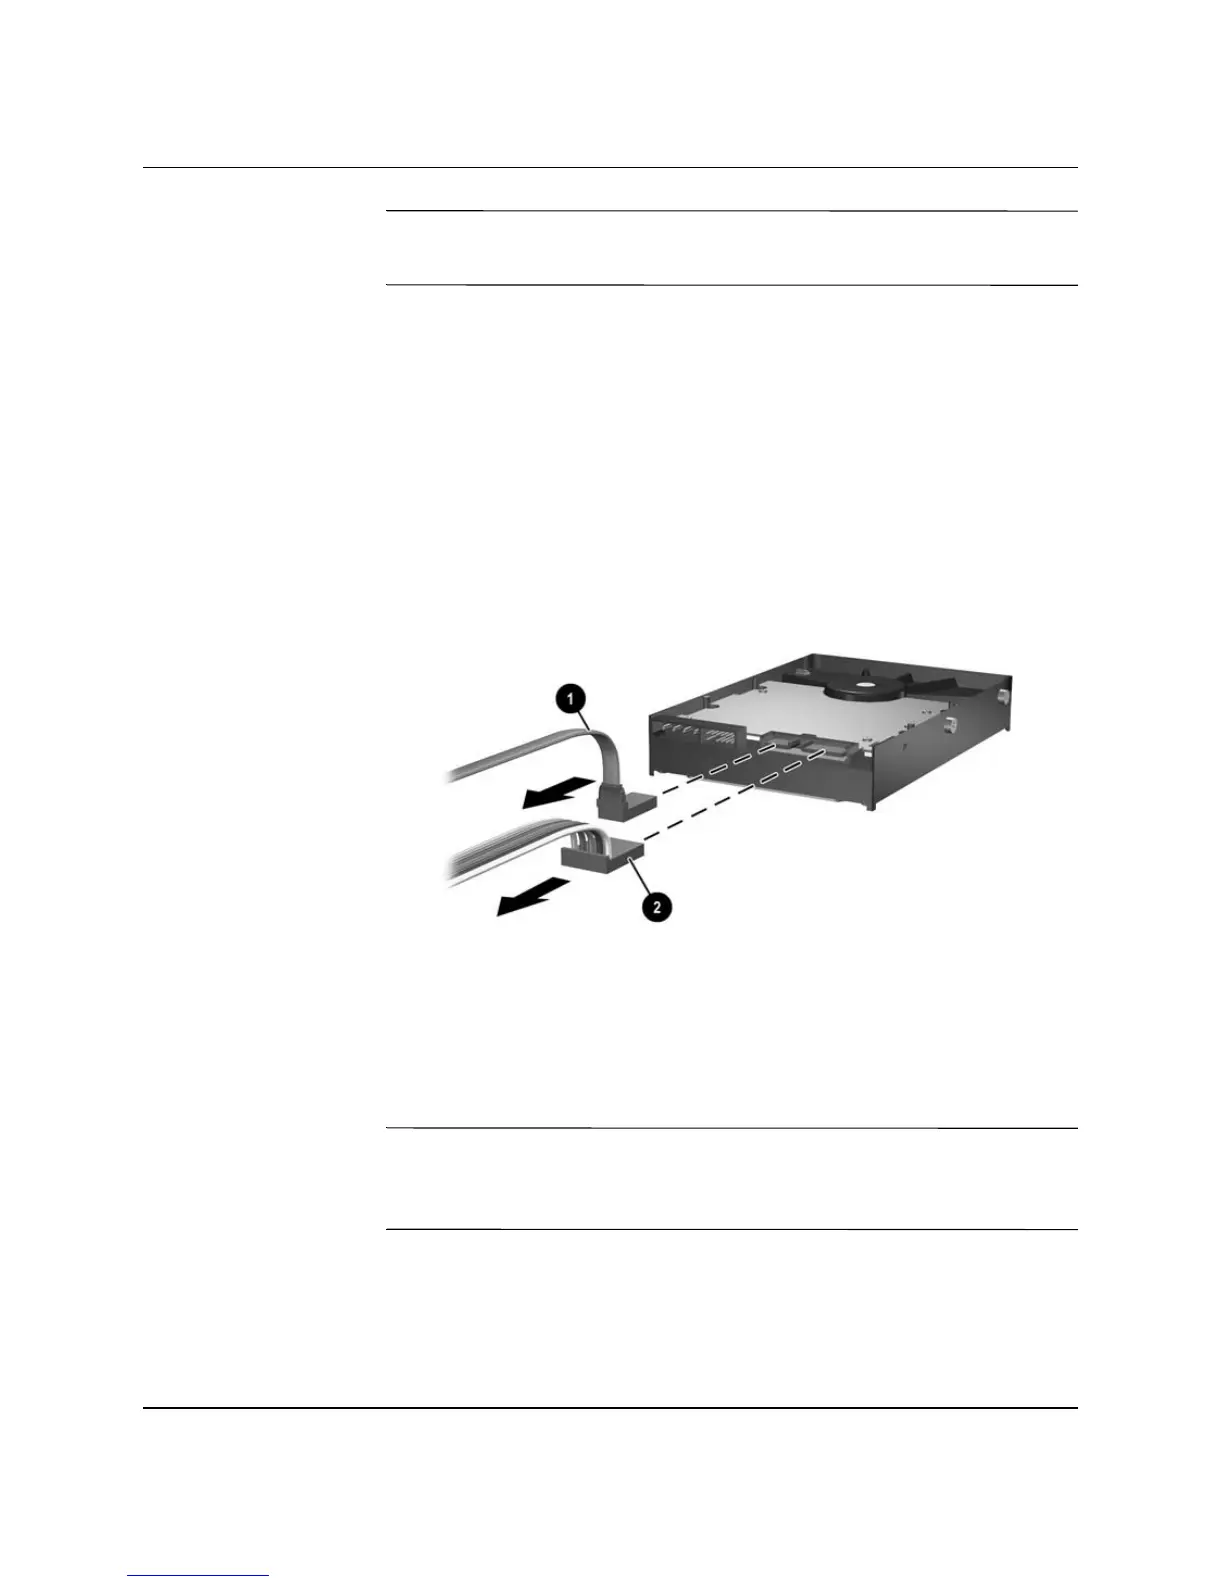
9. Disconnect the data cable 1 from the hard drive by pulling the
connector out of the socket in the hard drive.
10. Disconnect the other end of the data cable from the system board.
11. Disconnect the power cable 2 from the hard drive by pulling the
connector out of the socket in the hard drive.
Disconnecting the Data Cable and Power Cable from the Hard Drive
12. Transfer the four screws from the old drive to the new one. The
screws take the place of drive rails.
When transferring the screws, carefully note the position of the
screws on the old drive. The screws must be transferred to the same
position on the new drive.

Other manuals for HP Compaq dc7100 DT

Questions and Answers:

Question and Answer IconNeed help?

Do you have a question about the HP Compaq dc7100 DT and is the answer not in the manual?

HP Compaq dc7100 DT Specifications

General IconGeneral
Processor SpeedUp to 3.8 GHz
ChipsetIntel 915G
MemoryUp to 4 GB DDR2 SDRAM
Operating SystemWindows XP Professional
Form FactorDesktop
ProcessorIntel Pentium 4
Storage40 GB to 160 GB SATA
GraphicsATI Radeon X300 SE
Optical DriveDVD-ROM
AudioIntegrated audio
NetworkIntegrated Gigabit Ethernet
Expansion Slots1 PCI Express x16
Ports1 Parallel, 1 Serial, 2 PS/2, 1 VGA

Related product manuals