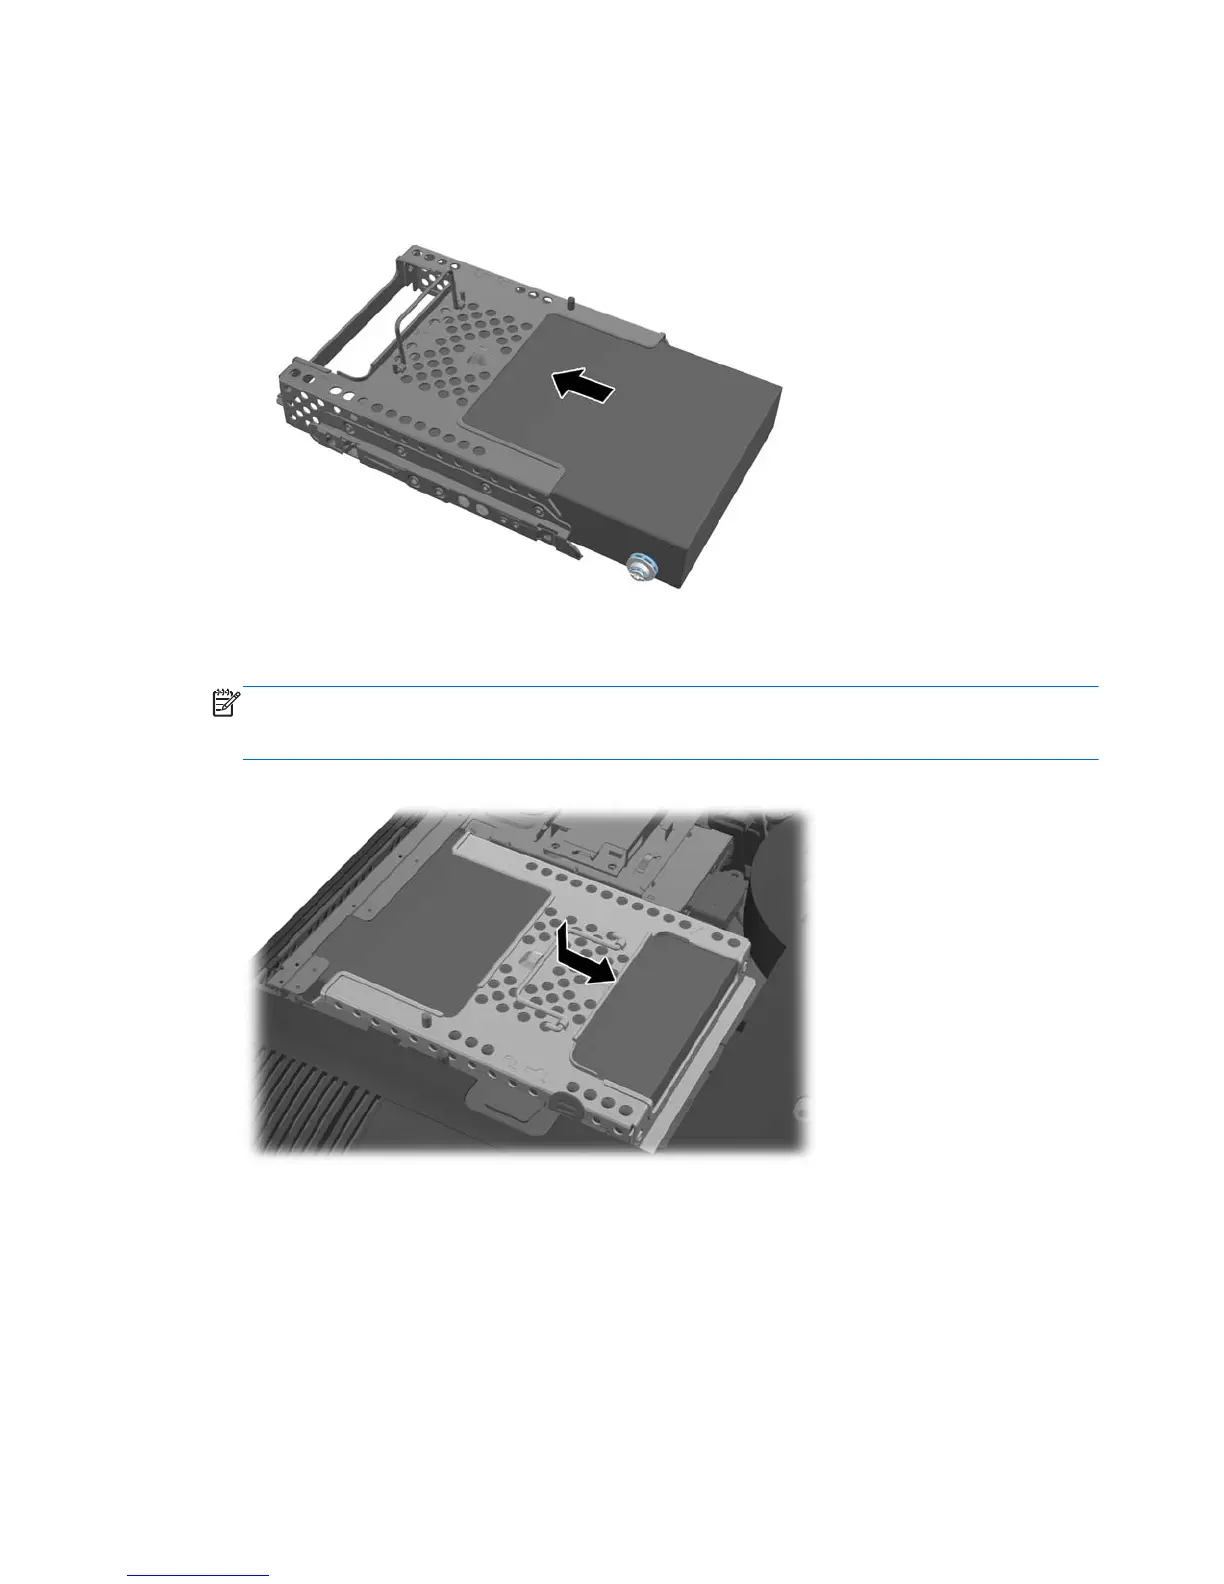
7. Slide the new hard disc drive, or drive adapter bracket holding an optional 2.5-inch drive, into the
cage until it snaps in place. Be sure that the connector on the hard disc drive is at the opening of
the cage.
Figure 7-21 Inserting the hard disc drive into the cage
8. With the hard disc drive connector facing toward the center of the chassis, place the hard disc
drive cage into the chassis and slide it toward the center until it snaps firmly into place.
NOTE: Make sure the hard drive is firmly seated in the connector. Failure to completely seat
the hard drive may result in the inability to install the access panel, as well as disk errors when
booting the computer.
Figure 7-22 Installing the hard disc drive cage
9. To replace the access panel, set the panel on the back of the computer, slightly above the stand,
and slide it down into place.
10. Reconnect the power cord and external devices.
11. Lock any security devices that were disengaged when the access panel was removed.
12. Turn on the computer.
46 Chapter 7 Removal and Replacement Procedures All-in One (AIO) Chassis

 Loading...