EL-MF877-00 Page 2
Template Revision D
last updated May-2022
HP Inc. instructions for this template are available at EL-MF877-01
Item Description
Components and parts requiring selective
treatments
items
included in
Capacitors / condensers (Containing PCB/PCT)
Electrolytic Capacitors / Condensers measuring greater
than 2.5 cm in diameter or height
☒ Power Supply capacitor(s) or condenser(s)
External electrical cables and cords
☒ AC power cord
☐ Audio, video or data cables
☒ Other: _USD Type C________
Plastics containing Brominated Flame Retardants (not
including external electrical cables and cords, PCBs or
PCAs already listed as a separate item above)
Components and parts containing toner and ink,
including liquids, semi-liquids (gel/paste) and toner.
Include the cartridges, print heads, tubes, vent
chambers, and service stations.
0
Components and waste containing asbestos
Components, parts and materials containing
refractory ceramic fibers
Components, parts and materials containing
radioactive substances
Components containing chlorofluorocarbons (CFC),
hydrochlorofluorocarbons (HCFC) or
hydrofluorocarbons (HFC), hydrocarbons (HC)
List the type and size of the tools that would typically be used to disassemble the product to a point where components and
materials requiring selective treatment can be removed.
Tool Size (if
applicable)
Hexagonal nut screw driver for DVI and D-SUB connector
3.0 Product Disassembly Process
3.1 List the basic steps that should typically be followed to remove components and materials requiring selective treatment including
the required steps to remove the external enclosure.
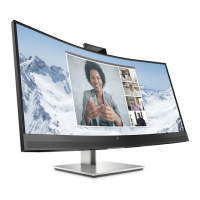
1. The model using the curved surface screen; There must be put soft mat above of the work station and don't push
hard on the machine to avoid cause screen to crack.
2. Push the button to remove the stand-base ass’y
3. Remove the screws to remove the Rear cover.
4. Use disassembly tool to open all the latches along the edge of the rear cover.
 Loading...