Do you have a question about the HP E24 G4 and is the answer not in the manual?
Essential safety precautions for service personnel to minimize risks of injury and equipment damage during monitor maintenance.
General service guidelines and precautions crucial for proper and safe operation and maintenance of the monitor.
Details on the European Union's RoHS directive and its implications for product components and replacements.
Overview of the manual's content and the two levels of service defined for the monitor.
Information on how to check for and obtain firmware updates for the monitor from HP's support website.
Procedure for ensuring product safety before returning it to the customer after repair, including AC leakage checks.
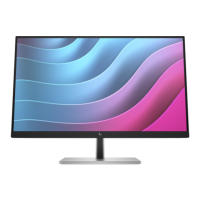
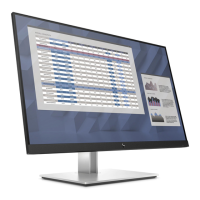
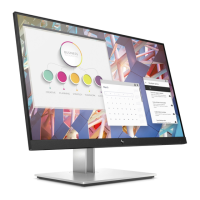
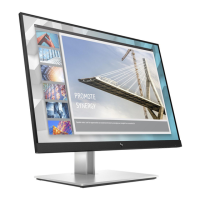
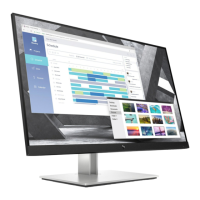
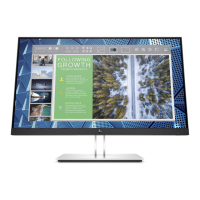
Description of the various features of the E23 G4/E24 G4 models, including screen size, panel type, and adjustability.
Identification and description of the buttons, lights, and controls located on the front of the monitor.
Identification and description of the ports, slots, and buttons located on the rear and sides of the monitor.
Guidance on locating the serial number and product number labels on the monitor, typically found on the rear.
Visual identification of major monitor components with a corresponding list of items and part numbers.
Instructions for HP authorized repair centers on purchasing power boards and sourcing capacitors/connectors.
Details on specific connectors, their identifiers, manufacturers, distributors, and part numbers for ordering.
Essential steps and equipment required before starting the disassembly process of the monitor.
Step-by-step instructions for safely removing the RC (Remote Control) from the monitor stand.
Detailed procedure for removing and replacing the monitor's power board, including connector locations and safety warnings.
Steps to repair the D-Sub connector, involving desoldering, removing, placing, and soldering the new component.
Steps to repair the HDMI connector, involving desoldering, hot air gun use, removal, placement, and soldering.
Steps to repair the DP connector, involving desoldering, hot air gun use, removal, placement, and soldering.
Steps to repair the USB-B connector, involving desoldering, removal, placement, and soldering of the new component.
Steps to repair the USB-A connector, involving hot air gun and soldering iron for removal, placement, and soldering.
Procedures to verify the correct operation of all monitor functions after component replacement or repair.
A guide to diagnosing and resolving common monitor issues, including causes and recommended solutions.
This document serves as a Maintenance and Service Guide for the HP E23 G4 and E24 G4 monitor models, providing comprehensive information for trained service personnel. It outlines procedures for spare parts, removal and replacement of components, diagnostic tests, and problem troubleshooting.
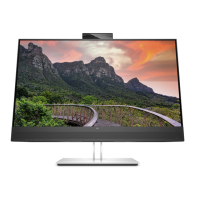
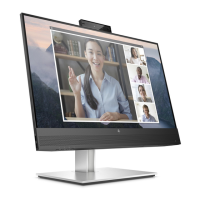
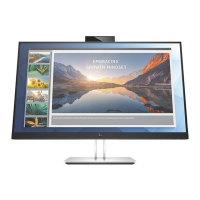
The HP E23 G4 and E24 G4 monitors are designed to offer a versatile and user-friendly display experience. Depending on the specific model, these monitors may feature full-screen support for lower resolutions, including custom scaling to maximize image size while preserving the original aspect ratio. The E23 G4 model offers a 58.4 cm (23.0 in) diagonal viewable screen area with 1920 × 1080 resolution, while the E24 G4 model provides a 60.5 cm (23.8 in) diagonal viewable screen area, also with 1920 × 1080 resolution. Both models typically incorporate an In-plane Switching (IPS) panel, which ensures wide viewing angles, allowing for clear visibility from various sitting or standing positions, or when moving from side to side. The nonglare panel, coupled with an LED backlight, further enhances the viewing experience by reducing reflections and providing consistent illumination.
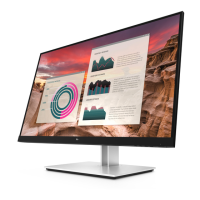
These monitors are equipped with ergonomic adjustment capabilities, including tilt, swivel, and height adjustments, allowing users to customize the display position for optimal comfort. A pivot capability enables the monitor head to rotate from landscape to portrait orientation, which can be particularly useful for tasks such as document viewing or web browsing. For flexible mounting solutions, the stand is removable, and the monitors are compatible with a VESA mounting bracket, allowing attachment to wall-mount devices or swing arms. The HP Quick Release 2 device facilitates quick attachment and detachment of the monitor head to the stand with a simple click and a convenient sliding tab release.
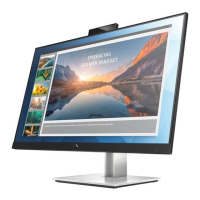
Connectivity options are robust, supporting various video inputs. The monitors include a DisplayPort™ video input, an HDMI™ video input, and a VGA video input (cables are included in select regions for VGA and HDMI). For peripheral connectivity, a USB hub is integrated, featuring one USB Type-B port (upstream) to connect to the computer and four USB Type-A ports (downstream) for connecting USB devices such as keyboards, mice, or USB hard drives. It is important to note that a USB Type-B or USB Type-C cable must be connected from the source device to the monitor to enable the USB Type-A ports.
User interaction is managed through four on-screen display (OSD) buttons. Three of these buttons are reconfigurable, allowing users to quickly select the most commonly used operations, enhancing convenience and efficiency. The monitors also feature Plug and Play capability, provided it is supported by the operating system, simplifying setup. A security cable slot is located on the rear of the monitor for an optional security cable, providing physical security. Cable management features are incorporated to help organize and route cables and cords, contributing to a tidy workspace. The OSD adjustments are available in several languages, facilitating easy setup and screen optimization for a global user base. An energy saver feature is included to meet requirements for reduced power consumption, aligning with environmental standards.
For maintenance and service, this guide emphasizes the importance of safety information and precautions. Only trained service personnel familiar with the product should perform maintenance. Key safety guidelines include ensuring a dry and clean working environment, using proper safety devices and approved tools, and always disconnecting power before opening the product's cabinet. Special attention is given to electrostatic discharge (ESD) safety procedures when handling electrical components. The guide also notes that some products may contain multiple batteries, which should not be disassembled or exposed to high temperatures to prevent explosion. Adherence to government requirements for battery recycling and disposal is also highlighted.
Important service information includes performing repairs in a repair center by professional service technicians, noting that the primary side of the monitor is a high voltage area. The monitors meet RoHS requirements, necessitating the use of lead-free solder wire for soldering. When replacing capacitors, it is crucial to match polarity, specification, part number, and location, and to insert new parts carefully to avoid short circuits. Preventing the board from getting wet is essential to avoid malfunctions. Quick soldering techniques are recommended to prevent overheating the circuit board, and the soldering iron tip should be kept clean and well-tinned. After any repair, a close inspection of the circuit board and a function test of the power supply are mandatory to confirm proper operation.
The guide also addresses ERP Lot5 requirements, stating that professional repairers must have technical competence and comply with applicable regulations. Firmware updates for the monitor are available on support.hp.com, and users are advised to check for updates if needed. Before returning a repaired product to the customer, an AC leakage current check on exposed metallic parts is required to ensure electrical safety.
The illustrated parts catalog provides a detailed breakdown of major components, including the panel, screws, lens, HP front logo, mid-cover, grounding screw, PCB screw, safety Mylar, power board, VGA screws, hit pot Mylar, IF board, main chassis, USB board screws, USB board, rear cover, spring, slider, OSD key, OSD key board, speaker cover, HP rear logo, VESA cosmetic cover, wall mount screws, stand, and base. Instructions for ordering parts, specifically the power board, are provided, along with a list of HP spare part numbers and manufacturer part numbers. Information on purchasing capacitors and connectors from specific EU distributors (SUSCON and CAPXON) is also included, with details on component descriptions, locations, and distributor part numbers.
Removal and replacement procedures are detailed, starting with preparation for disassembly. This involves reading safety information, cleaning and identifying the disassembly area, preparing for material flow, and ensuring necessary equipment such as a press fixture, working table, screwdriver, knife, gloves, cleaning cloth, ESD protection, and a scraper bar are available. Specific steps are provided for removing the stand base, rear cover, USB board, OSD key board, and main chassis assembly, as well as releasing screws for the mid-cover, removing black Mylar, and detaching VGA and PCB screws to access the PCB board.
Detailed instructions are given for power board removal, including identifying the connector position and locating the part number. A critical warning is issued regarding the capacitance of the power supply, which remains charged even after unplugging, advising against touching it until discharged. Connector repair procedures cover HDMI, DisplayPort, USB-B, and USB-A connectors, which are located on the main board. These procedures involve using a soldering iron and de-soldering pump to remove solder, using a hot air gun to melt solder on pins, lifting the old connector, placing the new component, and soldering it in place, ensuring it matches the PCB footprint.
A function test section outlines checks to be performed after repair, including D-Sub, HDMI, DP, and USB Hub tests, to confirm that all functions are working correctly. This involves verifying image display and sound playback on the monitor using a computer, notebook, or DVD player, and confirming the normal function of the USB Type-A ports.
Finally, a support and troubleshooting section provides a table of common problems, their possible causes, and recommended solutions. This covers issues such as a blank or flashing screen, blurred images, "Check Video Cable" messages, "Input Signal Out of Range" messages, the monitor not entering a low-power sleep state, "OSD Lockout" messages, and "Power Button Lockout" messages. Solutions range from checking power and video cable connections, adjusting OSD settings, replacing video cards, to disabling lockout features by pressing and holding specific buttons.
| Color gamut | 72 % |
|---|---|
| Pixel pitch | 0.274 x 0.274 mm |
| Screen shape | Flat |
| Pixel density | 93 ppi |
| Display diagonal | 23.8 \ |
| Anti-glare screen | Yes |
| Display technology | LCD |
| Native aspect ratio | 16:9 |
| Vertical scan range | 50 - 60 Hz |
| Maximum refresh rate | 60 Hz |
| Horizontal scan range | 30 - 80 kHz |
| Contrast ratio (typical) | 1000:1 |
| Display number of colors | 16.7 million colors |
| Display brightness (typical) | 250 cd/m² |
| Supported graphics resolutions | 640 x 480 (VGA), 720 x 400, 800 x 600 (SVGA), 1024 x 768 (XGA), 1280 x 1024 (SXGA), 1280 x 720 (HD 720), 1280 x 800 (WXGA), 1440 x 900 (WXGA+), 1600 x 900, 1680 x 1050 (WSXGA+), 1920 x 1080 (HD 1080) |
| USB hub version | 3.2 Gen 1 (3.1 Gen 1) |
| DisplayPort version | 1.4 |
| USB upstream port type | USB Type-B |
| USB Type-A downstream ports quantity | 4 |
| AC input voltage | 100 - 240 V |
| Energy efficiency scale | A to G |
| Power consumption (max) | 51 W |
| Power consumption (off) | 0.23 W |
| Power consumption (standby) | 0.5 W |
| Power consumption (typical) | 26 W |
| Operating temperature (T-T) | 5 - 35 °C |
| Operating relative humidity (H-H) | 20 - 80 % |
| Cables included | AC, DisplayPort, HDMI, USB Type-A to USB Type-B, VGA |
| Package depth | 223 mm |
| Package width | 611 mm |
| Package height | 392 mm |
| Package weight | 8400 g |
| Pivot angle | -90 - 90 ° |
| Tilt angle range | -5 - 23 ° |
| Panel mounting interface | 100 x 100 mm |
| Product color | Black, Silver |
| Market positioning | Business |
| Harmonized System (HS) code | 85285210 |
| Depth (with stand) | 207 mm |
|---|---|
| Width (with stand) | 539.4 mm |
| Height (with stand) | 494.9 mm |
| Weight (with stand) | 5700 g |
| Depth (without stand) | 47 mm |
| Height (without stand) | 323.3 mm |