EasyManua.ls Logo

HP f450x - User Manual

HP f450x
49 pages
Print Icon
To Next Page IconTo Next Page
Loading...
f450x
Car Camcorder
User Manual
Question and Answer IconNeed help?

Do you have a question about the HP f450x and is the answer not in the manual?

Overview

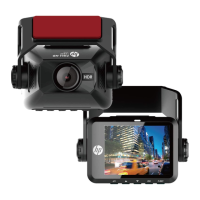
This document describes the HP f450x Car Camcorder, a device specifically designed for real-time video recording while driving.

Function Description

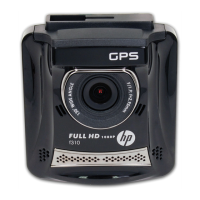
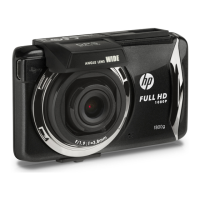
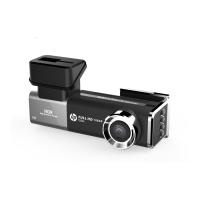
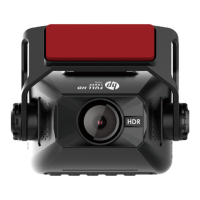
The HP f450x is a car camcorder that automatically powers on and starts recording when the car engine starts, and stops recording when the engine is switched off. It features a 2MP CMOS sensor, Full HD 1920x1080 resolution, and a 120° wide-angle lens. The device includes built-in GPS and Wi-Fi, and supports an optional 1080p rear camera.

Important Technical Specifications

  • Image Sensor: 2MP CMOS sensor
  • Effective Pixels: 1920 (H) x 1080 (V)
  • LCD Display: 3" TFT-LCD color screen
  • Lens: Wide Angle Fixed Focus lens, Aperture: Up to F1.8
  • Focus Range: 1.5m ~ Infinity
  • Satellite System: GPS
  • Video Resolution: 1920x1080 30fps, 1280x720 30fps
  • Video Format: TS
  • Still Image Resolution: Depends on video resolution setting
  • Still Image Format: DCF (JPG)
  • Shutter: Electronic shutter
  • G-Sensor: 3-Axis G-Force sensor
  • ISO: Auto
  • White Balance: Auto
  • Microphone: Built-in
  • Speaker: Built-in
  • Interface: Mini USB, micro USB
  • Power: Super Capacitor
  • Operating Temperature: 0° ~ 45° C
  • Operating Humidity: 20 ~ 70% RH
  • Storage Temperature: -20° ~ 70° C
  • Dimensions: 86.5 x 52 x 28.5 mm
  • Weight: Approx. 90g
  • Built-in Wi-Fi Chip: IEEE 802.11g/n(HT20) RTL8188FTV
  • Frequency Range: 2412 ~ 2462MHz
  • Wi-Fi Channel: Ch1 ~ Ch11
  • Storage Media: Supports microSD card with class V30 or higher, and capacity 32GB or higher. For 64GB or higher cards, they must be formatted by the device before use.

Usage Features

Getting Started

  • Memory Card: Insert the microSD card with pins facing forward. To remove, power off the camcorder and wait for the shutdown procedure to complete. It is recommended to use a class V30 or higher, 16GB or higher microSD card, and format it periodically (once a month).
  • Installation:
    1. Place the electrostatic sticker on the windshield, ensuring no bubbles.
    2. Push the mount into the slot on top of the device until a click is heard.
    3. Peel off the protective plastic sheet from the adhesive bracket.
    4. Press the bracket firmly onto the electrostatic sticker on the windshield.
    5. Loosen the knob to swivel the device vertically or horizontally, then tighten it to secure.
    • Installation Notes: Ensure the camcorder does not block the driver's view, is within the wiper's range, and the lens is clean. Avoid installing on dark tinted windows. Use only the supplied power charger.
  • Connecting to Power: Connect the supplied car charger to the camcorder (USB port input: DC 5V / 1.5A) and then to the vehicle's cigarette lighter socket (DC 12 / 24V). The camcorder powers on automatically when the engine starts.
  • LED Indicator: Green LED is always on for standby (not recording), Red LED flashes for recording.
  • Powering On/Off:
    • Auto: Powers on automatically a few seconds after the car engine starts (after charging the super capacitor) and turns off when the engine shuts down.
    • Manual: Press the POWER button to turn on. Press and hold for at least 2 seconds to turn off.
  • Reset: Insert a pin or paper clip into the Reset hole and hold for 5 seconds.
  • Initial Settings: Set the Time Zone and Date/Time accurately before use. Access via the OSD menu.

Using the Car Camcorder

  • Automatic Record: Starts recording automatically when the car engine is started and stops when the engine is switched off. Video files are saved for every 1 or 3 minutes of recording. Loop recording overwrites the oldest files when the memory card is full.
  • Emergency Recording: Press the OK button during video recording to enter emergency recording mode. The file is protected from being overwritten. This is also triggered automatically if Collision Detection is enabled. Emergency files are saved in the "Event" folder and occupy 20% of the card capacity.
  • Add Speed Point: Customize up to 50 speed cam positions by pressing the Up button when GPS positioning is complete.
  • Picture in Video (PIV): Press the Down button during recording to capture screenshots from the front lens.
  • Driving Safety Features (for reference only, drivers should exercise discretion):
    • Speed Cam Alert: Provides audible and screen alerts when approaching a speed cam, if enabled and GPS positioning is complete. The alarm screen turns red if driving faster than the speed limit.
    • Speed Limit Alert: Provides audible and screen alerts if the car's speed exceeds a set limit (Off / 50 ~ 200 km/h or 30~125 mph), if enabled and GPS positioning is complete. The alarm screen turns red if driving faster than the speed limit.
    • Driver Fatigue Alert: Provides audible and screen alerts one hour after recording begins, repeating every half hour, if enabled.
    • LDWS (Lane Departure Warning Systems): Provides audible and screen alerts when driving off or changing lanes at speeds over 70 km/h (43 mph), if enabled and GPS positioning is complete. Requires proper camcorder alignment for accuracy.
    • FCWS (Forward Collision Warning System): Provides audible and screen alerts when driving at speeds over 60 km/h (37 mph) and less than 20m from the car in front, if enabled and GPS positioning is complete.
    • Headlight Warning: Provides audible and screen alerts when poor lighting conditions are detected (rainy/cloudy weather, night, basements, parking lots, tunnels), if enabled.
  • Parking Mode: Activates Park Recording, Collision Detection, or Timelapse when the vehicle is parked. Requires ACC cable installation.
    • Park Recording: Screen turns off, but recording continues. Triggers emergency recording upon collision/vibration.
    • Collision Detection (Parking Mode): Screen turns off, but in standby detection. Triggers video recording upon motion or vibration/collision.
    • Timelapse: Continuously records one frame per second.
  • HUD (Head-Up Display): Displays car speed and date/time.
    • Manually: Press the Power button in preview screen to enter/exit HUD mode.
    • Automatically: If "HUD" is enabled in "LCD Setting", the camcorder enters HUD mode after 7 seconds of no operation when the car starts.
  • Playback Videos and Photos: Access the playback menu to browse and playback recorded video or photo files from the memory card.
  • Deleting Files: Stop recording, enter the main menu, select "File Deletion", choose a folder, and then select "Delete One" or "Delete All". Deleted files cannot be recovered.

Go Moto Plus App

  • Download and Install: Download the "Go Moto Plus" app from Google Play or App Store.
  • Wi-Fi Connection:
    1. Turn on the camcorder.
    2. Go to Menu > Wi-Fi and select "ON".
    3. The camcorder screen displays Wi-Fi Device ID ("hp_f450x_xxxxxx") and Password (default: 12345678).
    4. Search for the camcorder ID on your smartphone and connect. The Wi-Fi icon on the camcorder turns blue when connected.
    • Notes: Smartphone must be within 5m of the camcorder. If no app operation for 3 minutes, Wi-Fi auto turns off. All camcorder button operations are disabled when "Network Streaming" is active in the app. App language matches smartphone language. Supports Android 9.0+, iOS 13+, Harmony 2+.
  • Main Screen: Displays live preview, recording status, and access to various functions like switching camera preview, full screen display, start/stop record, snapshot, camera file, camera settings, map, and driving track.
  • Playback, Delete, and Download:
    1. Tap the "Camera File" icon.
    2. Files (Loop, Snapshot, Locked) from the camcorder are displayed. "F" for front camera, "R" for rear camera. Tap a thumbnail to playback.
    3. Tap "Select" to choose files for deletion or download to the smartphone. Downloaded files are marked "Downloaded" and saved in the "Go Moto Plus" album on the smartphone.
  • Local Album: Access downloaded files on the smartphone without Wi-Fi connection. Allows editing (remove audio, add music for videos; crop, change color for pictures).
  • Camera Setting (via App): Adjust camcorder options through the app.

Maintenance Features

  • MicroSD Card Formatting: Periodically format the microSD card (recommended once a month) to maintain performance and prevent file save failures.
  • Date/Time Reset: Reset the date and time if the battery power runs out or if the camcorder is not used for over 7 days to ensure video file time accuracy.
  • Lens Cleaning: Clean the lens regularly to prevent unclear videos or pictures caused by finger grease.
  • Firmware Updates: The device includes a "Firmware Version" option in the menu, suggesting that firmware updates may be available.
  • Troubleshooting: The manual provides notes on potential issues, such as GPS positioning accuracy, Wi-Fi signal limitations, and the impact of dark tinted windows on video quality. It also advises consulting the distributor for ACC cable information for Parking Mode.

HP f450x Specifications

General IconGeneral
BrandHP
Modelf450x
CategoryDash Cameras
LanguageEnglish

Related product manuals