Removal and replacement procedures 4–11
Hard drive
✎
The hard drive spare part kit includes a left and right hard drive bracket, Mylar sleeve, connector, and
four isolators.
Before removing the hard drive, follow these steps:
1. Shut down the computer. If you are unsure whether the computer is off or in Hibernation, turn the computer on,
and then shut it down through the operating system.
2. Disconnect all external devices connected to the computer.
3. Disconnect the power from the computer by first unplugging the power cord from the AC outlet and then
unplugging the AC adapter from the computer.
4. Remove the battery (see “Battery” on page 4-8).
Remove the hard drive:
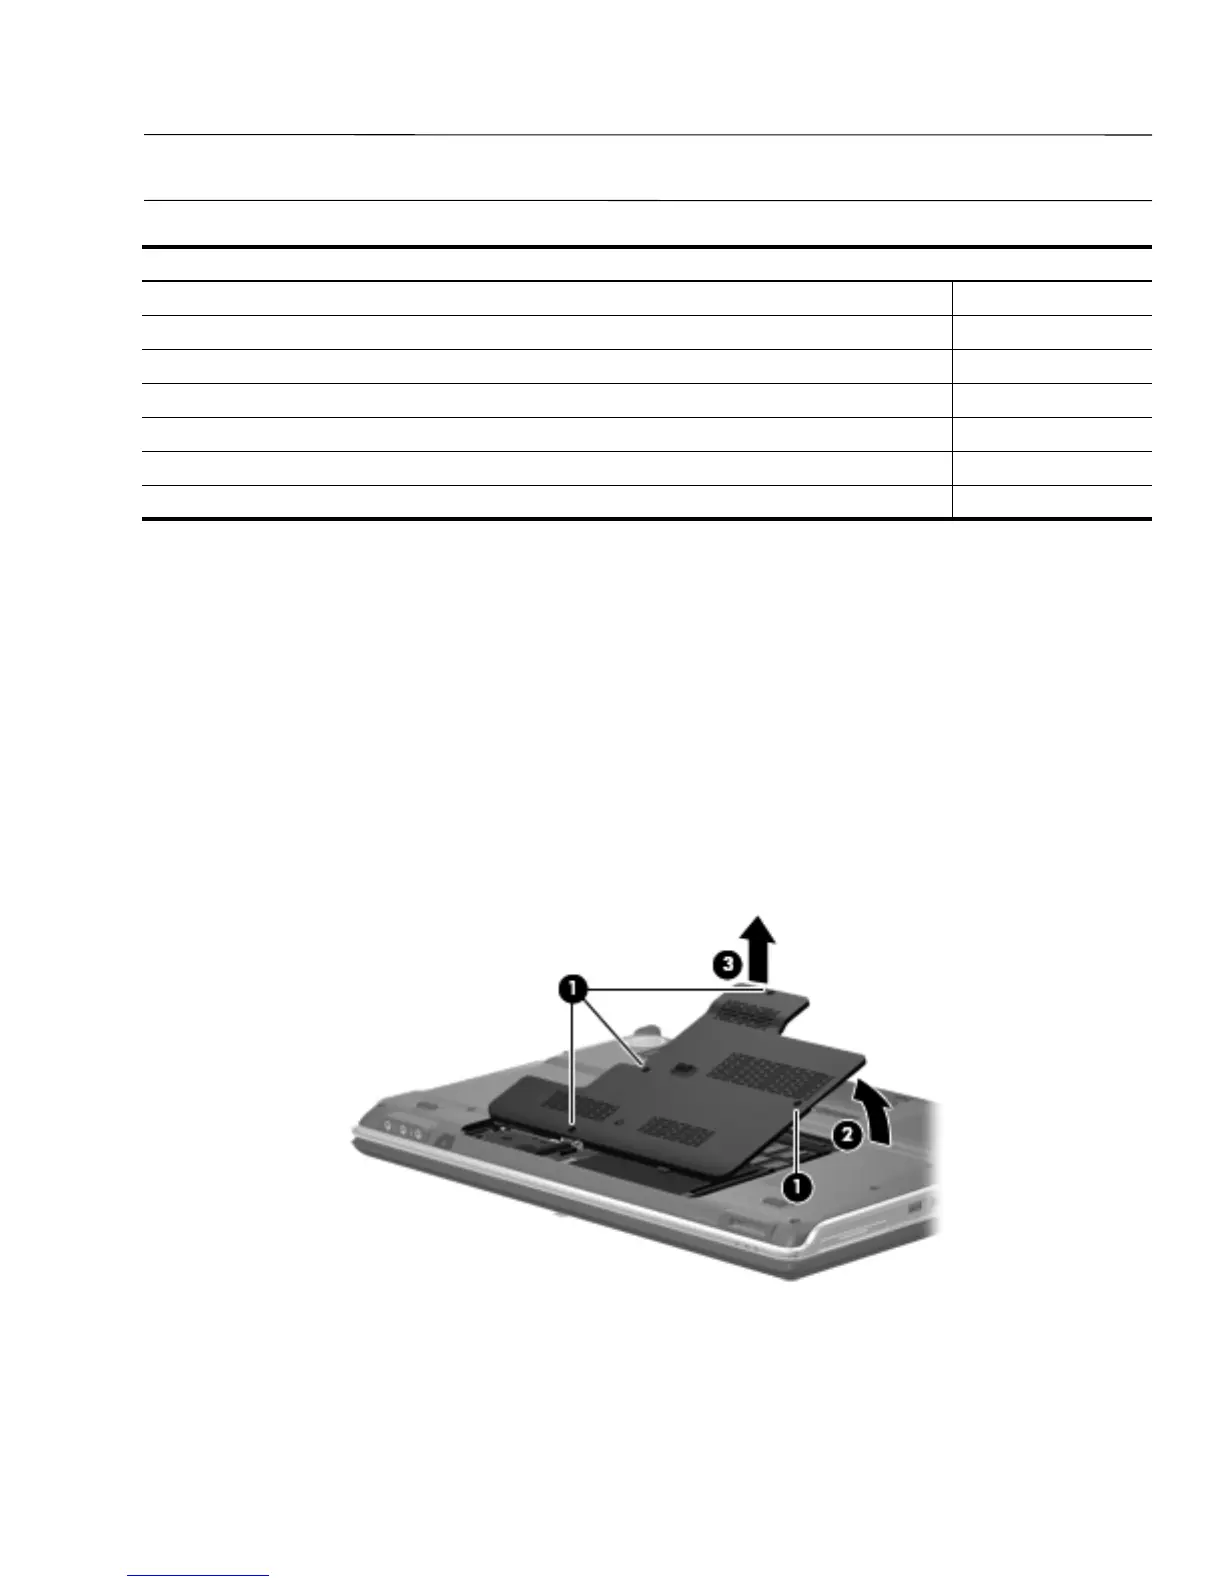
1. Loosen the four Phillips PM2.5×6.0 captive screws 1 that secure the hard drive cover to the computer.
2. Lift the rear edge of the hard drive cover 2, swing it up and forward, and then remove the cover 3. The hard
drive cover is included in the Plastics Kit, spare part number 496477-001.
Description Spare part number
500-GB, 5400-rpm 498071-001
400-GB, 5400-rpm 498072-001
320-GB, 7200-rpm 505857-001
320-GB, 5400-rpm 498069-001
250-GB, 5400-rpm 505856-001
160-GB, 7200-rpm 498068-001
160-GB, 5400-rpm 498070-001