Removing Assemblies 6-23
Laser Scanner
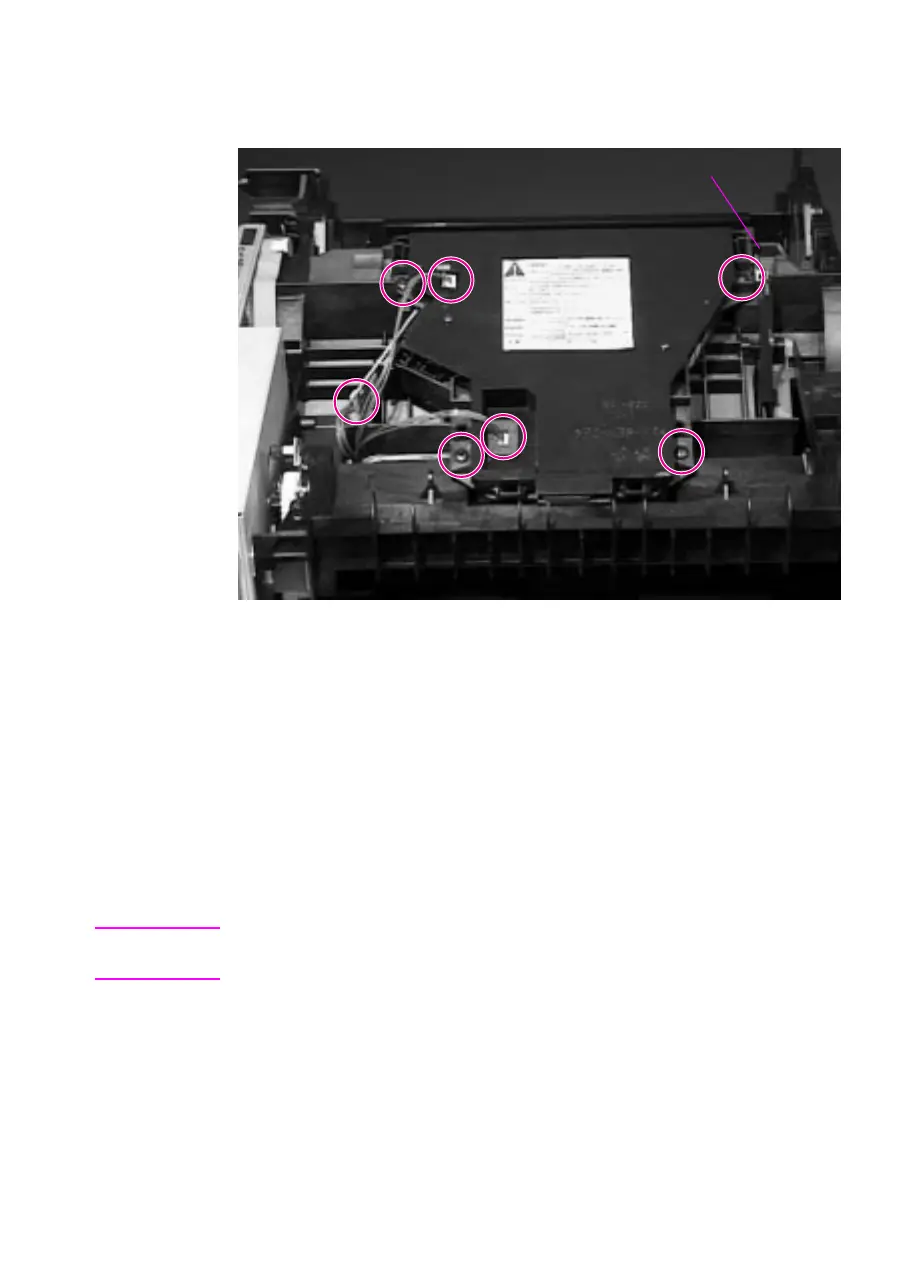
Figure 6-20 Removing the Laser Scanner
1 Remove the Top Cover (page 6-7). The Laser Scanner is on the
top of the printer, tilted toward the rear, and has a yellow label on
it.
2 Unplug the 3 connectors as shown.
3 Remove the 4 black screws around the edges of the Laser
Scanner. Do not remove the two screws on the cover of the Laser
Scanner.
4 Lift the Laser Scanner straight up.
Hint When you replace the Laser Scanner be sure the black shutter interlock
is resting on top of the silver shutter plate.
Shutter interlock and plate
For more information on the LaserJet 4000 / 4050 Visit www.PrinterSupplies.com 800-551-1943
 Loading...