EasyManuals Logo

HP ProBook 5320m - Notebook PC User Manual

HP ProBook 5320m - Notebook PC
143 pages
To Next Page IconTo Next Page
To Previous Page IconTo Previous Page
Page #92 background imageLoading...
Page #92 background image
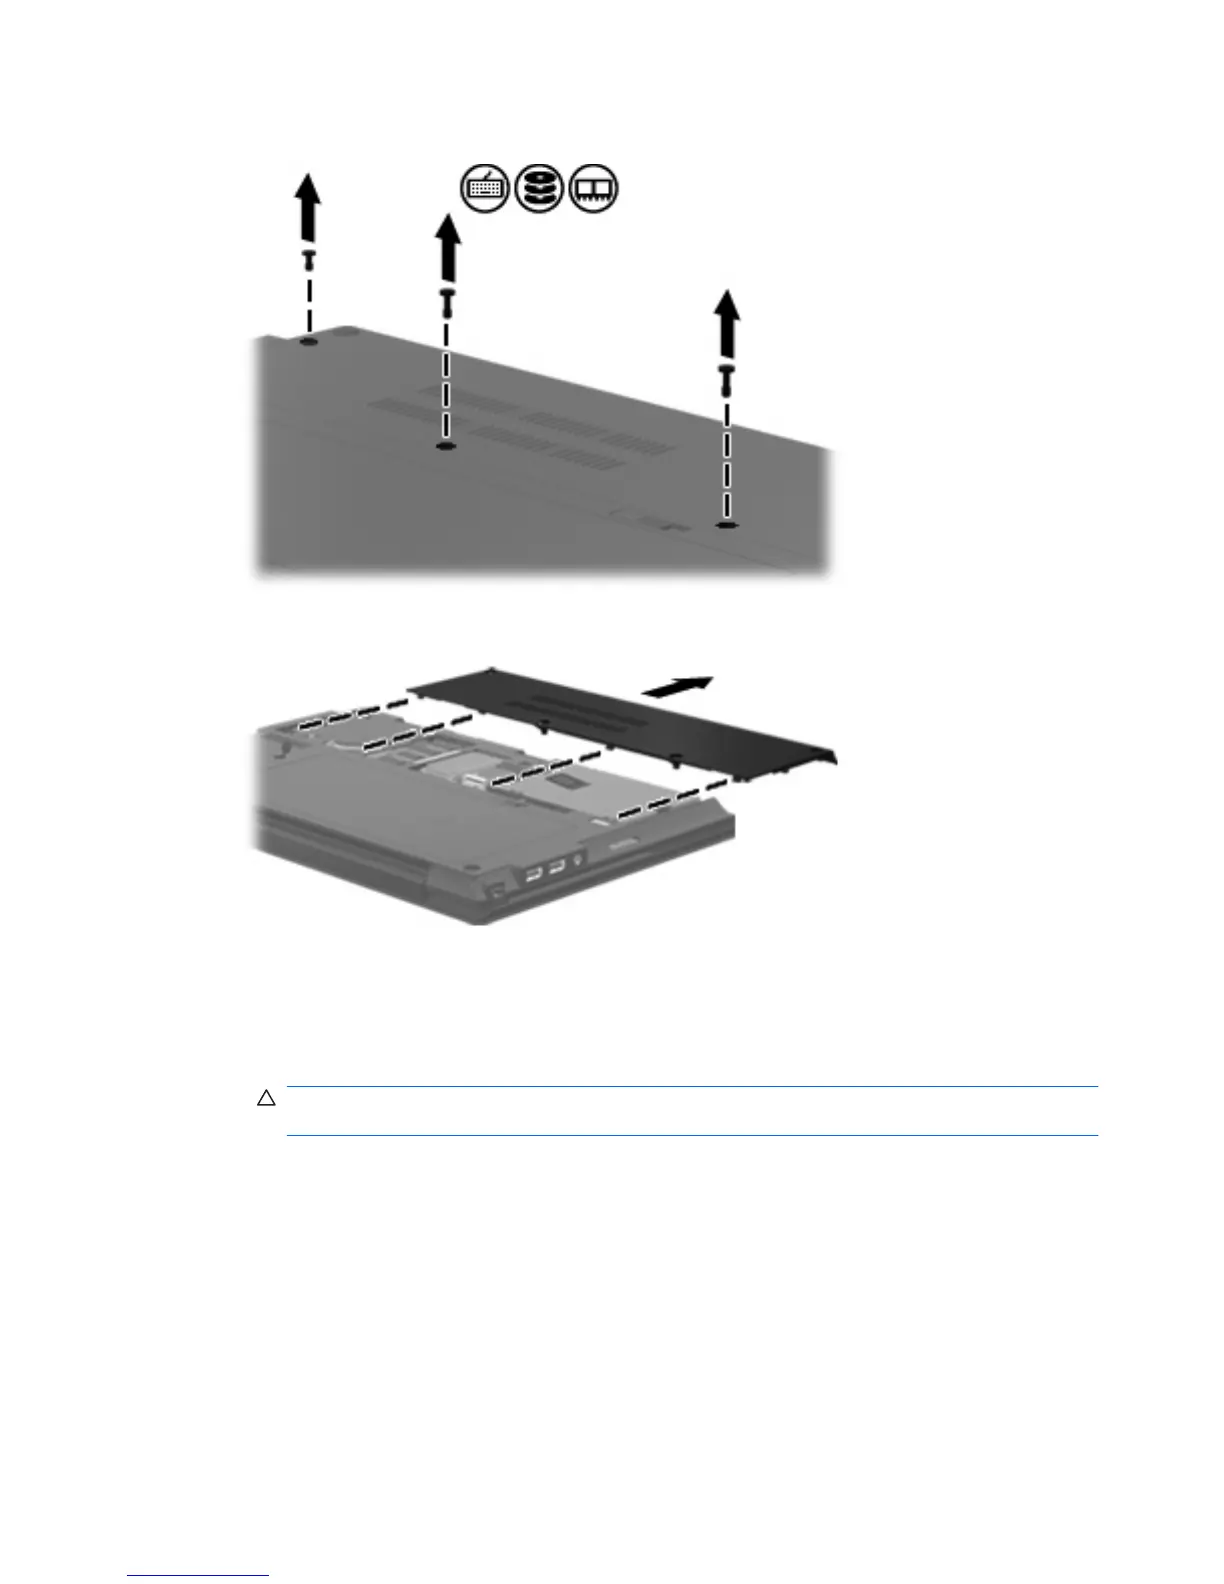
7. Remove the 3 screws from the bottom of the computer.
8. Slide the hard drive cover away from the computer to expose the memory module.
9. Remove the existing memory module:
a. Pull away the retention clips (1) on each side of the memory module.
The memory module tilts up.
CAUTION: To prevent damage to the memory module, hold the memory module by the
edges only. Do not touch the components on the memory module.
82 Chapter 9 Memory modules

Table of Contents

Questions and Answers:

Question and Answer IconNeed help?

Do you have a question about the HP ProBook 5320m - Notebook PC and is the answer not in the manual?

HP ProBook 5320m - Notebook PC Specifications

General IconGeneral
RAMUp to 8 GB DDR3
Display13.3-inch diagonal LED-backlit HD anti-glare (1366 x 768)
GraphicsIntel HD Graphics
Operating SystemWindows 7 Professional
Wireless802.11a/b/g/n, Bluetooth
Webcam2 MP webcam
Storage128 GB SSD
Battery4-cell (41 WHr) Li-Ion
ChipsetMobile Intel HM57 Express
AudioStereo speakers, microphone
PortsUSB 2.0, VGA, headphone/microphone combo
ProcessorIntel Core i5-450M / Intel Core i3-350M
Dimensions32.6 x 22.5 x 2.3 cm

Related product manuals