EasyManuals Logo

HP ProBook 5320m - Notebook PC User Manual

HP ProBook 5320m - Notebook PC
143 pages
To Next Page IconTo Next Page
To Previous Page IconTo Previous Page
Page #93 background imageLoading...
Page #93 background image
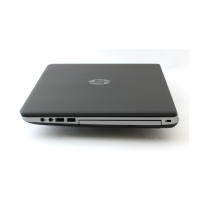
b. Grasp the edge of the memory module (2), and gently pull the module out of the memory
module slot.
To protect a memory module after removal, place it in an electrostatic-safe container.
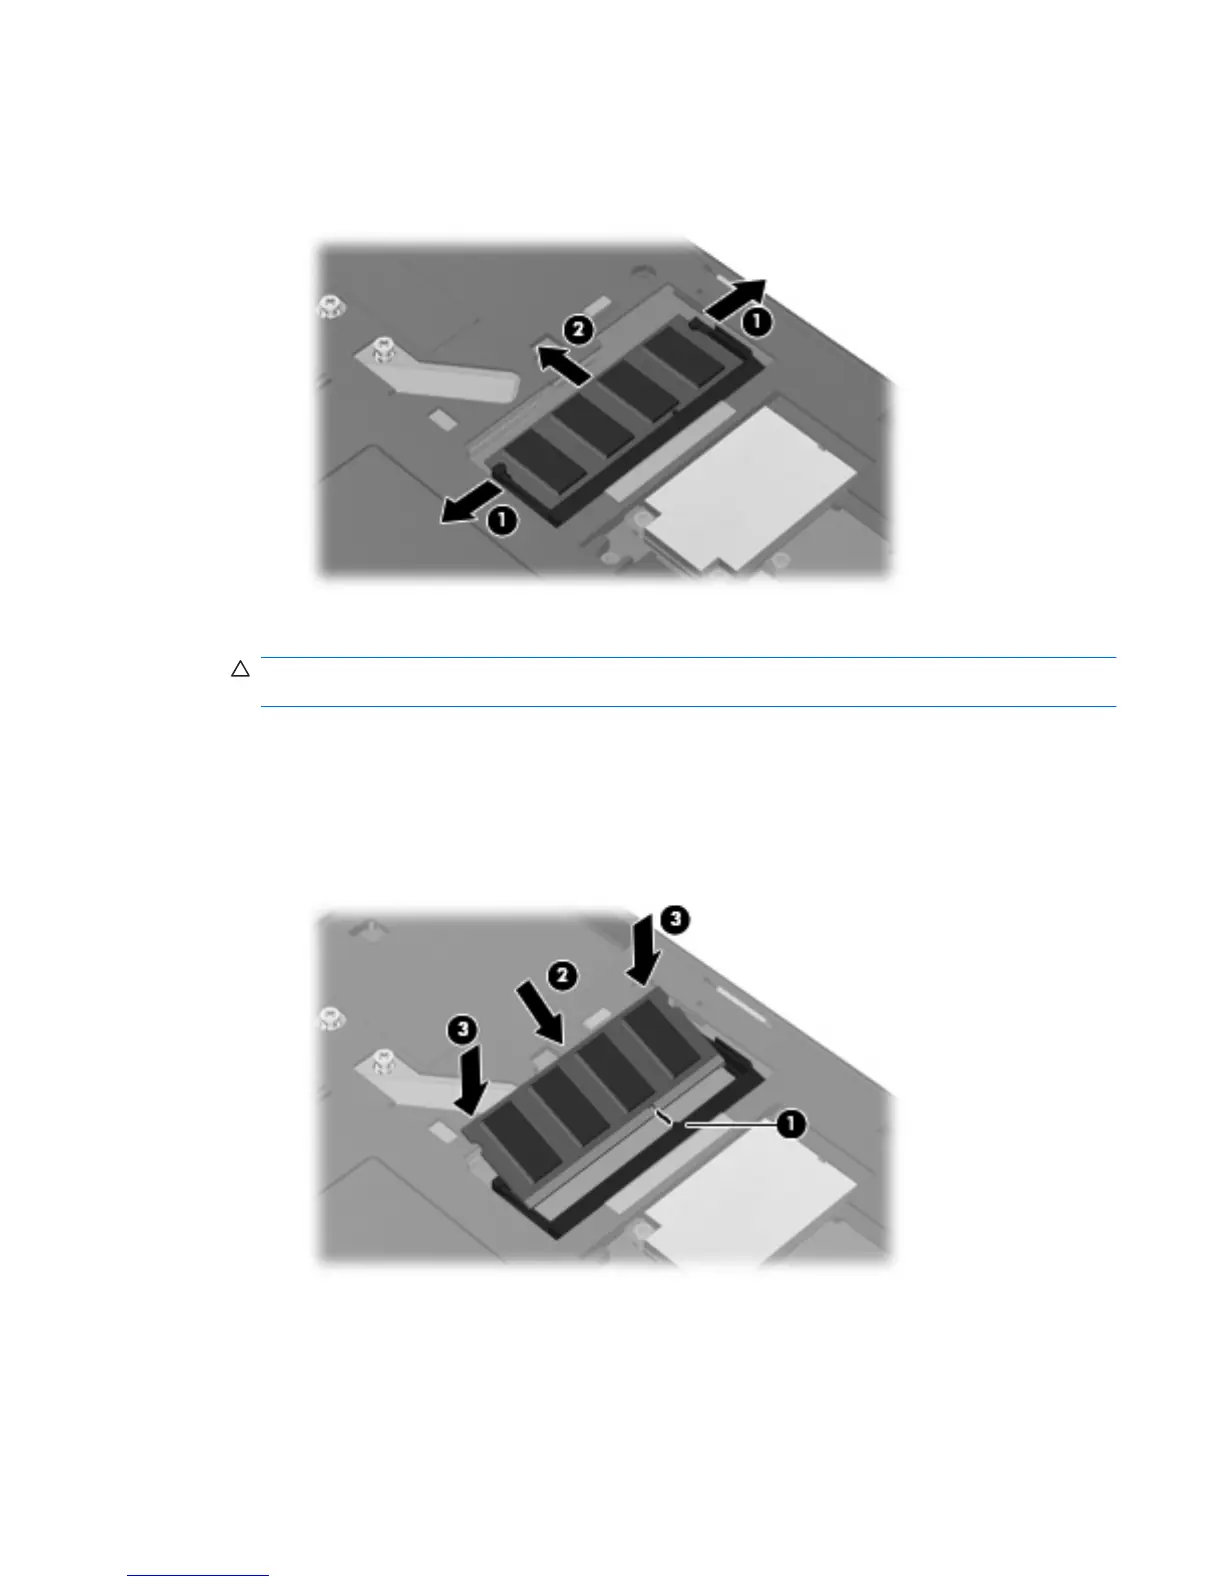
10. Insert a new memory module:
CAUTION: To prevent damage to the memory module, hold the memory module by the edges
only. Do not touch the components on the memory module.
a. Align the notched edge (1) of the memory module with the tab in the memory module slot.
b. With the memory module at a 45-degree angle from the surface of the memory module
compartment, press the module (2) into the memory module slot until it is seated.
c. Gently press the memory module (3) down, applying pressure to both the left and right edges
of the memory module, until the retention clips snap into place.
83

Table of Contents

Questions and Answers:

Question and Answer IconNeed help?

Do you have a question about the HP ProBook 5320m - Notebook PC and is the answer not in the manual?

HP ProBook 5320m - Notebook PC Specifications

General IconGeneral
RAMUp to 8 GB DDR3
Display13.3-inch diagonal LED-backlit HD anti-glare (1366 x 768)
GraphicsIntel HD Graphics
Operating SystemWindows 7 Professional
Wireless802.11a/b/g/n, Bluetooth
Webcam2 MP webcam
Storage128 GB SSD
Battery4-cell (41 WHr) Li-Ion
ChipsetMobile Intel HM57 Express
AudioStereo speakers, microphone
PortsUSB 2.0, VGA, headphone/microphone combo
ProcessorIntel Core i5-450M / Intel Core i3-350M
Dimensions32.6 x 22.5 x 2.3 cm

Related product manuals