Hardware options installation 59
7.
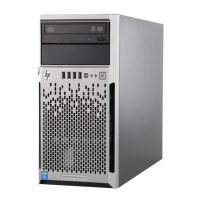
For added board stability, remove the screw located underneath the slot cover retainer latch, and then
use it to secure the expansion board.
8. Verify that any switches or jumpers on the expansion board are set properly. For more information, see
the documentation that ships with the option.
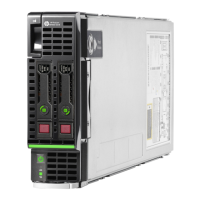
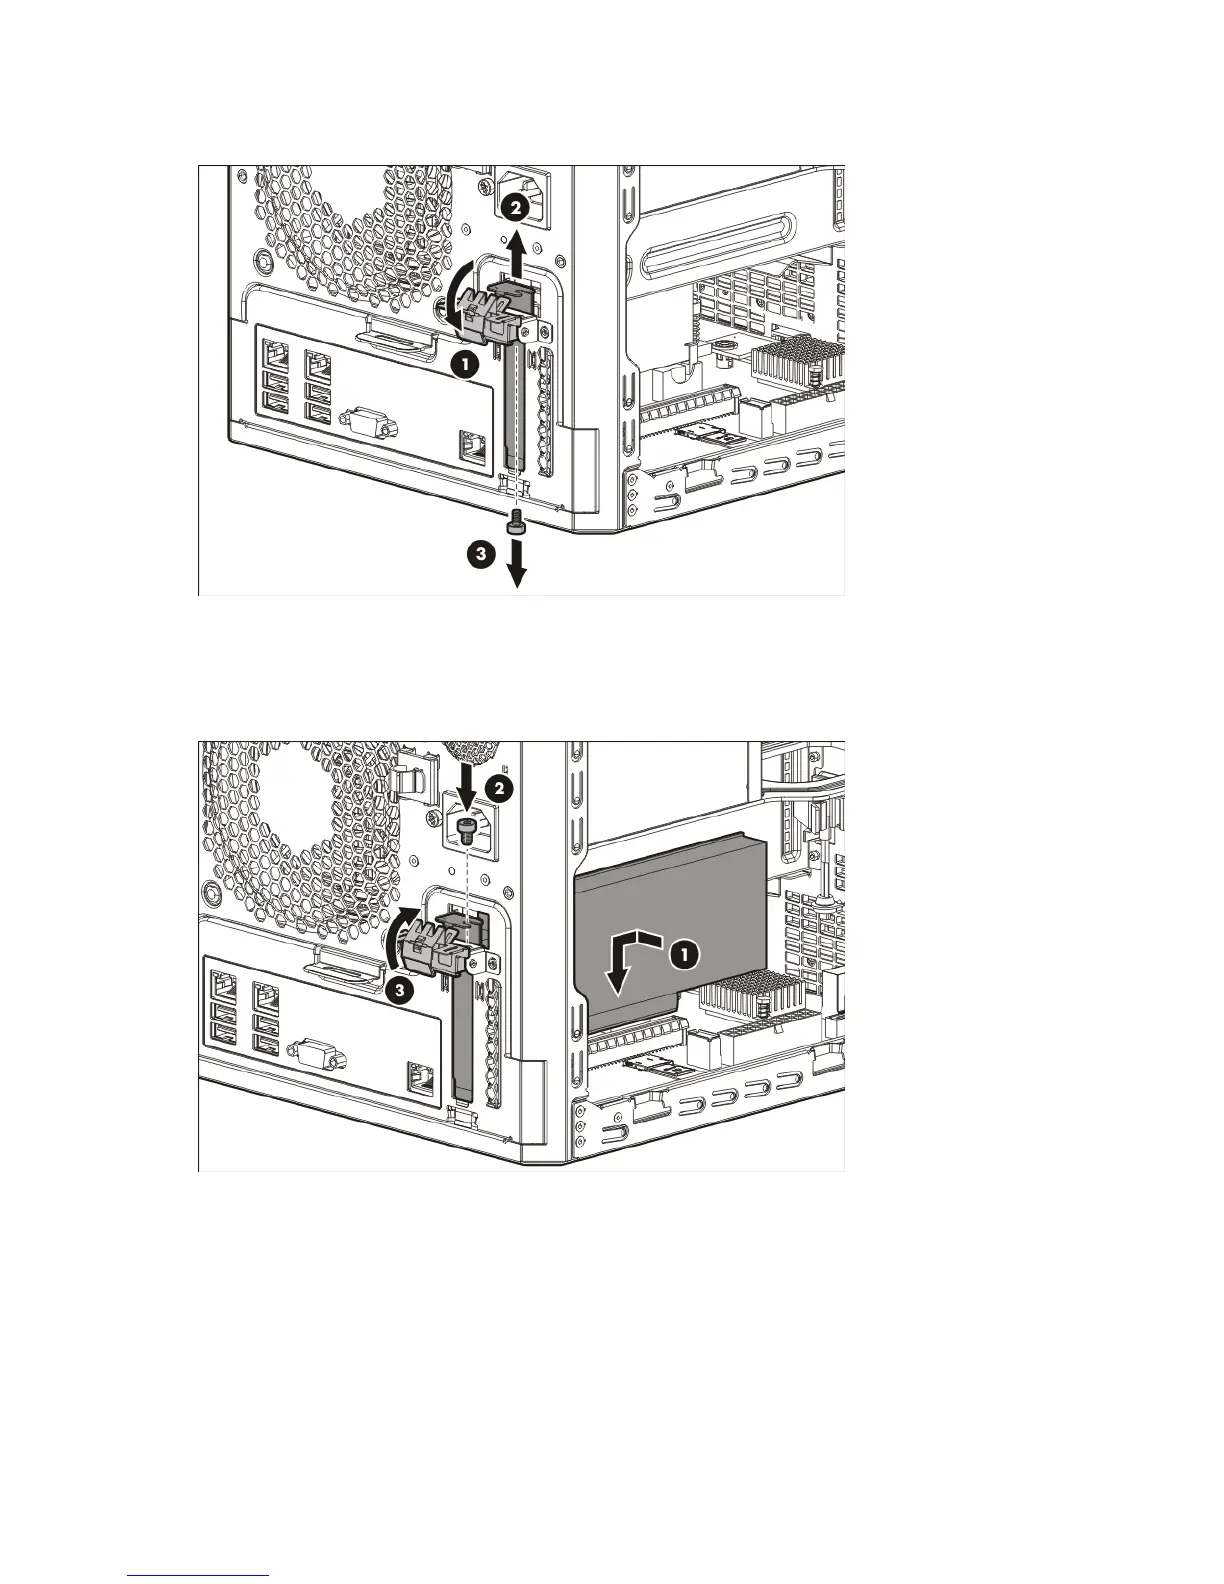
9. Install the expansion board. Verify that the board is firmly seated in the slot.
10. For added board stability, use the screw removed in step 7 to secure the board.
11. Connect all necessary internal cabling to the expansion board. For more information on these cabling
requirements, see the documentation that ships with the option.
12. Secure the expansion board internal cables in the internal left side cable clip.
13. Install the chassis cover (on page 18).
14. Connect all necessary external cabling to the expansion board. For more information on these cabling
requirements, see the documentation that ships with the option.
15. Connect the power cord to the server.
16. Press the Power On/Standby button.