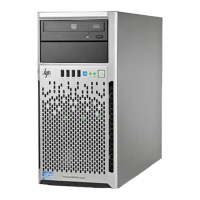
Mass Storage Cabling
NOTE: Make sure the lock side of the Mini SAS cable faces the
battery when installing the Mini SAS cable (see the picture below).
Server Configuration Overview
The steps listed below give an overview of the necessary setup
procedures for preparing the HP ProLiant MicroServer for operation:
1. Connect the AC power cord and peripheral devices.
2. Power up the server.
3. Press “F10” to enter BIOS setup.
4. Note the server BIOS version.
5. Verify the server BIOS version against the latest BIOS version
listed for this server on the HP website: http://www.hp.com
.
6. If you do not have the latest BIOS, update the BIOS now. Refer to
the HP ProLiant MicroServer Maintenance and Service Guide
available on the HP website: http://www.hp.com
.
7. Install a supported operating system of your choice. For detailed
procedures, refer to the documentation provided by the
operating system vendor. For a list of operating systems
supported by your ProLiant server, go to
http://www.hp.com/go/supportos
.
Pre and Post-installation Procedures
When installing additional options in your HP ProLiant MicroServer,
please use the following procedures:
Pre-installation procedures
1. Turn off the server and all the peripherals connected to it.
2. Unplug all cables from the power outlets to avoid exposure to
high energy levels that may cause burns when parts are
short-circuited by metal objects such as tools or jewelry.
3. Disconnect telecommunication cables to avoid exposure to shock
hazard from ringing voltages.
Post-installation procedures
1. Make sure that all components are installed according to the
described step-by-step instructions.
2. Verify that you have not left loose tools or other parts inside the
server.
3. Reinstall the peripherals and system cables that you have
previously removed.
4. Reinstall the system board into the chassis.
5. Connect all external cables to the system.
6. Press the power button on the top panel to turn on the server.
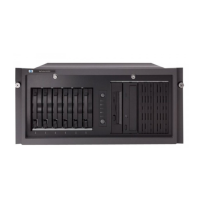
System Board Installation
Open the panel door before removing or replacing a server
component.
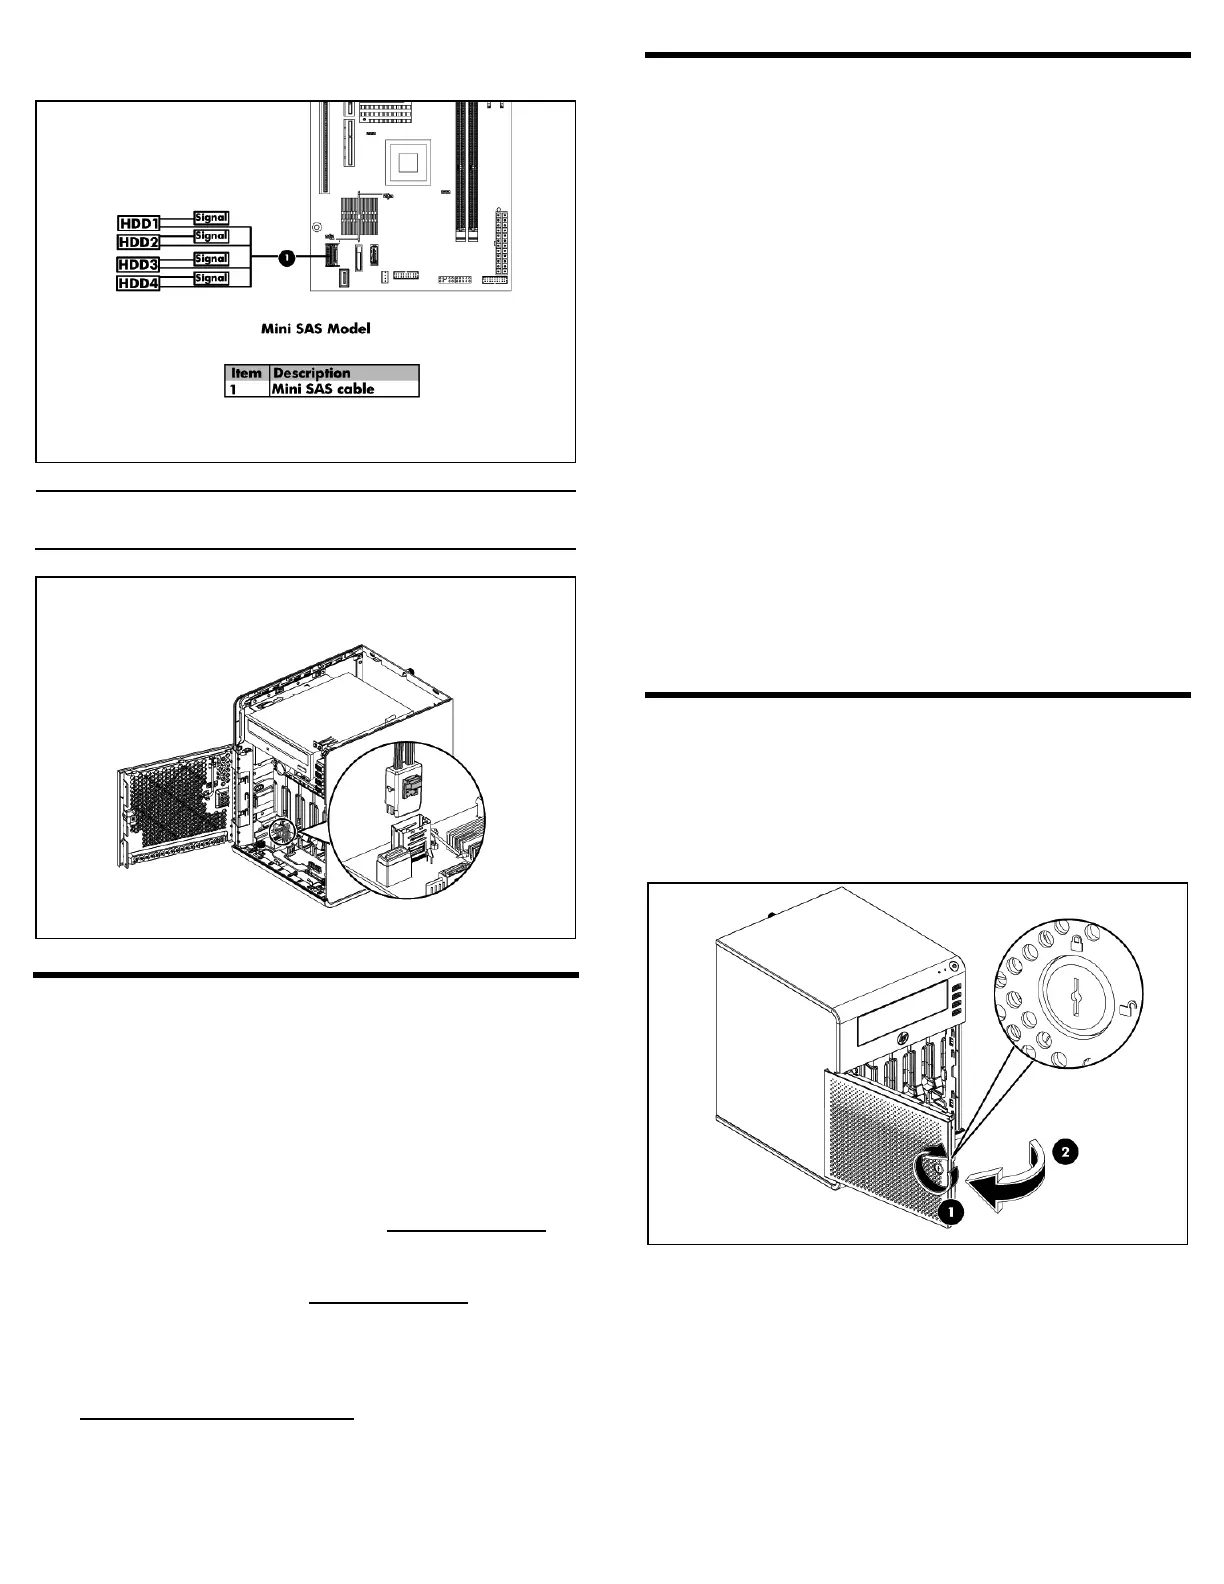
1. Use the HP ProLiant MicroServer’s key to unlock the panel door.
2. Open the panel door of the server. If necessary, remove any
components or cables that prevent access to the slot.
3. Unlock the cable clamp as shown in step 3.
4. Pull the power cable and fan cable out.
5. Unlock the cable clamp as shown in step 5.
6. Pull the bundle of cables out.