• For optimal performance, all DIMMs installed must be of the
same speed.
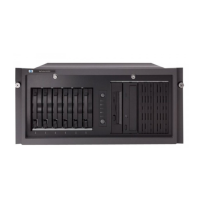
1. Completely open the holding clips securing the module.
2. Align the notch on the bottom edge of the module with the
keyed surface of the DIMM slot and then press the module fully
into the slot.
3. Lock the holding clicks to secure the memory module in place.
Installing a hard drive
The server has four 3.5” hard disc drive bays that support non-hot-plug
SATA drives. The basic system comes with one single hard drive. The
type and capacity of drives vary based on the server model.
Hard drive locations
IMPORTANT: When installing the hard drives, should install
them from hard drive 1, then hard drive 2, hard drive 3 and
hard drive 4.
Item Component
1 Hard drive 1
2 Hard drive 2
3 Hard drive 3
4 Hard drive 4
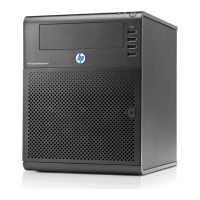
Hard drive installation
1. Press the hard disk carrier latch to release the handle.
2. Lift the handle.
3. Use the handle to pull the hard disk carrier out of the hard disc
drive bay.
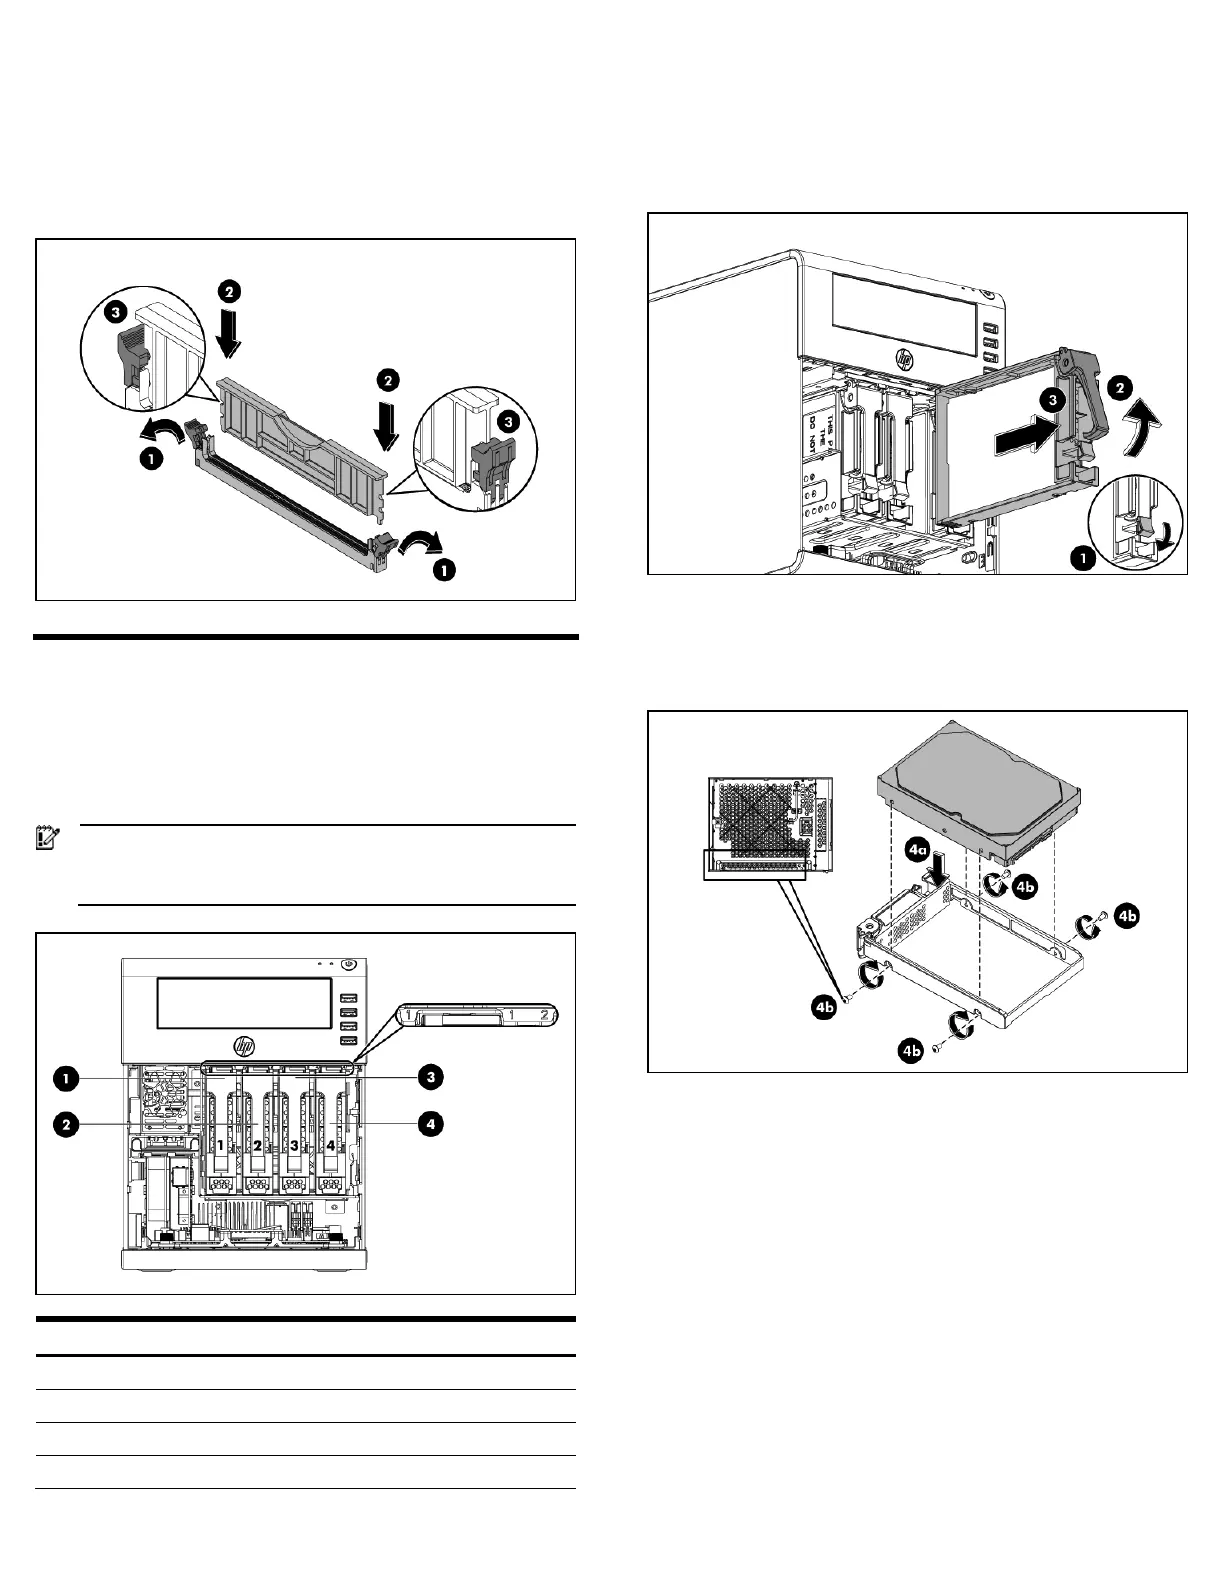
4. Install the new hard drive:
4a. Align the new hard drive on the carrier.
4b. Secure the hard drive assembly with four mounting screws
which located on the door panel.
5. Install the new hard drive assembly in the chassis:
5a. Insert the new hard drive assembly in the hard disc drive bay.
5b. Lock the hard disc drive carrier handle.