EasyManuals Logo

HP ProLiant ML10 Maintenance And Service Guide

HP ProLiant ML10
73 pages
To Next Page IconTo Next Page
To Previous Page IconTo Previous Page
Page #43 background imageLoading...
Page #43 background image
Removal and replacement procedures 43
CAUTION: THE PINS ON THE SYSTEM BOARD ARE VERY FRAGILE AND EASILY DAMAGED. To
avoid damage to the system board:
Do not touch the processor socket contacts.
Do not tilt or slide the processor when lowering the processor into the socket.
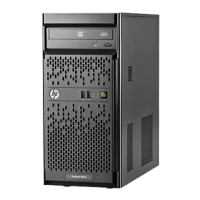
1. Install the processor. Use the notches on both sides of the processor to properly align it into the socket.
CAUTION:
Be sure to close the processor socket retaining bracket before closing the processor
locking lever. The lever should close without resistance. Forcing the lever closed can damage the
processor and socket, requiring system board replacement.
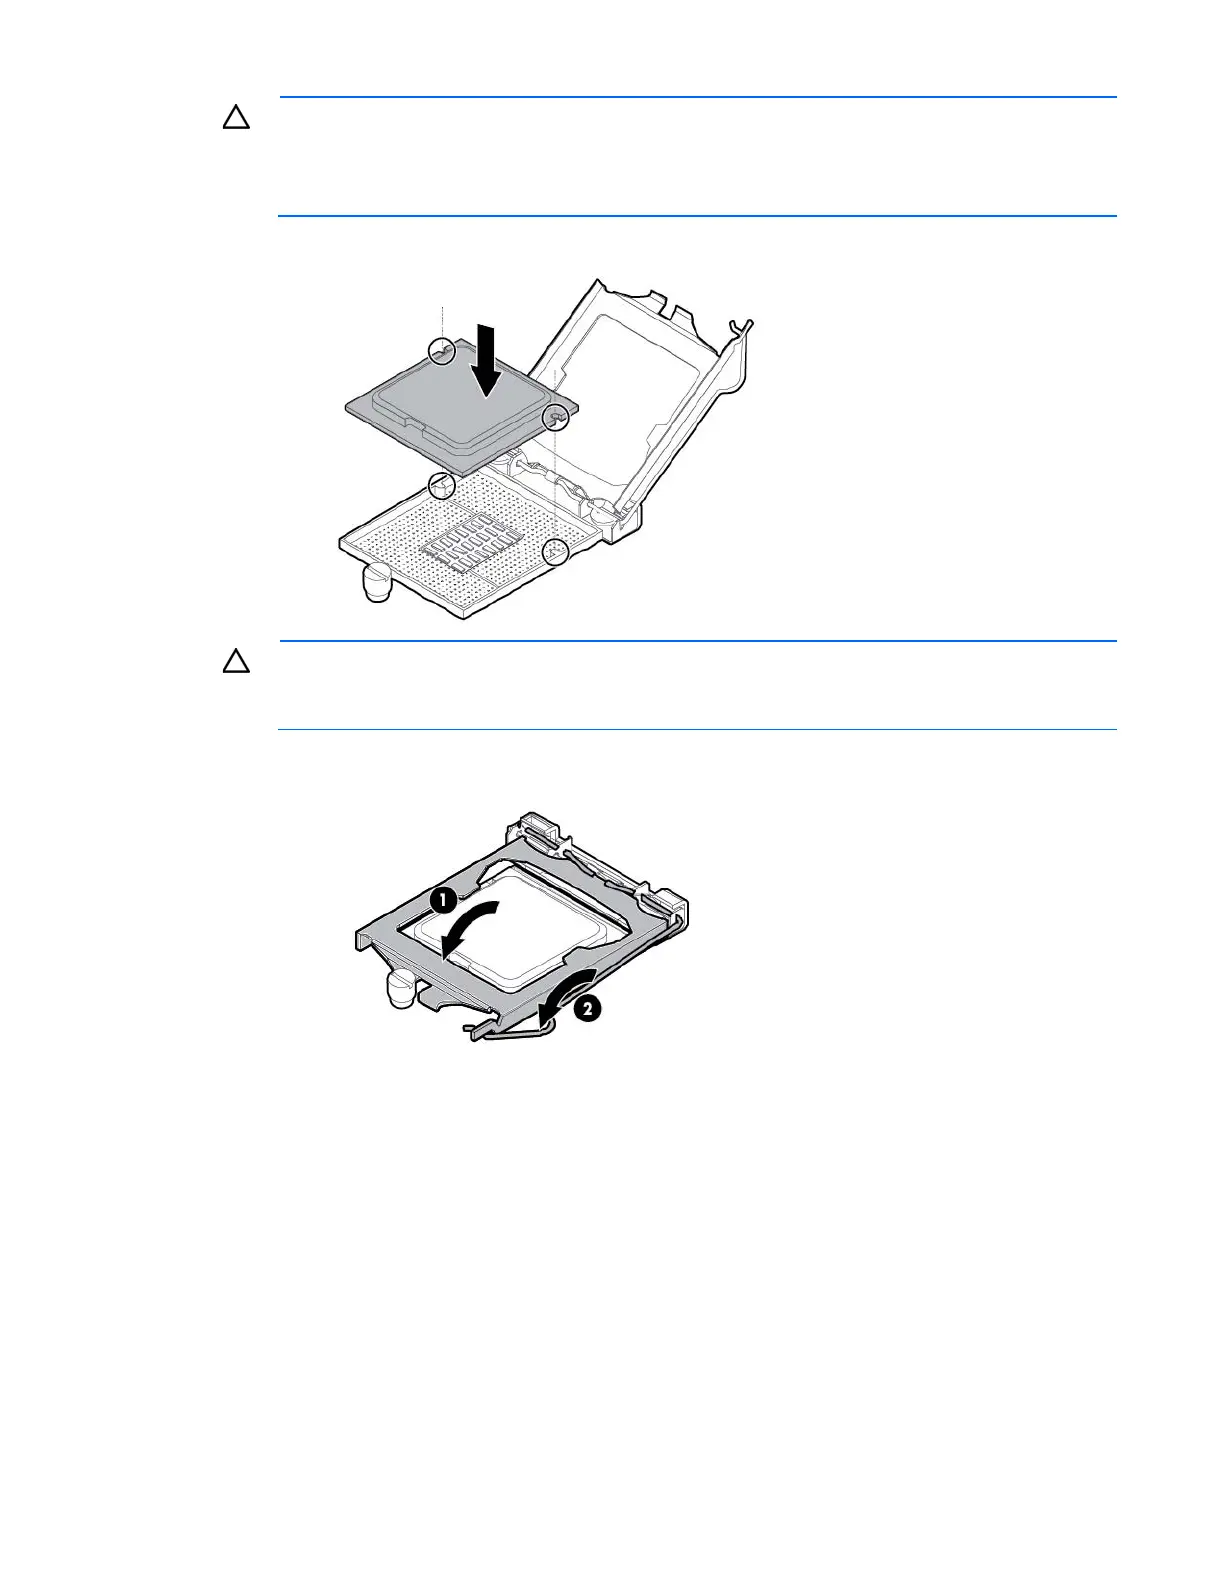
2. Close the processor retaining bracket, and then secure the processor locking lever.
3. Clean the old thermal grease from the heatsink with the alcohol swab. Allow the alcohol to evaporate
before continuing.

Table of Contents

Other manuals for HP ProLiant ML10

Questions and Answers:

Question and Answer IconNeed help?

Do you have a question about the HP ProLiant ML10 and is the answer not in the manual?

HP ProLiant ML10 Specifications

General IconGeneral
Memory Slots4
Form FactorTower
ProcessorIntel Xeon E3-1200 v3
MemoryUp to 32 GB
Drive Bays4 LFF
Power Supply300W
ChipsetIntel C222
Expansion Slots1 PCIe 3.0 x16, 1 PCIe 2.0 x1
Operating System SupportWindows Server, Red Hat Enterprise Linux, SUSE Linux Enterprise Server, VMware ESXi
RAID SupportIntegrated SATA RAID controller (Intel Rapid Storage Controller); optional HP Smart Array controllers

Related product manuals