Removal and replacement procedures 44
4.
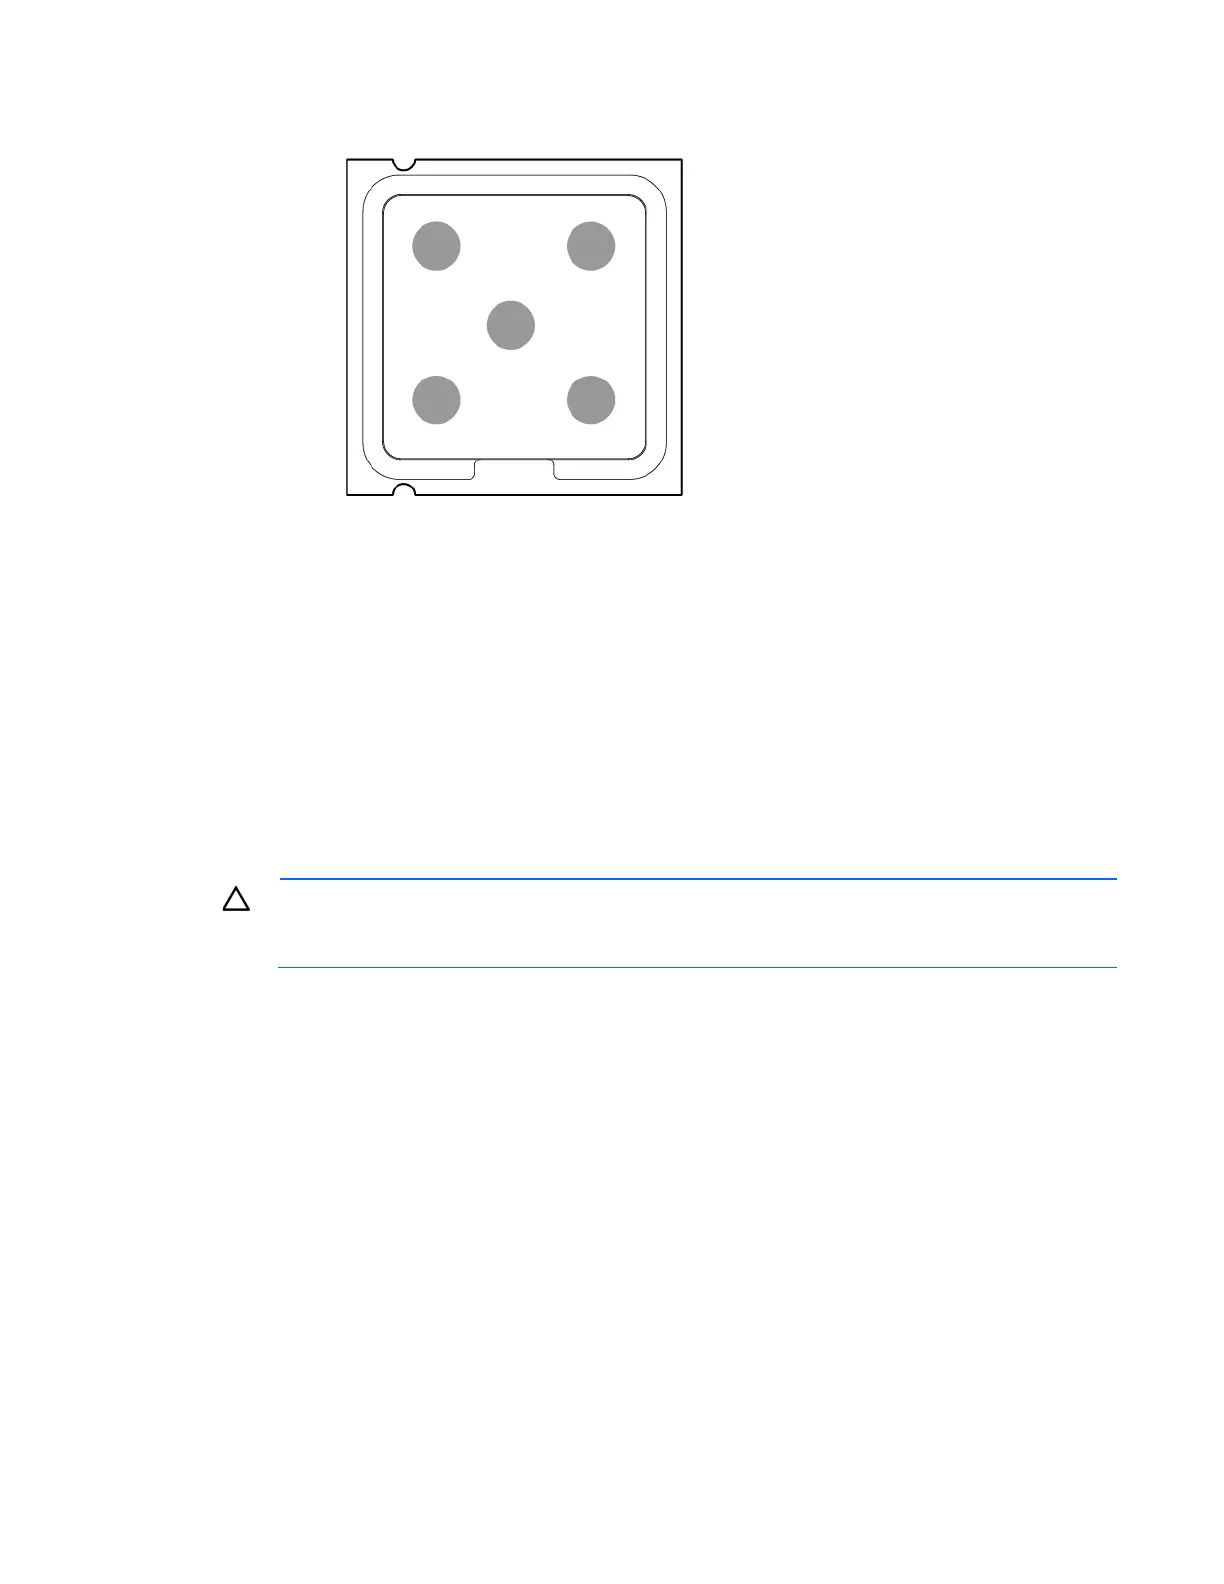
Apply all the grease to the top of the processor in the following pattern to ensure even distribution.
5. Install the heatsink ("Heatsink" on page 39).
6. Install the access panel.
7. Return the server to an upright position.
8. Connect the power cord to the server.
9. Connect the power cord to the power source.
10. Press the Power On/Standby button.
The server exits standby mode and applies full power to the system. The system power LED changes
from amber to green.
System board
CAUTION: To avoid ESD damage, when removing electrostatic-sensitive components from the
failed system board, place the components on a static-dissipating work surface or inside separate
antistatic bags.
To remove the system board:
1. Press the Power On/Standby button.
The server powers down and enters standby mode. The system power LED changes from green to
amber. Power is still applied to the server.
2. Disconnect the power cord from the power source.
3. Disconnect the power cord from the server.
 Loading...