EasyManuals Logo

HP ProLiant ML10 Maintenance And Service Guide

HP ProLiant ML10
73 pages
To Next Page IconTo Next Page
To Previous Page IconTo Previous Page
Page #51 background imageLoading...
Page #51 background image
Removal and replacement procedures 51
c.
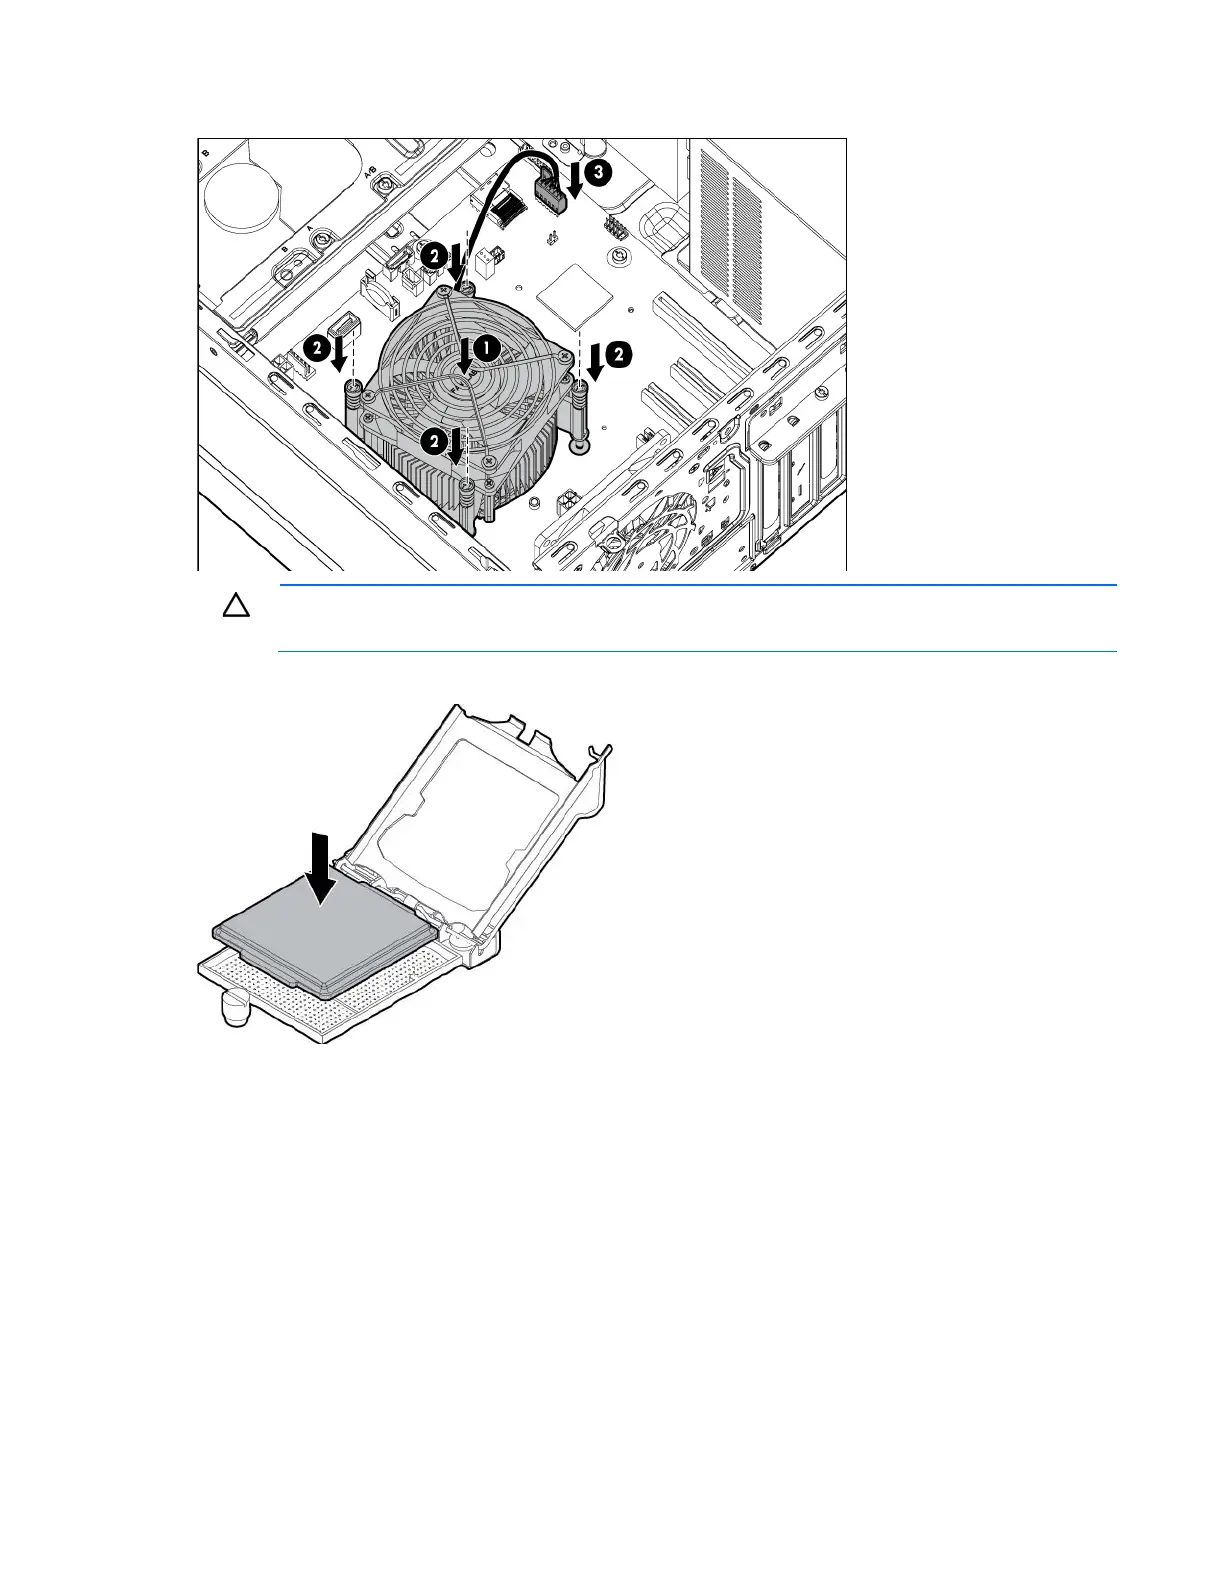
Connect the fan cable to the system board.
CAUTION: When returning a damaged system board to HP, always install all processor socket
covers to prevent damage to the processor sockets and system board.
9. Install the processor socket cover on the failed system board.
10. Install the DIMMs.
11. Install the access panel.
12. Return the server to an upright position.
13. Connect the power cord to the server.
14. Connect the power cord to the power source.
15. Press the Power On/Standby button.
The server exits standby mode and applies full power to the system. The system power LED changes
from amber to green.

Table of Contents

Other manuals for HP ProLiant ML10

Questions and Answers:

Question and Answer IconNeed help?

Do you have a question about the HP ProLiant ML10 and is the answer not in the manual?

HP ProLiant ML10 Specifications

General IconGeneral
Memory Slots4
Form FactorTower
ProcessorIntel Xeon E3-1200 v3
MemoryUp to 32 GB
Drive Bays4 LFF
Power Supply300W
ChipsetIntel C222
Expansion Slots1 PCIe 3.0 x16, 1 PCIe 2.0 x1
Operating System SupportWindows Server, Red Hat Enterprise Linux, SUSE Linux Enterprise Server, VMware ESXi
RAID SupportIntegrated SATA RAID controller (Intel Rapid Storage Controller); optional HP Smart Array controllers

Related product manuals