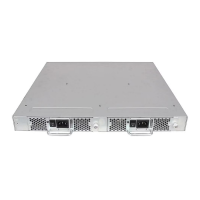
3. Power off the power supply to be replaced by setting the AC power switch to the off (O)
position.
The fans in the other power supply automatically switch to high speed to maintain adequate
cooling.
4. Unplug the power cord from the power supply and fan assembly being replaced.
5. Unscrew the captive screw using a Phillips screwdriver.
6. Remove the power supply and fan assembly by pulling the handle out and away from the
chassis.
7. Note the product and airflow labels (or their absence) on the assembly just removed.
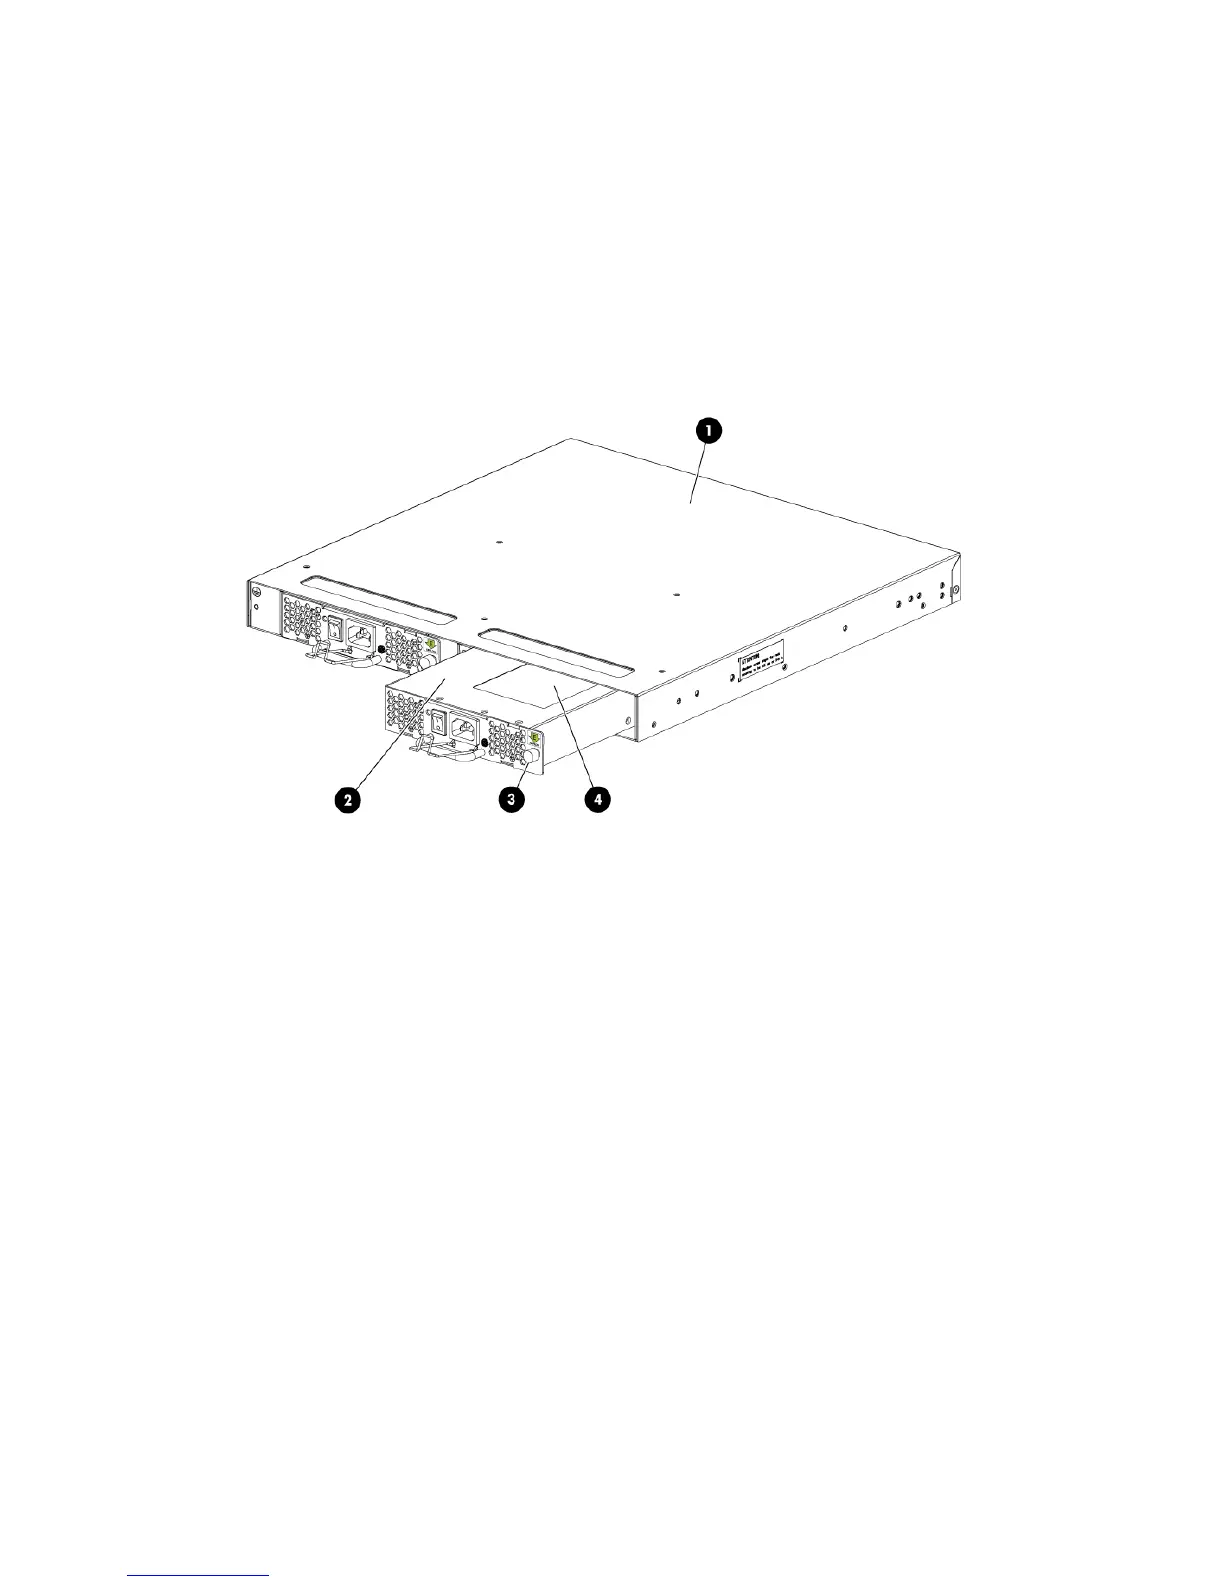
Figure 19 Replacing the power supply and fan assembly
2. Power supply and fan assembly1. Switch chassis
4. Product and airflow labels3. Captive screw
FRU removal and replacement 41
 Loading...