4.
Remove the stand (see
Stand on page 17).
5. Remove the I/O cover (see
I/O cover on page 15).
6.
Remove the feet (see
Feet on page 16).
7. Remove the back cover (see
Back cover on page 22).
8. Remove the amp board shield (see
Amp board shield on page 28).
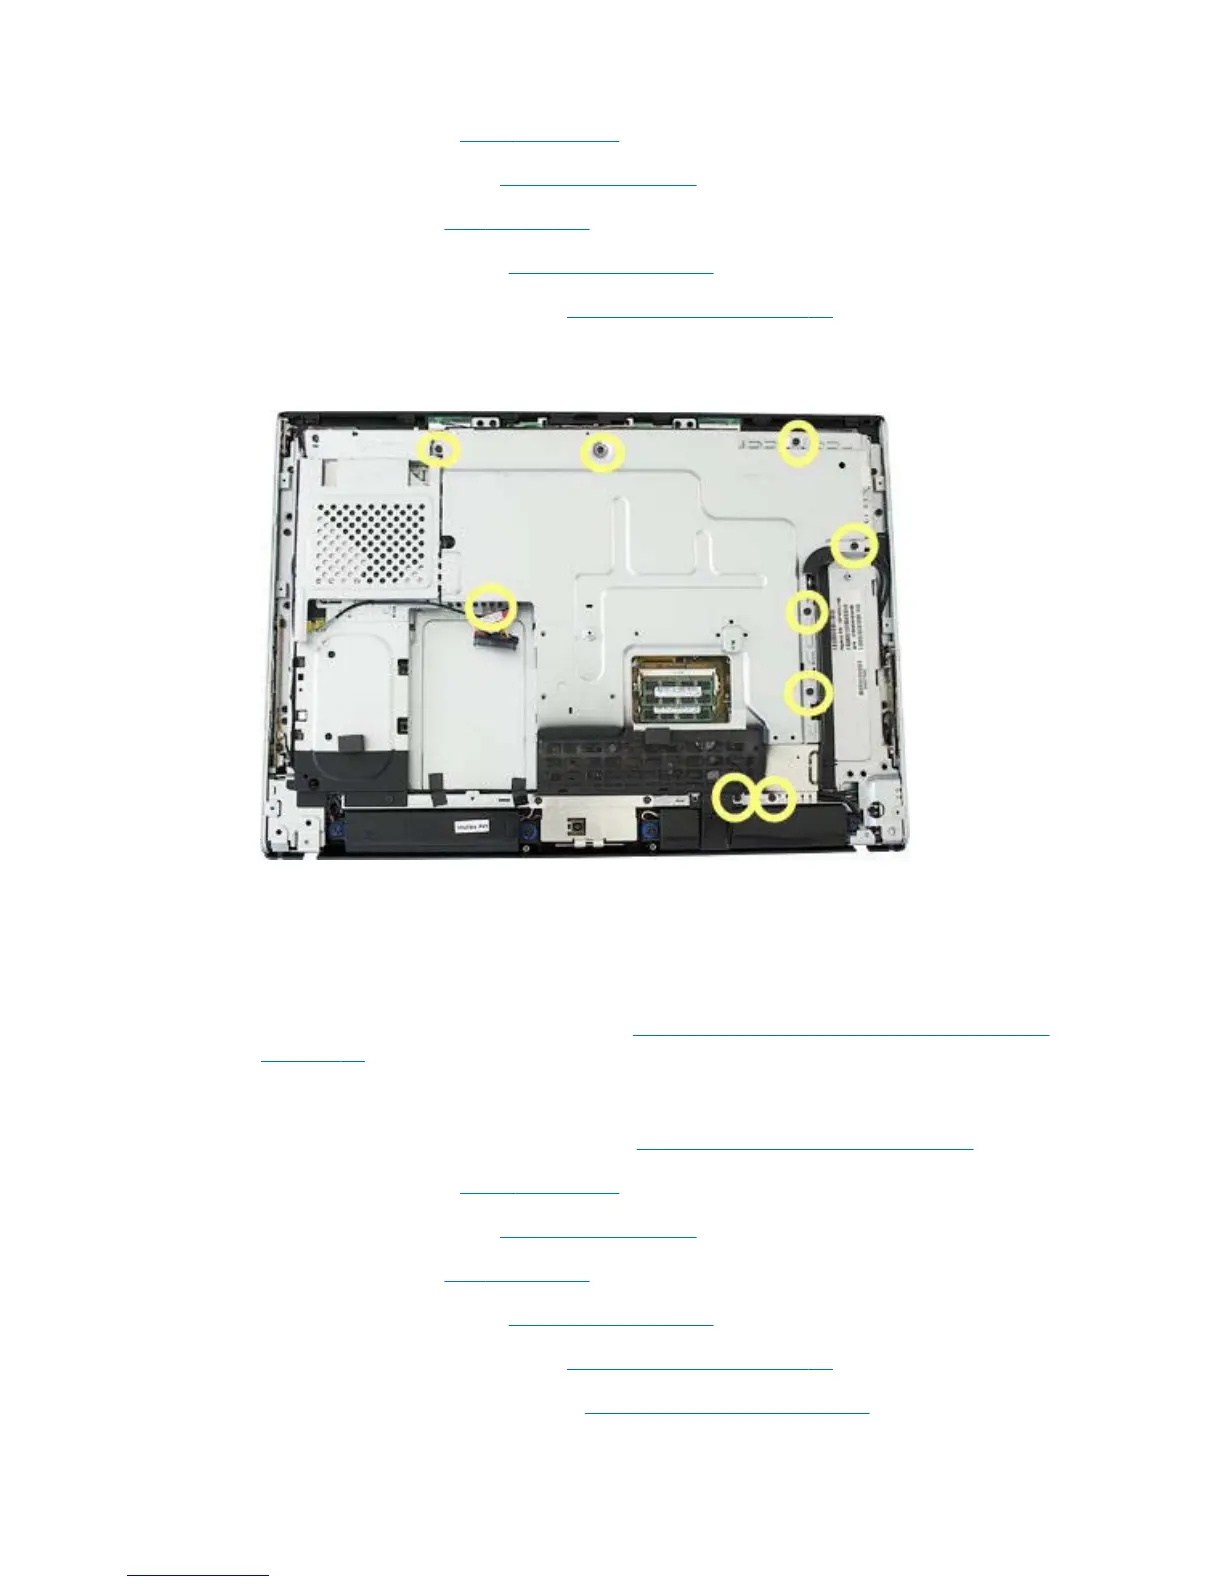
9. Remove the system board shield by removing the nine screws that secure it to the computer, and
then lifting it off the computer.
To install the system board shield, reverse the removal procedures.
Graphics card – Discrete or UMA
1. Prepare the computer for disassembly (see Preparing to disassemble the HP TouchSmart PC
on page 12).
2. Place the computer face down on a soft, flat surface.
3. Remove the hard drive/memory cover (see
Hard drive/memory cover on page 14).
4. Remove the stand (see
Stand on page 17).
5.
Remove the I/O cover (see
I/O cover on page 15).
6. Remove the feet (see
Feet on page 16).
7. Remove the back cover (see
Back cover on page 22).
8. Remove the amp board shield (see
Amp board shield on page 28).
9. Remove the system board shield (see
System board shield on page 28).
Graphics card – Discrete or UMA
29

 Loading...