OptiX OSN 8800/6800/3800
Hardware Description
Huawei Proprietary and Confidential
Copyright © Huawei Technologies Co., Ltd.
DIP Switches on the TN16EFI Board
The master and slave subracks are connected through the ETH1/ETH2/ETH3 interface on the
EFI. The ID of each subrack is set by using two DIP switches on the EFI board. The value that
can be set by using each of the two DIP switches on the EFI board is a binary value 0 or 1.
ID1-ID4 correspond to bits 1-4 of SW2, and ID5-ID8 corresponding to bits 1-4 of SW1.
Among these ID values, only ID1-ID5 are valid. ID6-ID8 are reserved. The bits from high to
low are ID5-ID1, by which a maximum of 32 states can be set. The value is 00000 by default.
"0" indicates the master subrack. The other values indicate slave subracks.
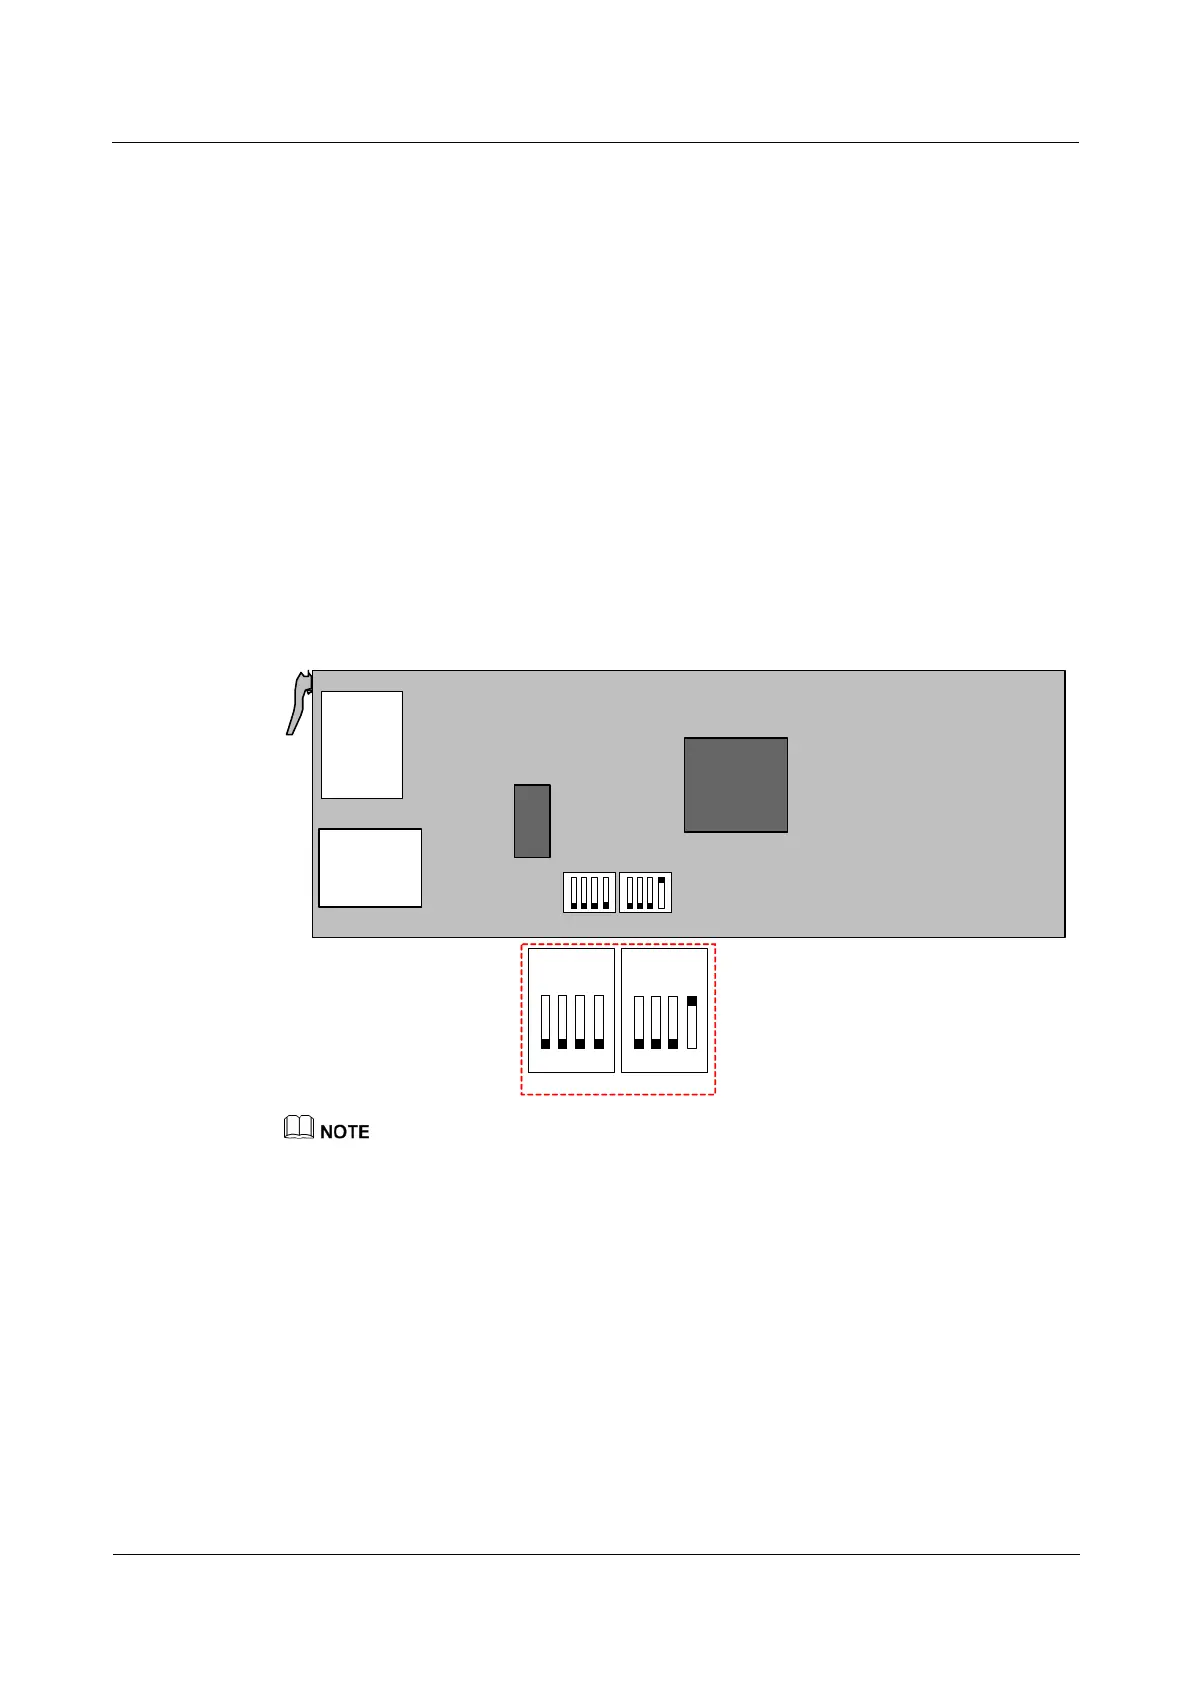
Figure 4-19 shows the position of the DIP switches on the EFI board.
The two DIP switches are numbered SW1 and SW2 and are located to the right of the
T1.
When the DIP switch is ON, the value of the corresponding bit is set to 0.
As shown in Figure 4-19, the value represented by the ID5-ID1 is 000001, which is 1 in
decimal system. That is, the subrack ID is 1.
Figure 4-19 Position of the DIP switches on the EFI board
U8
SERIAL
NM_ETH2
T1
SW1
SW2
ON
ON
ON
ON
(ID1)
(ID2)
(ID3)
(ID4)
ON
ON
ON
ON
(ID5)
(ID6)
(ID7)
(ID8)
SW1
SW2
Ensure that the ID6 to ID8 switches are turned on as shown in Figure 4-19.
 Loading...