SR05-D1A3-PV manual v1801 27/83
5.2 Mounting and levelling SR05
SR05 in its standard configuration is equipped with a visible bubble level and two
mounting holes. For easy mounting and levelling on a (non-)horizontal surface, SR05’s
optional ball levelling is recommended. Ball levelling offers:
• easy levelling
• easy cable orientation
• easy instrument exchange
• easy mounting (mounting bolts and nuts included)
When installing SR05, ball levelling allows SR05 to rotate 360 ° and to tilt up to 10 °.
This allows compensation for up to a ten degree angle when installing on a non-
horizontal surface. A 4 mm hex key (un)locks the ball levelling mechanism. When using a
tube or rod for installing SR05, the optional tube mount is recommended. Combined with
ball levelling it allows mounting to a 25 to 40 mm diameter tube with the same ease of
levelling and instrument exchange.
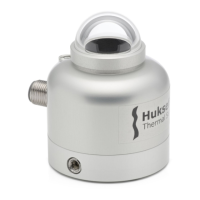
Figure 5.2.1 From left to right: SR05 in its standard configuration with 3 metre cable;
with optional ball levelling for easy mounting and levelling on a (non-)horizontal surface;
with optional ball levelling and tube mount for easy installation on a 25 to 40 mm
diameter tube. Mounting bolts are included with the ball levelling and / or tube mount.
5.3 Installing SR05
SR05 without ball levelling and tube mounting options can be mounted using two M5
bolts (not included). For the required bolt lengths, 5 to 7 mm should be added to the
thickness of the user’s mounting platform. See the chapter on required tooling.
 Loading...