SR05-D1A3-PV manual v1801 28/83
5.4 Installing SR05 with its ball levelling and tube mount
Two M5x20 bolts and two M5 nuts are included with SR05’s ball levelling option. These
are to be used to mount SR05 with its ball levelling to a (non-)horizontal surface.
Two M5x30 bolts and two M5x40 bolts are included with SR05’s tube mount with ball
levelling. These bolts are to be used to clamp both ball levelling and tube mount to a 25
to 40 mm diameter tube. For tube diameters larger than or equal to 33 mm, use the
M5x40 bolts instead of the M5x30 bolts for a secure fit.
The unique ball head mechanism of SR05’s ball levelling mount is used to level SR05.
When ordering ball levelling with SR05, it is delivered attached to SR05. In that case
follow steps 1 to 7 below to mount and level SR05. Make sure the glass dome is
protected at all times.
In case SR05 is not attached to its ball levelling mount yet, the user has to ensure a shim
is placed properly in the centre of the bottom plate of SR05 before mounting and
levelling. The shim allows smooth levelling and is shown top left in Figure 5.4.1. See
chapter 5.5 for placing SR05’s ball levelling shim. When ordering SR05 combined with
ball levelling, the shim is already positioned in its place in the factory.
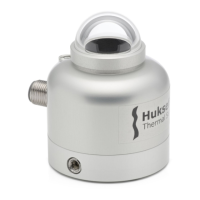
Figure 5.4.1 On the left SR05’s ball levelling including shim (mounting bolts not
displayed) and on the right SR05 placed on the ball levelling mount. Loosen the
countersunk set screw on SR05’s side to unlock, allowing placement of the ball head and
SR05 levelling, and tighten it to lock the ball head mechanism. A 4 mm hex key is the
only tool needed to place and remove the ball levelling and to allow and disallow levelling
adjustment. The shim, included when ordering ball levelling, allows for smooth levelling
and should be positioned properly in the centre of the bottom plate of SR05.
1) Loosen SR05’s countersunk set screw with a 4 mm hex key by turning the hex key
counter clockwise until the screw is slightly protruding (sticking out).
 Loading...