EasyManuals Logo

Hunter Hydrawise HC Quick Start Guide

Hunter Hydrawise HC
12 pages
To Next Page IconTo Next Page
To Previous Page IconTo Previous Page
Page #4 background imageLoading...
Page #4 background image
2
Mounting the controller
1. Using a drill bit of ⁄ inch diameter,
drill a hole to a depth of 1 inch
(25 mm).
2. Insert plastic anchor so it is ush
with the surface of the wall.
3. Screw 1 inch screw into anchor
leaving the head protruding about
⁄ inch (4 mm).
4. Slide the controller case over the
screw head.
5. Mark second mounting point (see
in diagram), remove controller, drill
hole, insert plastic anchor, slide
controller case over rst screw head
and screw into place.
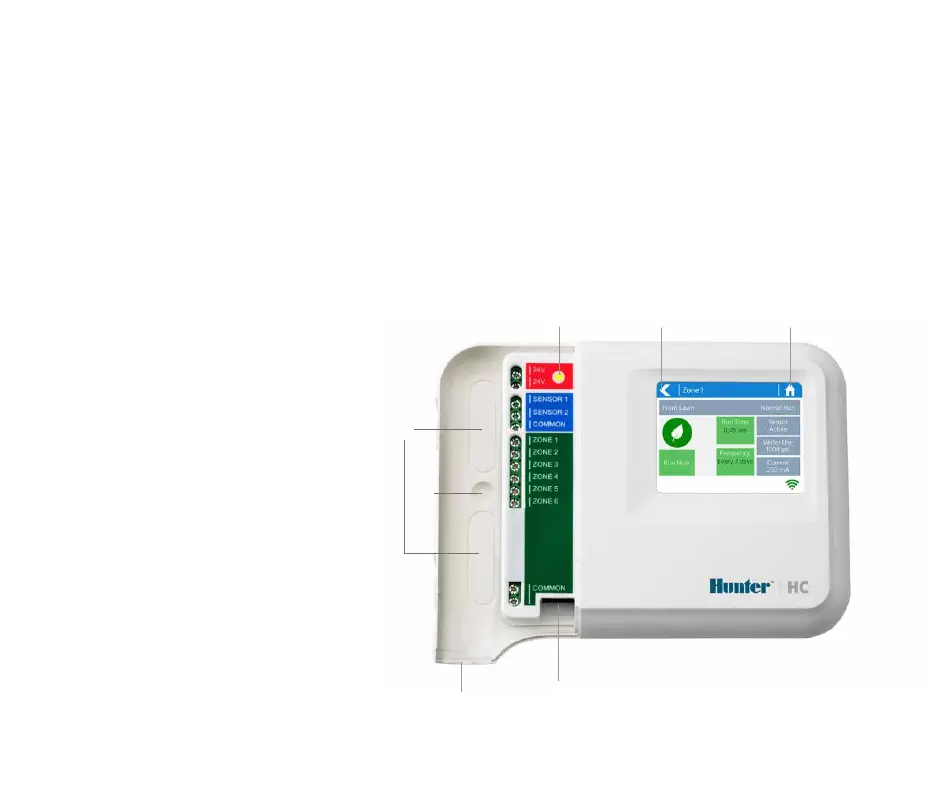
Rear cable entry point
(remove with knife)
Conduit cable entry point
(remove with knife)
Wall mounting screw
Power indicator
Expansion module
cable entry
Go to previous screen
Go to home screen

Other manuals for Hunter Hydrawise HC

Questions and Answers:

Question and Answer IconNeed help?

Do you have a question about the Hunter Hydrawise HC and is the answer not in the manual?

Hunter Hydrawise HC Specifications

General IconGeneral
Wi-FiYes
Weather AdjustmentYes
Flow Meter CompatibilityYes
Power Source24VAC
TypeSmart Irrigation Controller
EnclosureIndoor/Outdoor
WaterSense CertifiedYes
Smart Home CompatibilityAmazon Alexa, Google Assistant
CompatibilityHunter and standard irrigation systems
ControlRemote via app
Water Saving FeaturesWeather-based adjustments

Related product manuals