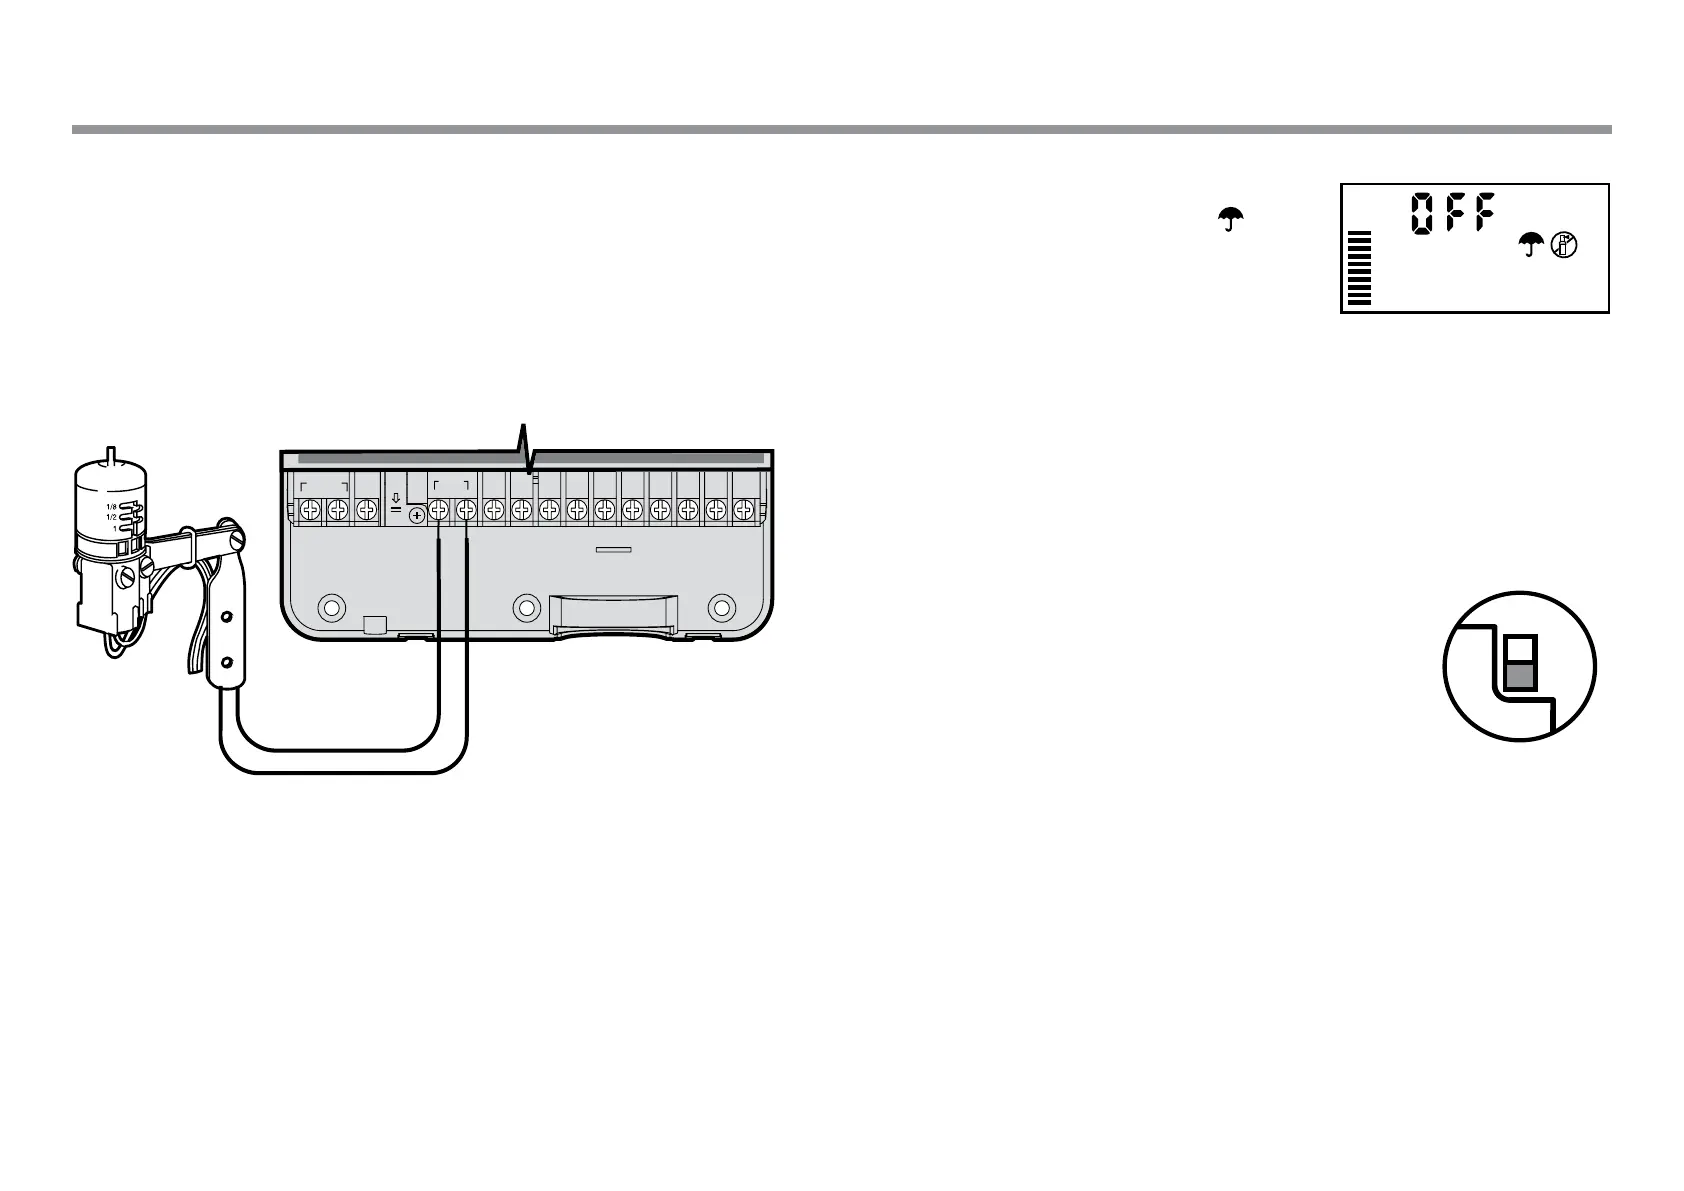
11
A Hunter weather sensor or other micro-switch type weather sensors
can be connected to the X-Core
®
. The purpose of this sensor is to stop
automatic watering when weather conditions dictate.
1. Remove the metal jumper plate that is attached across the two
SEN terminals inside the controller.
2. Connect one wire to one SEN terminal and the other wire to the
other SEN terminal.
When the weather sensor has deactivated
automatic watering, the OFF, and icon
will appear on the display.
Testing the Weather Sensor
The X-Core provides simplied testing
of a rain sensor when the sensor is wired into the sensor circuit. You
can manually test proper operation of the rain sensor by running a
MANUAL CYCLE or by activating the system using the One Touch
MANUAL START (see page 22). During the Manual cycle, pressing the
test button on the Mini-Clik
®
will interrupt watering.
Manually Bypassing the Weather Sensor
If the rain sensor is interrupting irrigation, you can bypass it by using
the bypass switch on the front of the controller.
Slide the switch to the SENSOR BYPASS position
to disable the rain sensor from the system to
allow for controller operation. You can also bypass
the weather sensor for manual operation by using
the MANUAL – ONE STATION function.
The Bypass switch does not aect the Seasonal
Adjust update when using Solar Sync
®
sensor.
SEN C P 1 2 3 4 5 6 7 8
REM
24VA C
BAT
CONNECTING A HUNTER "CLIK" WEATHER SENSOR