Hydroid – Series User Manual
16 04/19
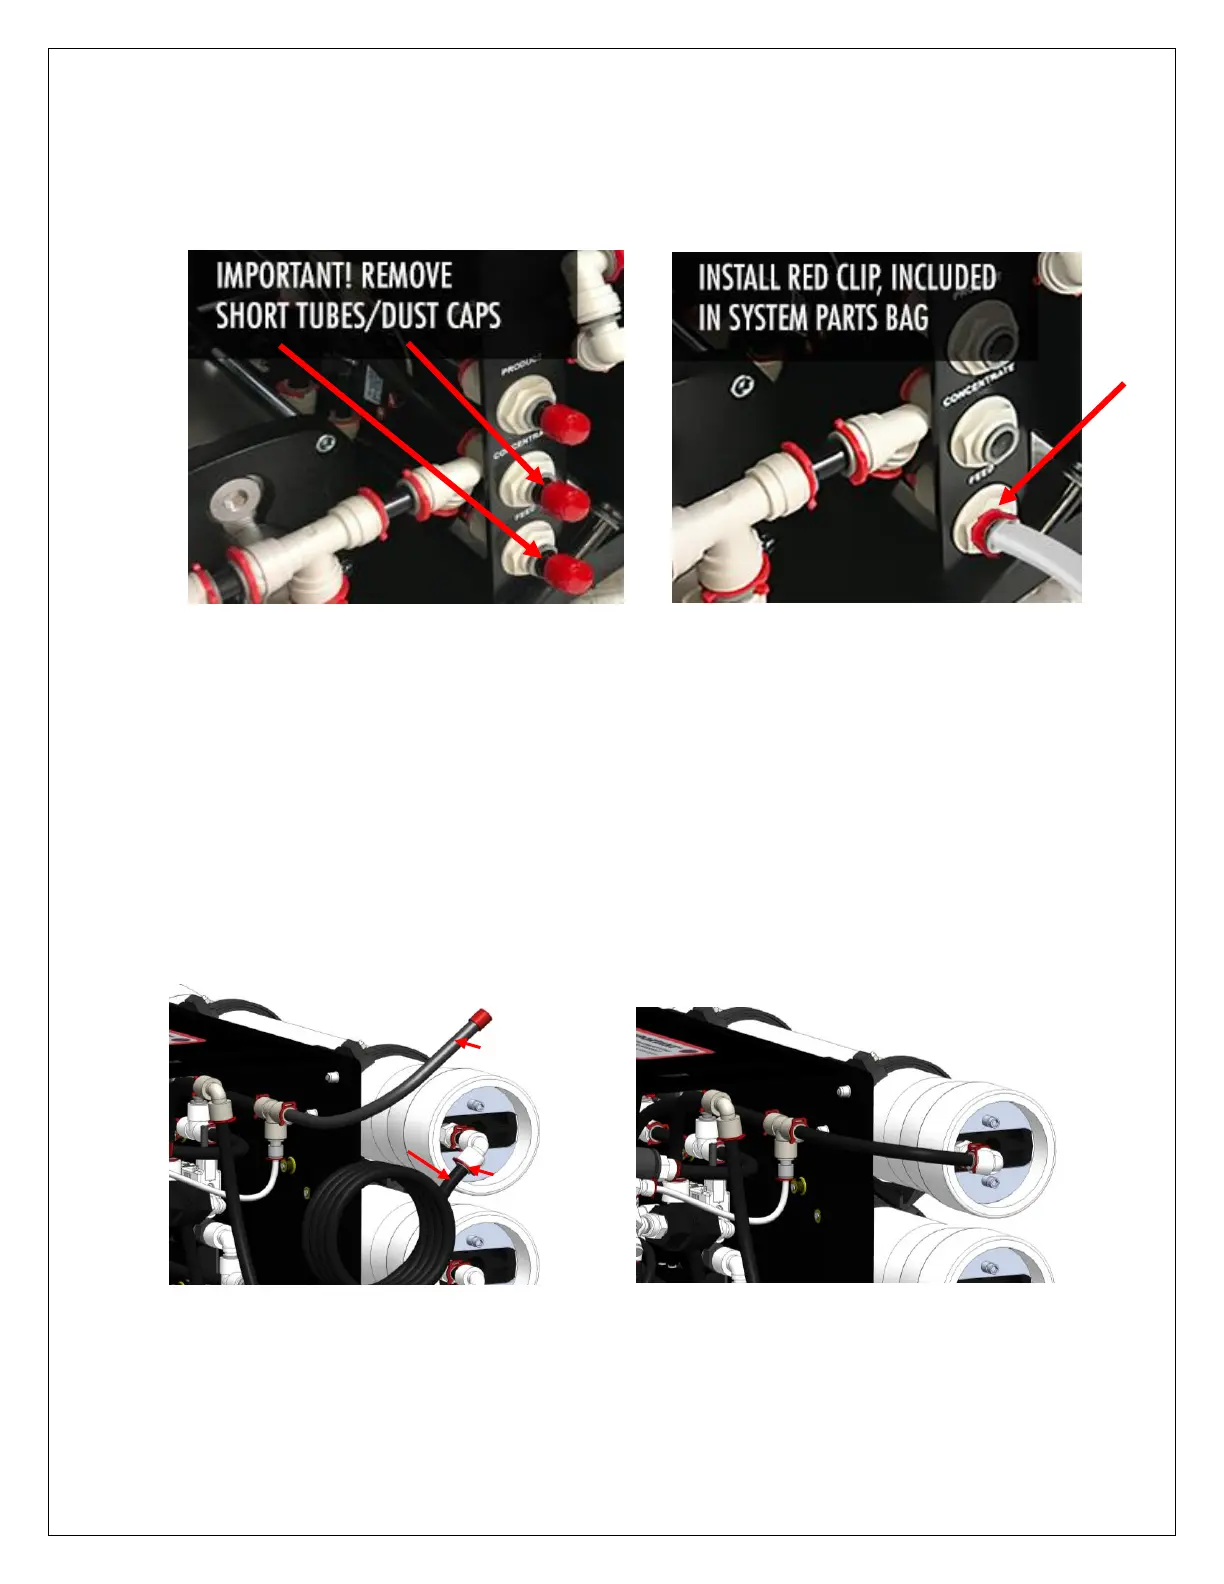
1. Remove dust caps and short tubes from all ports: PRODUCT (purified water - blue tubing),
CONCENTRATE (drain - black tubing), and FEED (inlet - white tubing). Install the provided
white tubing to FEED port for inlet water. Install a red clip (included in system parts bag) on
FEED port to lock tubing in place. Install other end of white FEED line to tap/source water,
or use included garden hose connector (included in system parts bag).
Refer to page 4 for quick-release port instructions.
2. The open end of the pre-installed ½” black tubing labeled “Flush” (B) goes to a drain.
Now you can begin to slowly turn on the water supply and flush the dust from the carbon
pre-filter, until water stream is clear (approx. 5 min).
3. Turn OFF the water supply and immediately turn it ON again, to create an aggitated flush
effect in the carbon cartridge. Repeat this process 3 – 4 times or until there are no carbon
fines in the water stream.
4. Install System Tubing for Normal Operation: Remove red clip (A), disconnect ½” black
Flush tubing (B) and then push system tubing (C) into carbon pre-filter port. Replace the
red clip to lock system tubing to carbon pre-filter, shown in the picture below. For filter
replacements, reverse this step.
IMPORTANT: Keep black Flush tubing for future carbon pre-filter flush procedures.