Hydroid – Series User Manual
17 04/19
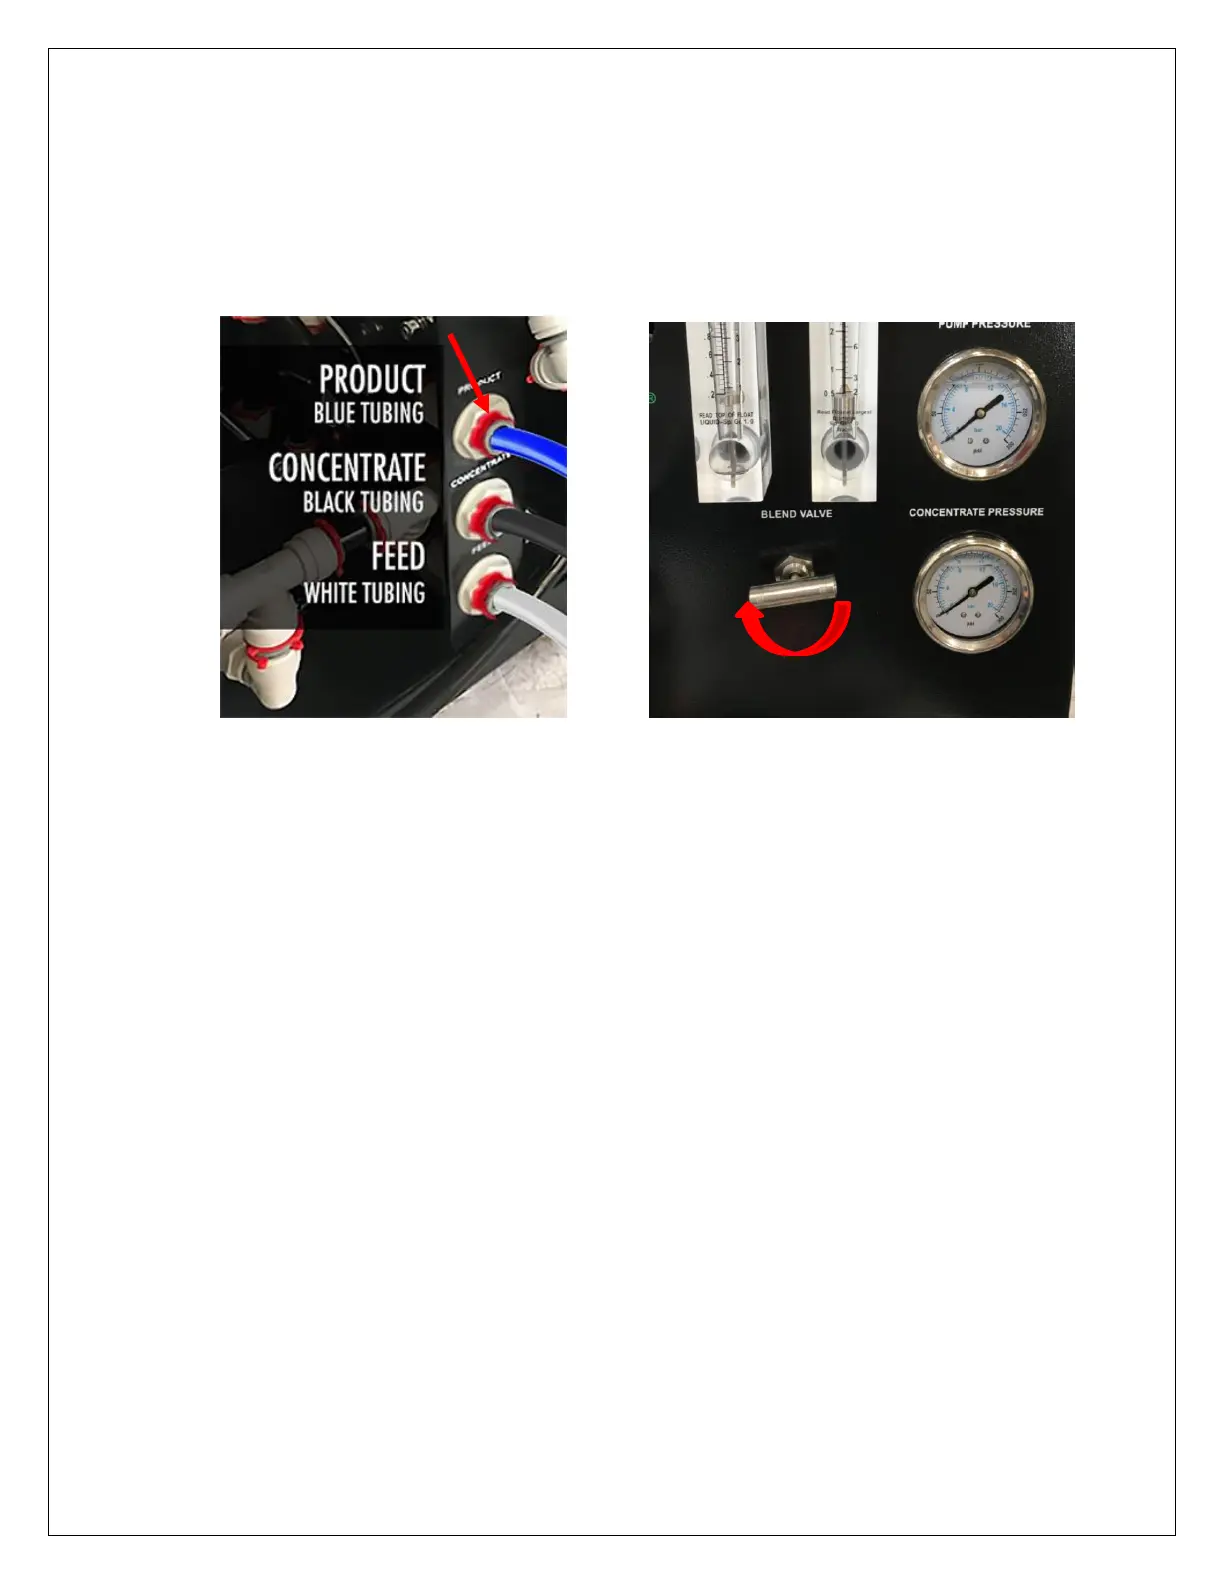
5. Connect Provided Tubing: PRODUCT (purified water - blue tubing) and CONCENTRATE
(drain - black tubing) to their ports; re-direct the open ends of both the PRODUCT (purified
water – blue tubing) and CONCENTRATE (waste water – black tubing) to drain. Install the
red clips included in systems parts bag. Fully close the blend valve by turning it clockwise.
6. Activate the system purge feature by
pressing and holding the Power button on the controller for 5 seconds. The inlet valve will
open and the system will flush continuously.
7. Let the system purge until no bubbles appear in CONCENTRATE (drain water - black
tubing) flow meter (approx. 15 min).
8. When the Hydroid system has been purged of air, press the power button momentarily to
turn off the purge feature. The Hydroid will turn off.
9. Inspect the system for leaks. If no leaks are apparent, the next step is to flush the
Membrane Elements.
10. Turn system on and allow the system to run uninterrupted for at least 30 minutes to flush
the Membrane Elements.
11. After 30 minutes, shut down the system and re-direct PRODUCT (purified water - blue
tubing) to holding tank. Your system is now ready for normal operation.