EasyManua.ls Logo

Hypertherm XPR Series User Manual

Hypertherm XPR Series
41 pages
To Next Page IconTo Next Page
To Previous Page IconTo Previous Page
Page #19 background image
Preventive Maintenance Program
XPR Instruction Manual 809480 19
Be careful that you do not pinch the wires between the cover and the
center panel.
Examine the coolant system
Examine the coolant system for coolant leaks at all connections. Make sure you examine:
The gas connect console
The torch connect console
The torch main body
The internal connection in the plasma power supply
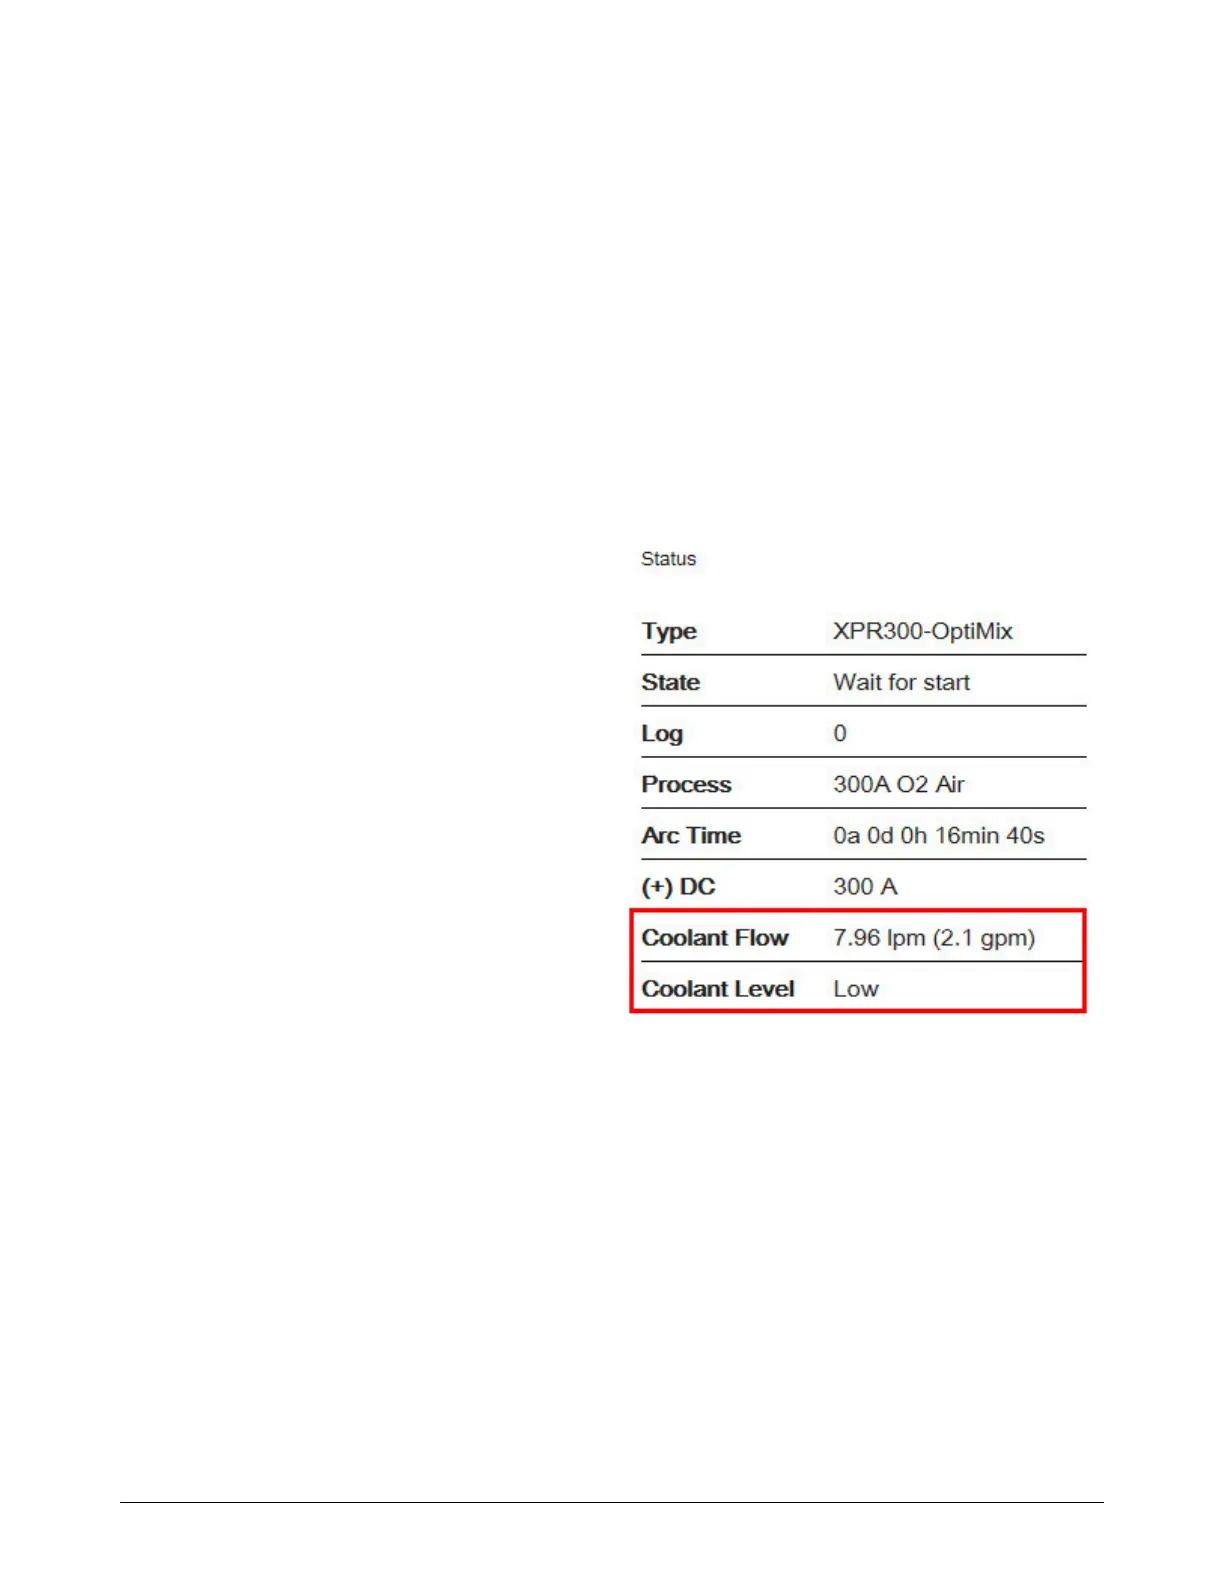
Do the coolant flow test
1. Look at the CNC or plasma power
supply screen on the XPR web interface
to identify the coolant flow rate.
Shown for reference only.
2. Make sure that the coolant flow rate is
acceptable:
Between 3.79 L/min – 11.36 L/min
(1 gal/min –3.0 gal/min) for an
XPR170 cutting system.
Between 3.79 L/min 9.46 L/min
(1 gal/min 2.5 gal/min) for an
XPR300 cutting system.
If the flow rate is outside of the
correct range, an internal
obstruction can be the cause.
3. If you find obstructions, remove them. Replace damaged parts if found.
4. If coolant flow remains slow, and it has been more than 6 months since the last coolant
replacement, replace the coolant. See Replace the coolant and coolant filter, and clean and
examine the pump screen on page 21.
Hypertherm recommends coolant replacement every 6 months.
5. If the coolant flow remains slow, see How to measure coolant flow in your system’s instruction
manual.
6. If you cannot find or resolve the problem with these corrective actions, contact your cutting
machine supplier or regional Hypertherm Technical Service team.

Table of Contents

Question and Answer IconNeed help?

Do you have a question about the Hypertherm XPR Series and is the answer not in the manual?

Hypertherm XPR Series Specifications

General IconGeneral
BrandHypertherm
ModelXPR Series
CategoryWelding System
LanguageEnglish

Summary

Preventive Maintenance Program

Overview of Preventive Maintenance

Introduces the Preventive Maintenance Program and its importance for system performance.

Cleaning and Inspection Schedule

Outlines daily, weekly, and monthly tasks for system cleaning and inspection.

Daily Maintenance Procedures

Details the daily maintenance checks for inlet pressures, air filters, and coolant levels.

Examine and Lubricate O-rings

Provides instructions for inspecting and lubricating O-rings on the torch and consumables.

Examine Water Tube and Torch

Guides on inspecting the water tube and torch for damage or wear.

Weekly Maintenance Procedures

Lists weekly maintenance checks for hoses, cables, leads, and gas leak tests.

Gas Leak Testing Procedure

Explains how to perform automated gas leak tests and interpret results.

Coolant Flow Verification

Details how to check the coolant flow rate and identify potential issues.

Monthly Maintenance Procedures

Details monthly maintenance tasks like cleaning the power supply and examining components.

Six-Month Maintenance Tasks

Covers replacing the coolant and coolant filter and cleaning the pump screen.

Component Replacement Schedule

Lists components and their recommended replacement schedules based on arc hours.

Cutting Environment and Operation Effects

Discusses how cutting environment and operations affect component wear and lifespan.

Consumable Overuse Impact

Explains the impact of consumable use and overuse on system components.

Short Cut-Cycle Time Considerations

Describes how short cut-cycles increase wear on specific system components.

Part Numbers for Hoses, Cables, and Leads

Provides part numbers and lengths for various hoses, cables, and leads.

Related product manuals