© Copyright 2019 HYPERVSN. All rights reserved 15
6. DEVICE INSTALLATION
WARNING! Installation should be performed by an authorized specialist.
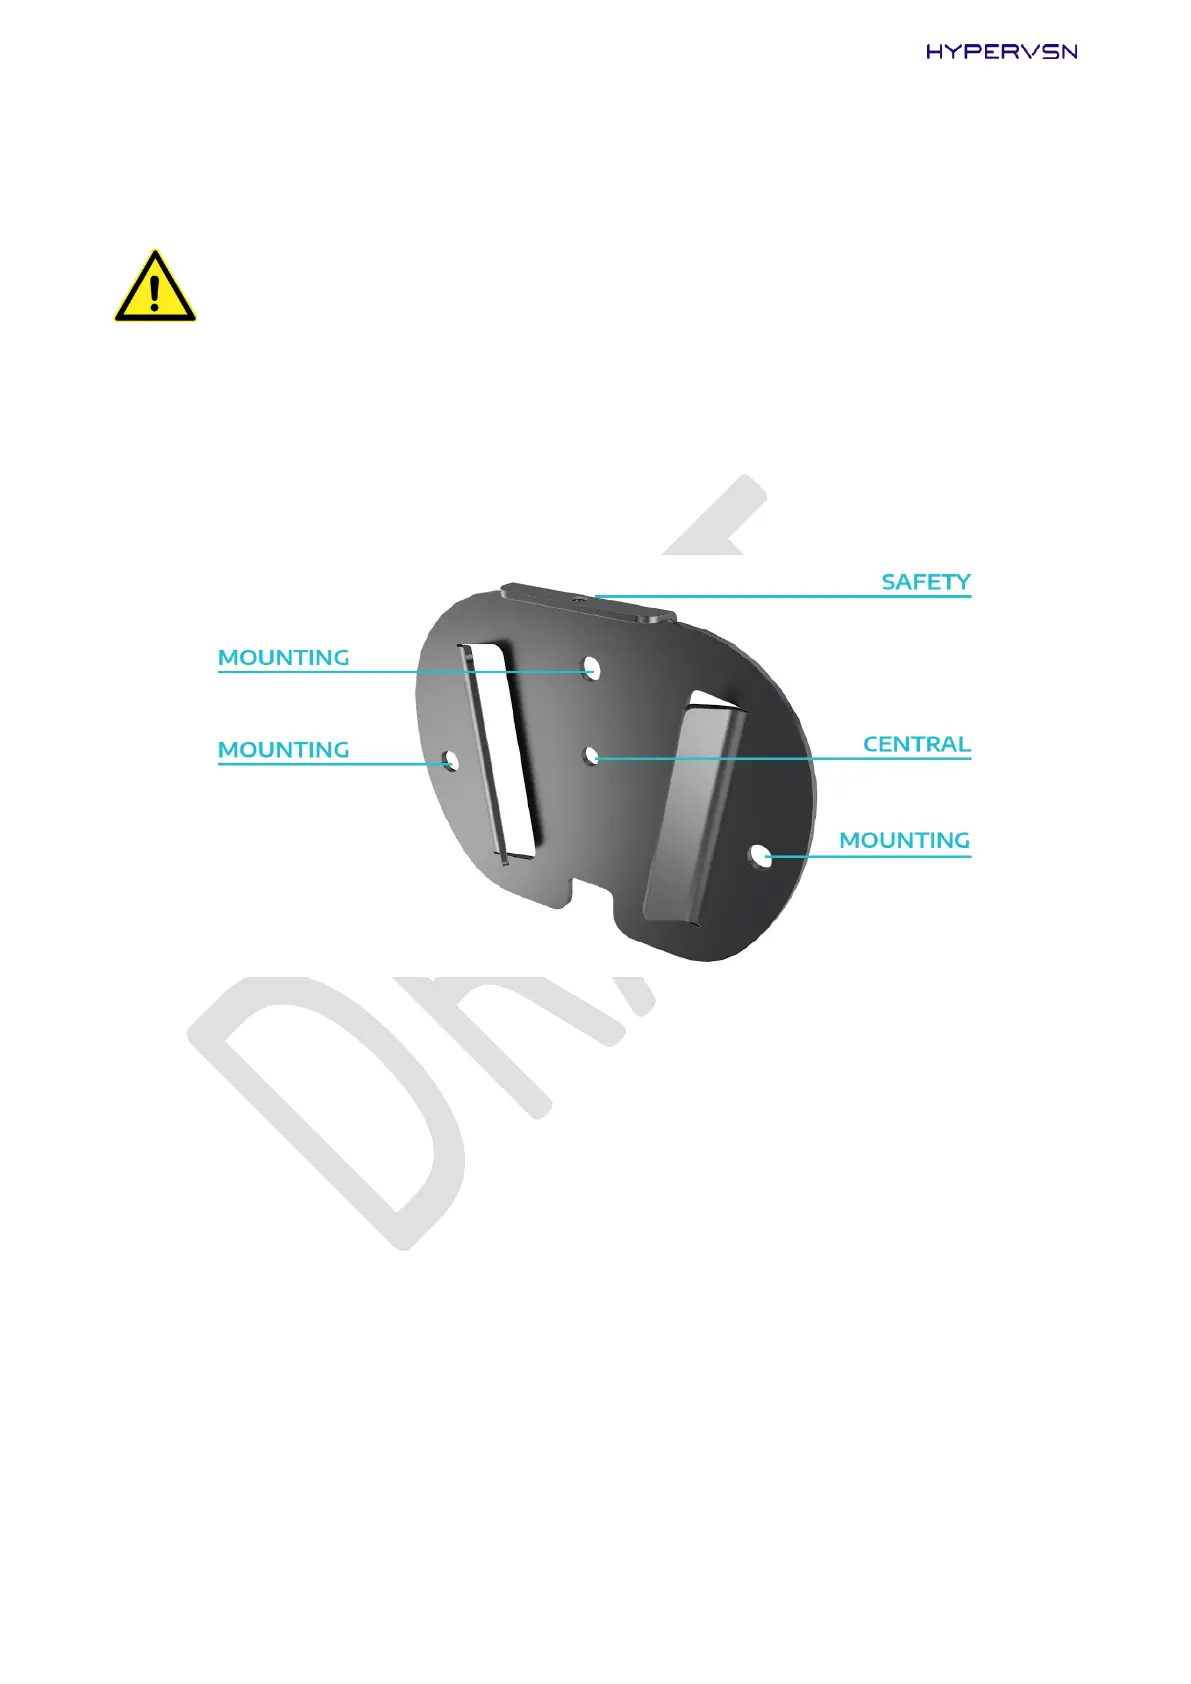
The wall bracket has five holes:
1 central hole – to locate the central point of the location, where the Device will be mounted,
3 mounting holes (5.2mm diameter) – to fix the wall bracket,
1 safety hole – to fix the stator to the wall bracket by a screw.
Picture 11. Holes in the wall bracket
1. Mark the desired position of the center of the Device on the wall.
2. Position the wall bracket on the wall so that the central hole lines up with the new mark. Keep the
orientation of the wall bracket the same as indicated in Picture 11. Be sure that it is level.
3. Mark the position of the 3 mounting holes on the wall.
4. Drill 3 holes in the marked positions.
5. Using the appropriate mounting hardware, firmly attach the wall bracket to a wall (Picture 12, steps
1-2).