Operator Restraint System
There is an indicator icon on the display panel for
the seat belt. The icon is ON as described in the
Operating Manual. The indicator icon can help
the operator remember to fasten the seat belt.
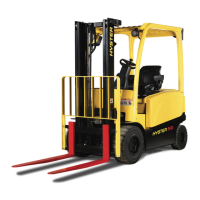
The seat belt, hip restraint brackets, and the seat
and seat mounting components are the parts of the
operator restraint system (see Figure 10). If the lift
truck is equipped with manual hydraulic control
levers, the control lever assembly and latch are also
part of the operator restraint system. Each item
must be checked to make sure it is attached se-
curely, functions correctly and is in good condition.
Make sure the seat rails are not loose. The seat
rails must lock securely in position, but move freely
when unlocked. The seat rails must be securely at-
tached to the mounting surface. See Figure 10.
Emergency Locking Retractor (ELR)
When the ELR style seat belt is properly buckled
across the operator, the belt will permit slight oper-
ator repositioning without activating the locking
mechanism. If the truck tips over, travels off a
dock, or comes to a sudden stop, the locking mecha-
nism will be activated and hold the operator's lower
torso in the seat. See Figure 10.
A seat belt that is damaged, worn, or does not oper-
ate properly will not provide protection when it is
needed. The end of the belt must fasten correctly in
the latch. The seat belt must be in good condition.
Replace the seat belt if it is damaged or worn.
The following seat belt operation checks must be
performed three times before replacing the seat
belt assembly:
• With the hood closed and in the locked posi-
tion, pull the seat belt slowly from the retrac-
tor assembly. Make sure the seat belt pulls
out and retracts smoothly. If the seat belt
does not pull out of the retractor assembly
the internal latch may be locked. Pull firmly
on the seat belt and hold for a moment to re-
move slack from the belt in the retractor. Re-
lease the seat belt. Seat belt will retract and
the internal latch will unlock. If the seat belt
cannot be pulled from the retractor assembly
or the belt will not retract, replace the seat
belt assembly.
• With the hood closed and in the locked posi-
tion, pull the seat belt with a sudden jerk.
Make sure the seat belt will not pull from the
retractor assembly. If the seat belt can be
pulled from the retractor when it is pulled
with a sudden jerk, replace the seat belt as-
sembly.
• With the hood in the open position, make
sure the seat belt will not pull from the re-
tractor assembly. If the seat belt can be
pulled from the retractor, with the hood in
the open position, replace the seat belt as-
sembly.
Seat Adjustments
Seat Position Adjustment (Standard Seat)
Fore and aft adjustment - it is recommended that
the seat be adjusted so that the thigh is horizontal
to the ground in order to achieve the best ergo-
nomic position.
Seat Position Adjustment (Swivel Seat)
• The seat swivels 12 degrees to the right to al-
low the operator a more ergonomic position
when driving in reverse.
• The seat swivels 5 degrees to the left to allow
easier exit of the truck.
• The neutral position is shown in Figure 11.
Maintenance Procedures Every 8 Hours or Daily 8000 SRM 1541
16