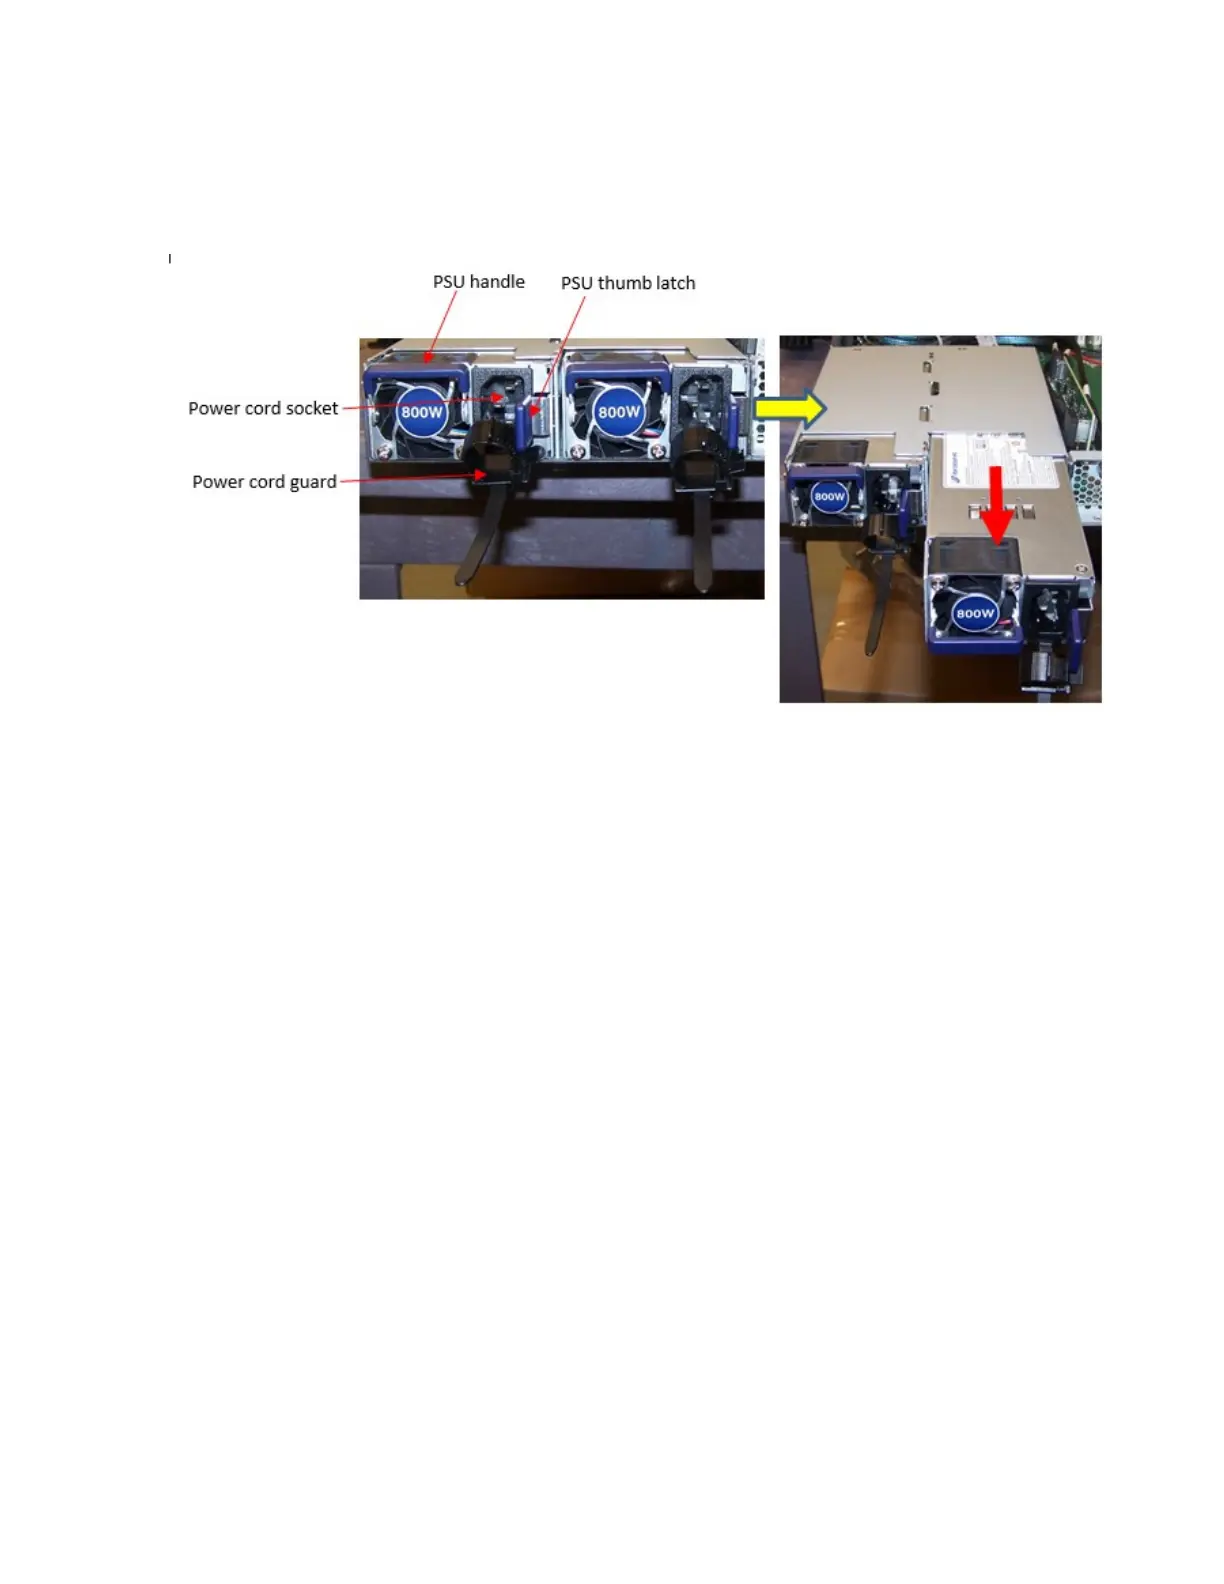
3. Holding both handle and thumb latch, pull unit towards you until it is free of the PSU slot, as shown in
the following gure.
4. To replace a PSU, insert unit into a free PSU slot.
5. Push unit into slot as far as it will go. You will hear a click when the PSU is locked in place.
6. Attach power cord to the PSU and then to the PDU.
Figure 31. Replacing PSU
Remove and install a drive
Each hot-pluggable 2.5” drive is mounted on a drive carrier assembly with an ejection lever for quick
installation and removal.
Note: Because your drives are hot-pluggable, it is unnecessary to power off your system in order to
replace them.
Note: Note: Make sure you take note of the orientation of the drive carrier before pulling it out. The carrier
will not t properly into the bay if not inserted correctly.
The following steps cover replacing and installing ClevOS drives:
1. To remove the drive you are replacing or remove a blank carrier from the drive bay:
a. Push the colored ejector lever button. The lever will automatically unlatch. Pull the drive carrier out
of the drive bay, as shown in the following gure.
Chapter 6. Maintain the appliance
29
 Loading...


