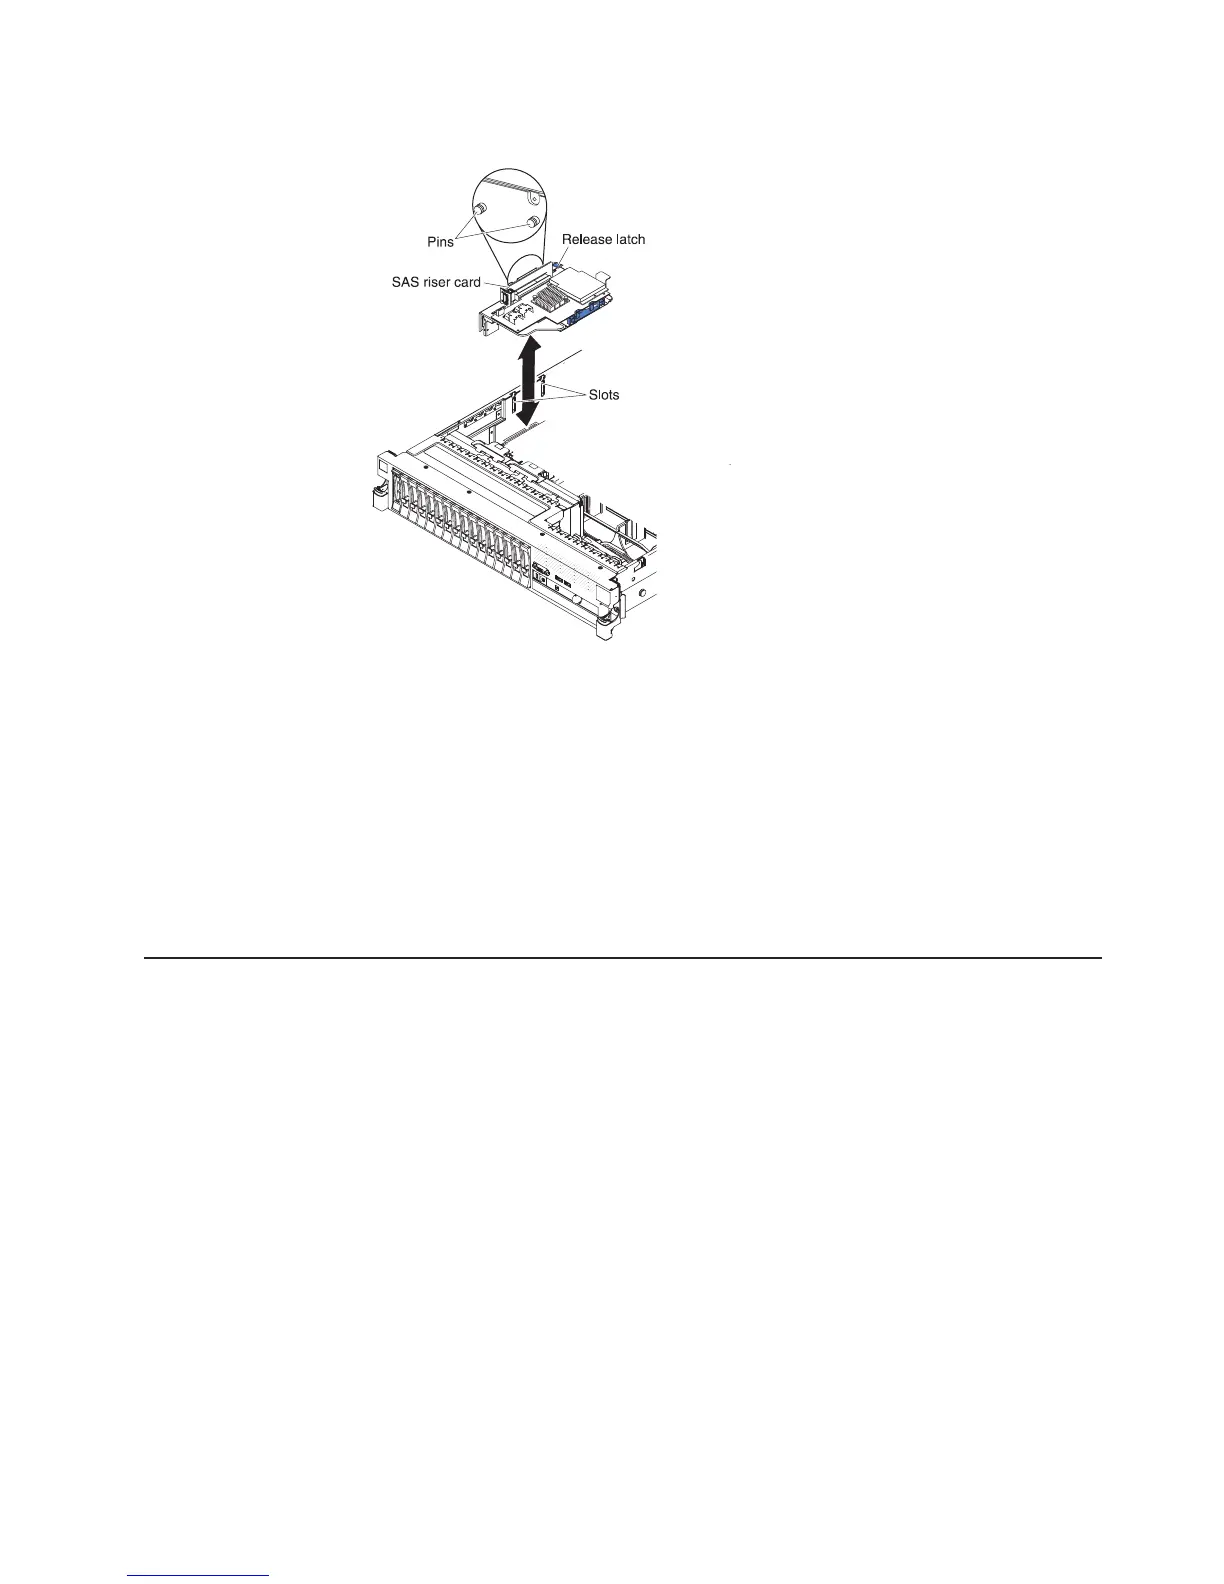
v Tape-enabled server model:
1. Align the pins on the back side of the SAS riser-card with the slots on the
server chassis.
2. Make sure that any tape drive cables are routed correctly underneath the
SAS riser-card. For information about the cable routing, see “Installing an
optional tape drive” on page 89.
3. Press the SAS controller assembly into place. Make sure that the SAS
riser-card is firmly seated and that the release latch and retention latch hold
the assembly securely.
If you have other devices to install or remove, do so now. Otherwise, go to
“Completing the installation” on page 139.
Removing a ServeRAID SAS controller from the SAS riser-card
A ServeRAID SAS controller is installed in a dedicated slot on the SAS riser-card.
Important: If you have installed a SAS expander card in a 16-drive-capable server,
the SAS controller is installed in a PCI riser-card assembly and is installed and
removed the same way as any other PCI adapter. Do not use the instructions in this
topic; use the instructions in “Installing a PCI adapter” on page 53 and “Removing a
PCI adapter” on page 57.
Depending on the server model, the server comes with a ServeRAID-BR10il v2
SAS/SATA controller or a ServeRAID-M1015 SAS/SATA controller installed.
You can replace the ServeRAID SAS controller with another supported ServeRAID
SAS controller. For a list of supported ServeRAID SAS controllers, see
http://www.ibm.com/servers/eserver/serverproven/compat/us/.
Note: For brevity, in this documentation the ServeRAID SAS controller is often
referred to as the SAS controller.
Chapter 2. Installing optional devices 121

 Loading...


