Installing a hard disk drive
The following notes describe the type of hard disk drives that the server supports
and other information that you must consider when you install a drive. For a list of
supported drives, see http://www.ibm.com/servers/eserver/serverproven/compat/us/.
Important: Do not install a SCSI hard disk drive in this server.
v Locate the documentation that comes with the hard disk drive and follow those
instructions in addition to the instructions in this chapter.
v The server supports eight 2.5-inch hot-swap or simple-swap hard disk drives
installed on Ultra-Slim hard disk drive trays. An optional 8-drive-bay kit is
available for 16-drive-capable server models. For a list of supported 2.5-inch hard
disk drives, see http://www.ibm.com/servers/eserver/serverproven/compat/us/.
v All hot-swap drives in the server should have the same throughput speed rating.
Using hard disk drives with different speed ratings will cause all drives to operate
at the throughput speed of the slowest drive.
v The ID that is assigned to each bay is printed on the front of the server, above
the drive bay.
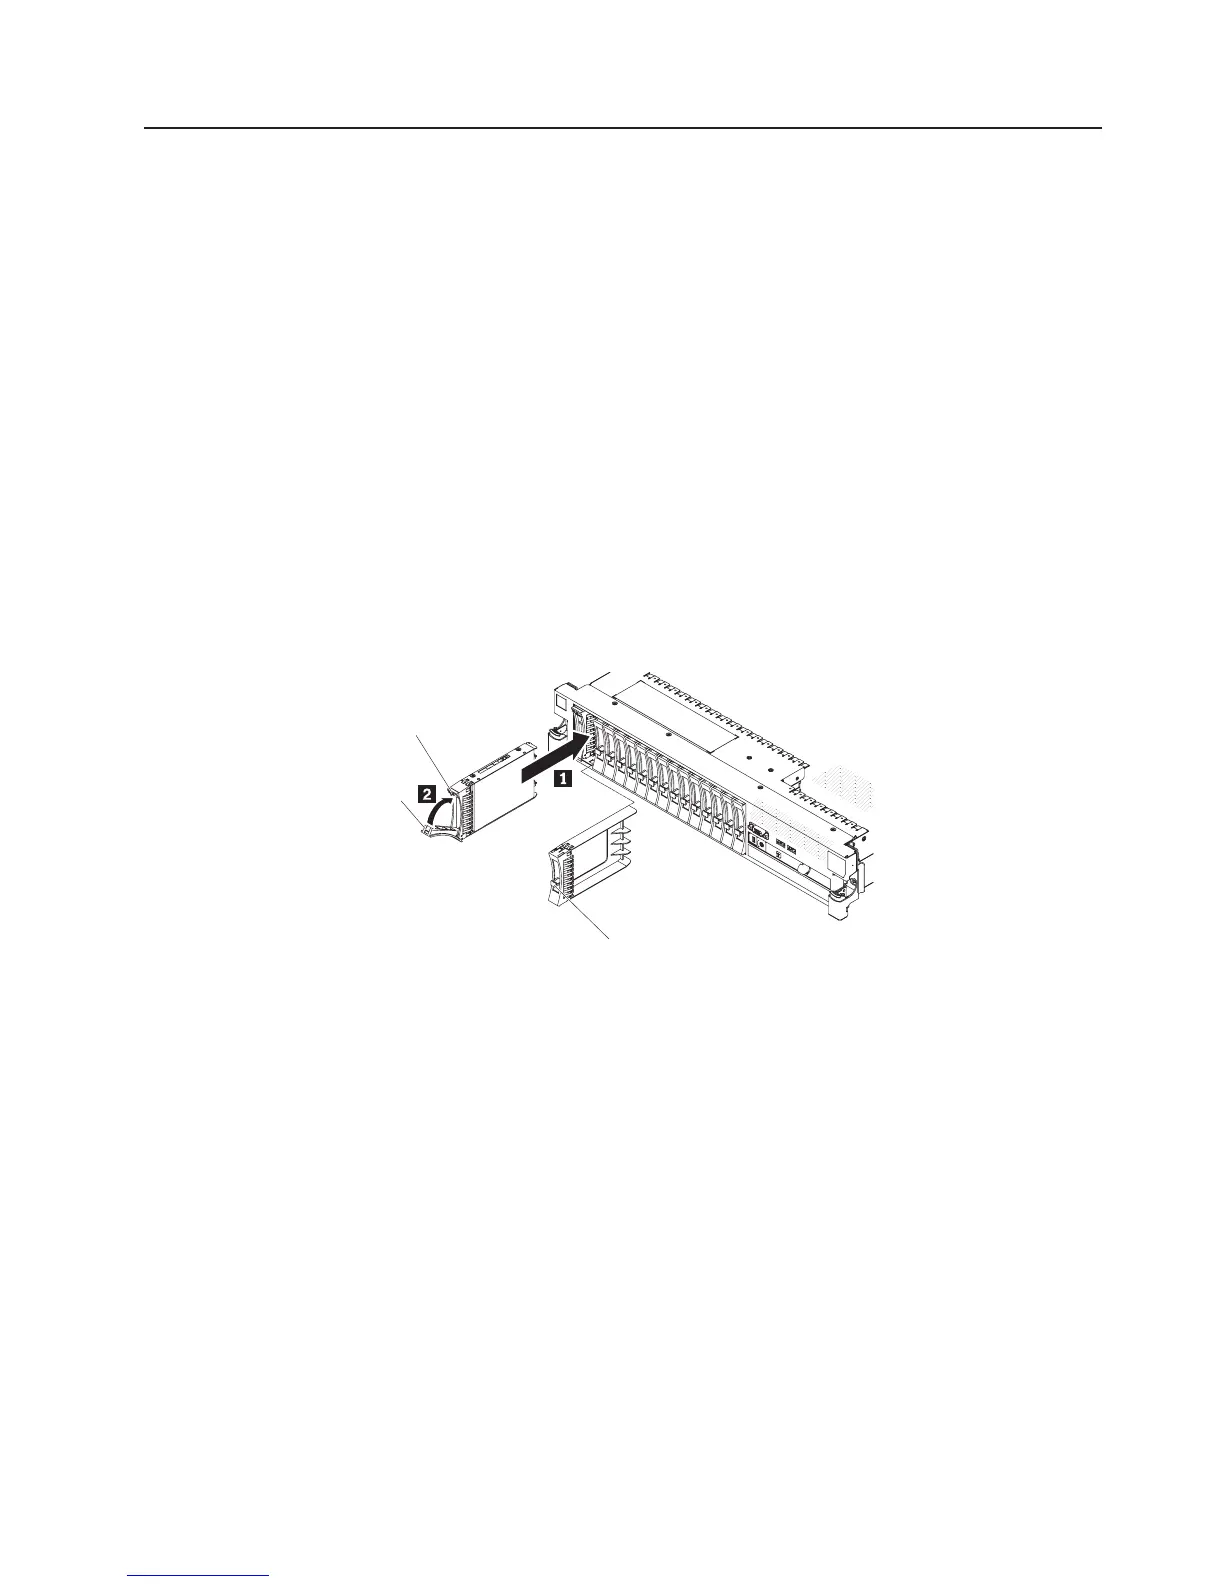
The following illustration shows how to install a hot-swap hard disk drive.
Latch
Handle
Filler panel handle
To install a drive in a hot-swap bay, complete the following steps.
Attention: To maintain proper system cooling, do not operate the server for more
than 10 minutes without either a drive or a filler panel installed in each bay.
1. Read the safety information that begins on page vii, “Installation guidelines” on
page 37, and “Handling static-sensitive devices” on page 39.
2. Remove the filler panel from one of the empty hot-swap bays: Grasp the filler
panel handle and pull the filler panel away from the server.
3. Install the hard disk drive in the hot-swap bay:
a. Orient the drive as shown in the illustration.
b. Make sure that the tray handle is open.
c. Align the drive assembly with the guide rails in the bay.
d. Gently push the drive assembly into the bay until the drive stops 1.
e. Push the tray handle to the closed (locked) position 2.
f. If the system is turned on, check the hard disk drive status LED to verify that
the hard disk drive is operating correctly.
Chapter 2. Installing optional devices 59
 Loading...


