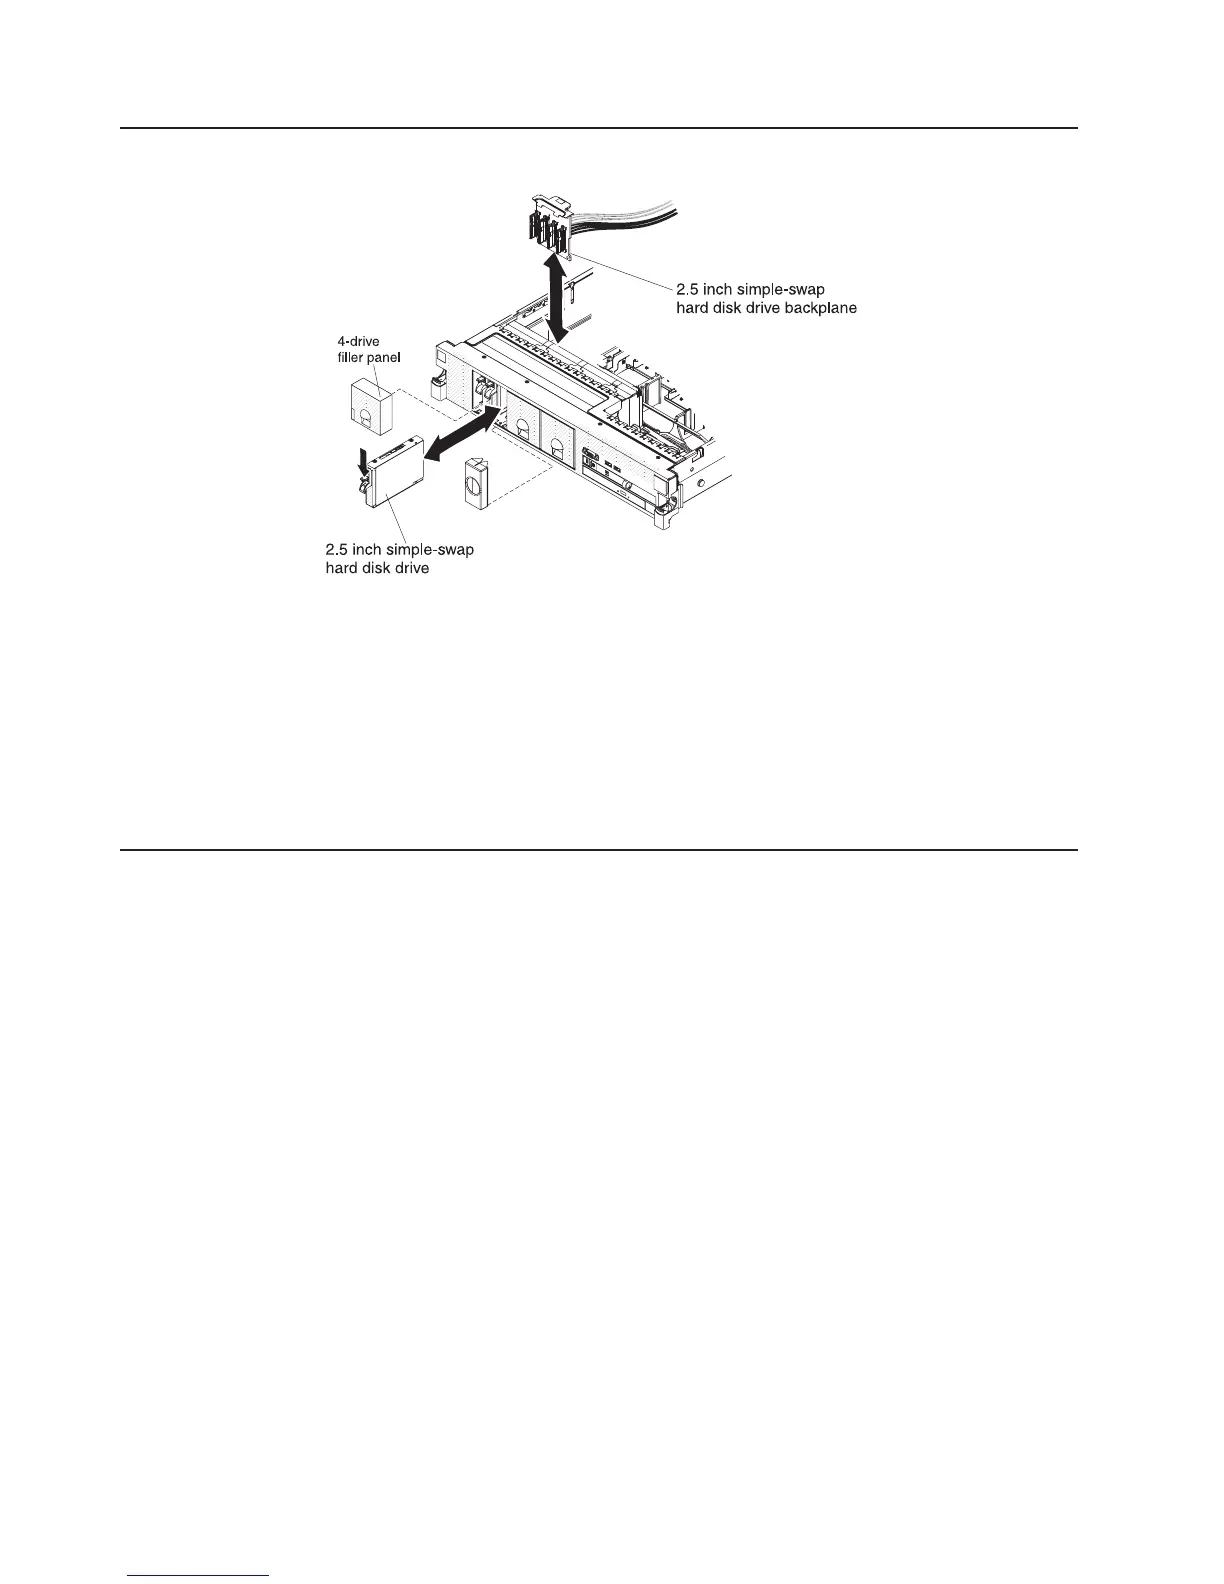
Removing a simple-swap hard disk drive
Attention: To maintain proper system cooling, do not operate the server for more
than 10 minutes without either a drive or a filler panel installed in each bay.
To remove a hard disk drive from a simple-swap bay, complete the following steps.
1. Read the safety information that begins on page vii, “Installation guidelines” on
page 37, and “Handling static-sensitive devices” on page 39.
2. Remove the drive filler panel.
3. Push drive into the bay until it latches into place.
4. Replace the drive filler panel.
Installing a SAS/SATA 4 Pac HDD upgrade option
If the server is a 16-drive-capable model with four hard disk drive bays installed,
you can install an IBM System x3650 M3 Hot-swap SAS/SATA 4 Pac HDD upgrade
option. See http://www.ibm.com/servers/eserver/serverproven/compat/us/ for a list of
supported optional devices. To order a SAS/SATA 4 Pac HDD upgrade option,
contact your IBM marketing representative or authorized reseller.
Note: You need to install the SAS/SATA 4 Pac HDD upgrade option first in order to
upgrade to either SAS/SATA 16 Pac HDD system or a 8 Pac HDD + tape system.
The SAS/SATA 4 Pac HDD upgrade option kit contains the following components:
v One 2.5-inch hard disk drive backplane
v Four M3.5 screws
v One blank EMC filler
v Four drive bay filler panels
v Two backplane brackets
v One ServeRaid controller
v One SAS signal cable
v One internal power cable
v One backplane bracket
62 System x3650 M3 Types 4255, 7945, and 7949: Installation and User’s Guide

 Loading...


