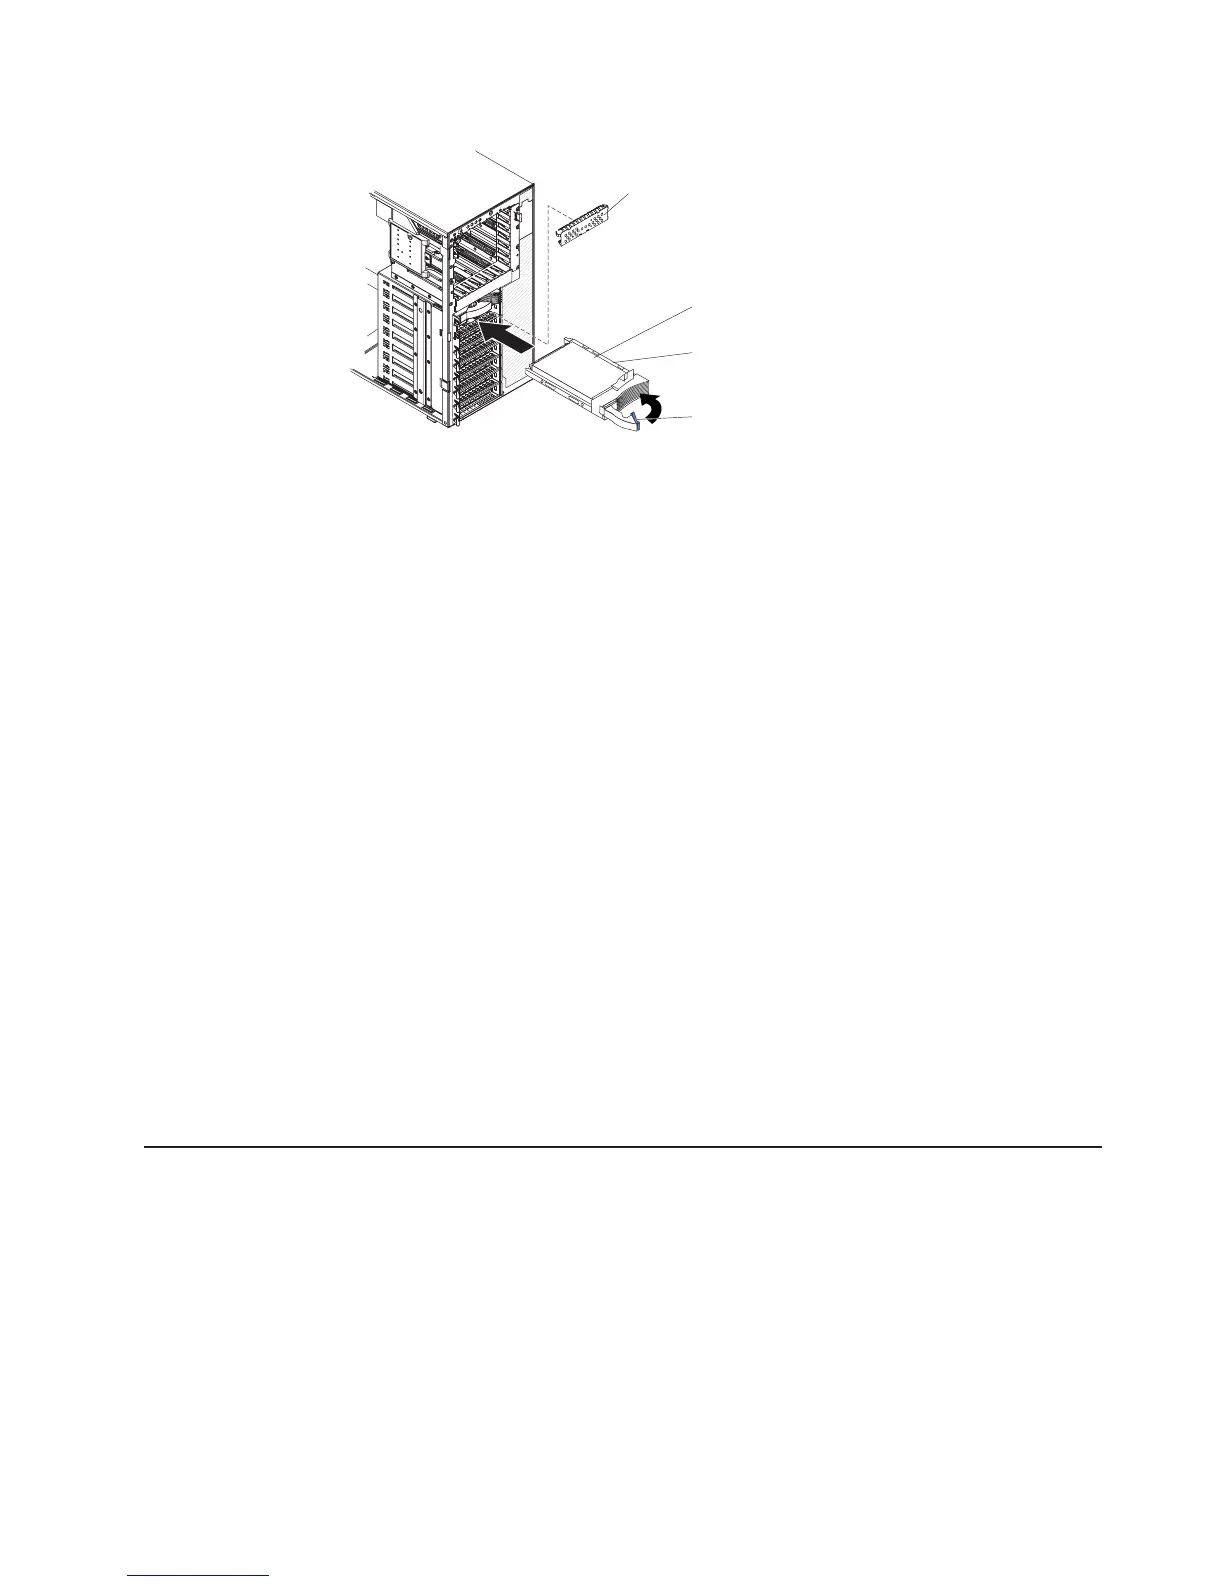
EMC shield
Hard disk drive
Drive tray
Drive tray handle
(in open position)
1. Read the safety information that begins on page v and “Installation guidelines”
on page 21.
2. Remove the bezel from the server.
3. Open the drive tray handle and pull the drive out of the server.
To
install a hot-swap hard disk drive, complete the following steps:
1. Read the safety information that begins on page v and “Installation guidelines”
on page 21.
2. Remove the filler panel from one of the empty hot-swap bays.
3. Make sure that the tray handle is open; then, install the hard disk drive into the
hot-swap bay.
Notes:
1. When you turn on the server, check the hard disk drive status LEDs to verify
that the hard disk drive is operating correctly.
If the amber hard disk drive status LED is lit continuously, that drive is faulty
and must be replaced. If the green hard disk drive activity LED is flashing, the
drive is being accessed.
2. If the server is configured for RAID operation using an optional ServeRAID
adapter, you might have to reconfigure your disk arrays after you install hard
disk drives. See the ServeRAID documentation on the IBM ServeRAID Support
CD for additional information about RAID operation and complete instructions
for using ServeRAID Manager.
If
you have other optional devices to install or remove, do so now. Otherwise, go to
“Completing the installation” on page 46.
Installing an IBM Remote Supervisor Adapter II SlimLine
An optional IBM Remote Supervisor Adapter II SlimLine can be installed only in its
dedicated connector on the system board. The Remote Supervisor Adapter II
SlimLine is not cabled to the system board.
To install a Remote Supervisor Adapter II SlimLine, complete the following steps:
1. Read the safety information that begins on page v and “Installation guidelines”
on page 21.
2. Turn off the server and peripheral devices, and disconnect the power cords and
all external cables.
3. Remove the left-side cover.
Chapter 2. Installing optional devices 31

 Loading...


